Mermaid Halloween Decorations That Are Enchanting and Easy
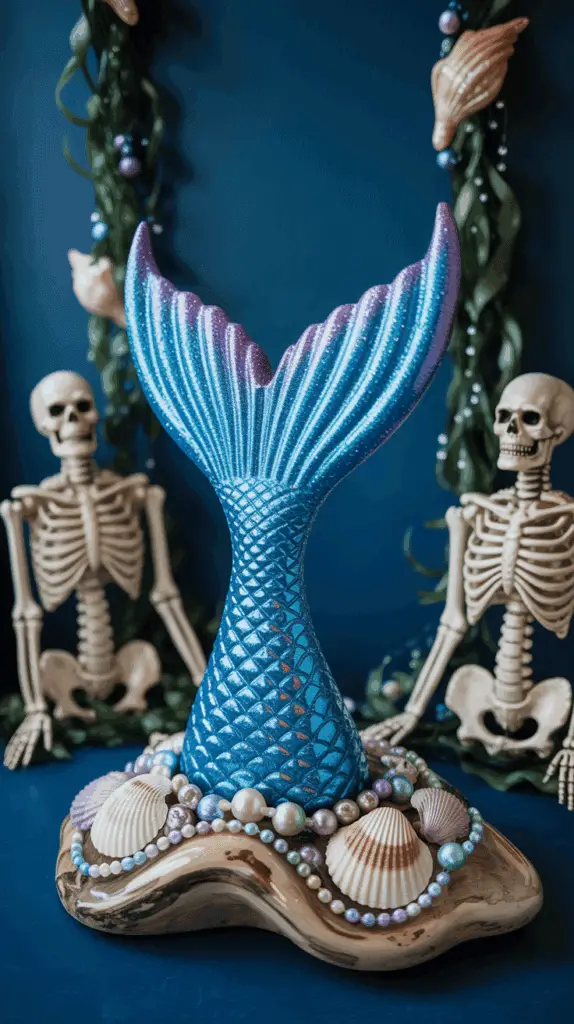
I’m always looking for ways to add extra magic to Halloween, and Mermaid Halloween Decorations are a huge hit around here! With three boys who love anything colorful and a little bit quirky, I’ve found that mermaid touches make our house feel both whimsical and inviting!
I used this mermaid Halloween decor set — sparkly, whimsical, and perfect for a beachy Halloween vibe.
These decorations bring an enchanting twist to the usual spooky stuff, and the bright colors light up the whole space. If you want to create an atmosphere that feels playful, magical, and fun for your family, you’ll love how easy these ideas are to pull together!

Getting Started: Mermaid Halloween Decor Essentials


Getting ready for Mermaid Halloween Decorations is one of the most fun parts of the season! Before I start hanging up tails and seashells everywhere, I always do a quick check to see what basics I need. If you’re like me, with kids ready to help as soon as they see a glittery shell, you want to make sure you’ve got all the essentials on hand. A little bit of prep always makes the magic easier (and trust me, it keeps the chaos to a minimum).
Must-Have Mermaid Colors and Supplies

Mermaid themes work best when you start with the right color palette. I stick mostly with seafoam greens, teals, purple, and splashes of pink and gold. Glitter is practically essential in our house—my boys love seeing everything sparkle! Some simple supplies really help set the mood and make decorating fast.
Here’s what I keep in my mermaid decor “toolbox”:
- Rolls of iridescent streamers or ribbons
- Packets of colorful tissue paper (think pastels and ocean tones)
- Glitter glue or glitter spray (the more shimmer, the better!)
- Seashells and faux pearls (from the craft store or dollar bins)
- Blue and purple balloons
- Fish netting (you can find this in party stores, sometimes even with nautical decor)
I grab a small storage bin to toss these items in—makes it easy to pull out when the decorating urge hits.
Key Decor Items That Make the Theme Pop

Some decorations have an instant “wow” factor. The right mermaid touches make everything feel magical, even if the rest of your house is full of traditional Halloween pumpkins and bats.
My go-to mermaid Halloween decorations:
- Seashell garlands (I string these up on the mantel or across the front door)
- Large paper or cardboard mermaid tails (hung on walls, doors, or even windows)
- Shell and pearl table scatter for parties or snack tables
- Holographic window clings shaped like bubbles, shells, or little fish
- DIY “under the sea” wreath (start with a foam wreath and glue on seaweed-looking ribbon, shells, and little toy fish)
Each year, my boys pick out a new mermaid tail or sea creature to add. It’s like building our own collection that gets a little more fun (and sparkly) as time goes on.
Easy Accent Pieces You’ll Be Glad You Grabbed
The little things often pull everything together. You don’t need to go overboard. I love finding items that double as both toys and decorations—huge time saver! Here are a few small things that add big impact:
- Mermaid-themed LED tea lights (set the mood without any candle worries)
- Sequined throw pillows or mermaid blankets for couches and chairs
- Ocean-themed paper lanterns and pom-poms
- Tablecloths or runners in shimmering fabrics (sometimes I use old scarves or costume fabric as quick table decor)
- Plastic or resin sea creatures (think crabs, seahorses, or octopuses—kids play with them all season!)
These details help your mermaid Halloween decorations stand out and turn any room into a playful underwater world. My kids always point to these touches when they’re showing friends around, which makes all the effort so worth it!
DIY Mermaid Halloween Decorations Anyone Can Make
When Halloween rolls around, my house gets taken over by mermaids! Finding Mermaid Halloween Decorations that are easy and sparkly has become a bit of a tradition here (my three boys help me every step of the way). There’s something magical about transforming our living room and yard into an underwater adventure. The best part is, you don’t need fancy skills or a huge budget. I promise, these simple ideas bring big smiles and a sea of color to any home!
Glistening Mermaid Tail Garlands

This is a project even the littlest hands can help with, and I love how it brightens up any corner. Mermaid tail garlands are a top pick because the materials are easy to find, and you can make them as bold or as pastel as you want. Here’s how I whip up tail garlands for windows, doorways, or even the stair rail.
You’ll need:
- Glitter paper or cardstock (think teal, purple, pink, gold)
- Scissors
- String or yarn (white or a shimmery color works best)
- Tape or a hot glue gun
- A mermaid tail template (draw your own or print one)
Steps:
- Trace and cut out several mermaid tails from your glitter paper.
- Lay them out and decide on your color order (I usually let the boys pick).
- Tape or glue each tail to your string or yarn, spacing them about four inches apart.
- Hang the garland in entryways, over the fireplace, or along a wall.
If you’re looking to add a little extra pop, layer two or three colors for each tail for a “scale” effect. Gold and silver look especially pretty mixed into the bunch. For parties, I sometimes hang several garlands together at different heights for a shimmery wave effect. So simple but seriously stunning!
Glow-in-the-Dark Jellyfish Lanterns
Want to surprise your kids (and their friends) with something really cool? Glow-in-the-dark jellyfish lanterns are always a huge talking point at Halloween get-togethers. These look fantastic hanging from trees or even indoors from ceiling hooks. They are soft, spooky, and come together with common supplies.
Supplies:
- White paper lanterns (from party stores or dollar stores)
- Tissue paper (soft colors work well)
- Scissors
- Glow sticks (the more, the brighter!)
- Clear tape or glue
How I make them:
- Open the paper lantern and insert a glow stick, looping and taping so it hangs inside.
- Cut long strips of tissue paper for “tentacles” and tape them around the bottom edge of the lantern.
- Fluff and curl the tissue strips a little for movement.
- Add extra pieces (think sparkly tulle or ribbon) if you want more shimmer.
For safety, I use battery-powered glow sticks or LED lights, especially when hanging these in bedrooms or low spaces. I like to cluster them in corners or dangle them over the snack table for a glowing sea-creature effect at night. Outside, I use fishing line to hang jellyfish lanterns from porch roofs or tree branches. The glow looks magical as soon as the sun sets, and my kids always tell me it feels like we’re having a real undersea adventure!
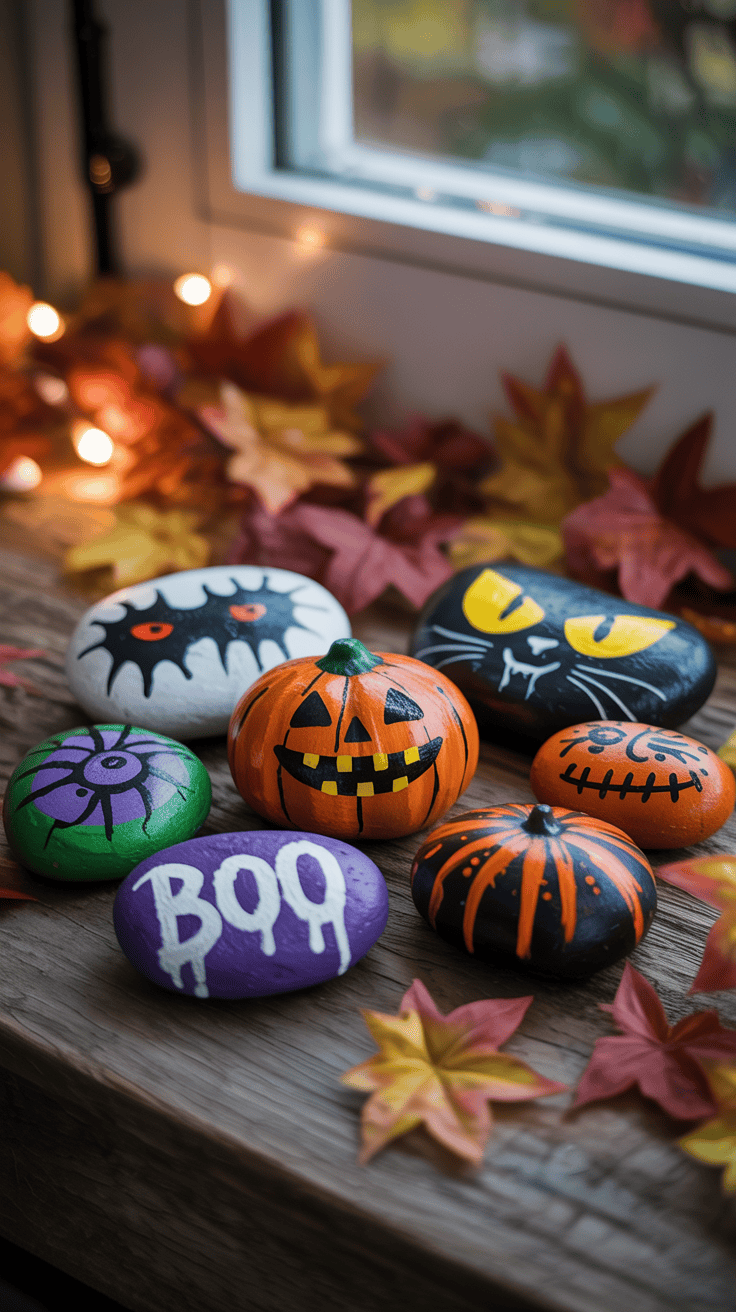
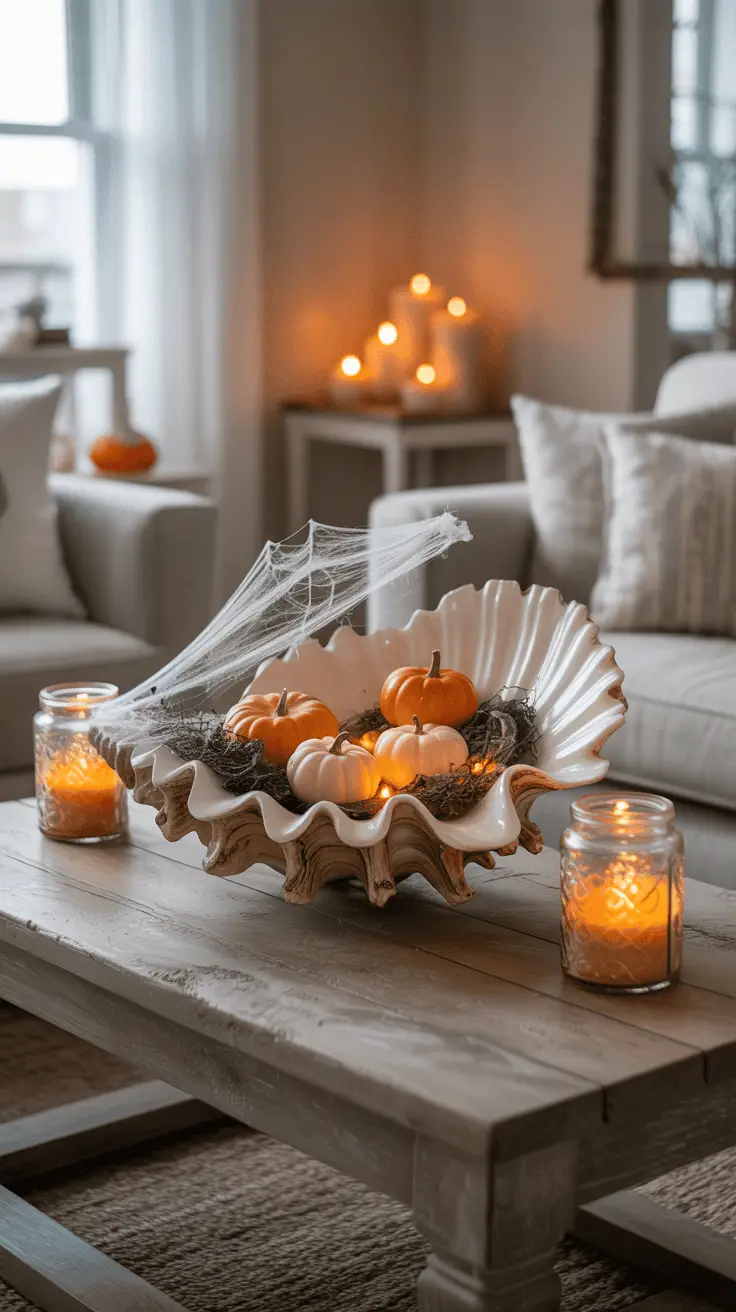
Under-the-Sea Pumpkin Decorating
Carving can be fun, but I learned pretty fast that messy pumpkin guts and little hands don’t always mix! So now we skip the knives and go full-on under-the-sea with no-carve pumpkin decorating. With some paint, glue, and sparkle, you can turn any plain pumpkin into a mermaid or sea creature.
Non-carving mermaid pumpkin ideas:
- Paint the pumpkin teal, lavender, or blue and add scales with metallic or glitter paint.
- Glue on craft-store shells and faux pearls for a mermaid crown effect.
- Use sequins for a sparkling tail or fish scales.
- Draw cute faces or sea creature eyes with black marker or paint.
- Hot-glue small starfish or tiny toy fish for extra personality.
I like to set up a “pumpkin painting station” on the kitchen table with trays, brushes, washable paints, and plenty of paper towels. My boys love picking out which sea creature they’ll try every year (the octopus was a hit last time). If you want to make it even more kid-friendly, stick to stickers and self-adhesive jewels. No fuss, no mess, and everyone can do their own!
Pumpkin decorating is always a memory-maker here, and the finished pumpkins hold up great on the porch or inside. It also gives you another excuse to bring in all those bright mermaid colors, even as the rest of the neighborhood goes orange and black.
Transforming Your Space: Magical Mermaid Tablescapes & Party Zones

Bringing Mermaid Halloween Decorations to life is my secret weapon when I want our home to feel special, festive, and filled with laughter! Creating fun tablescapes and party zones helps anchor all the magic, whether you’re hosting a party or just making snack time exciting for your own little mermaids (and mermen). The good news? You do not need to be a professional or buy fancy supplies to make your home look straight out of a fairytale. Here are some of my favorite, tried-and-true setups that are fun for the kids and stunning in photos!
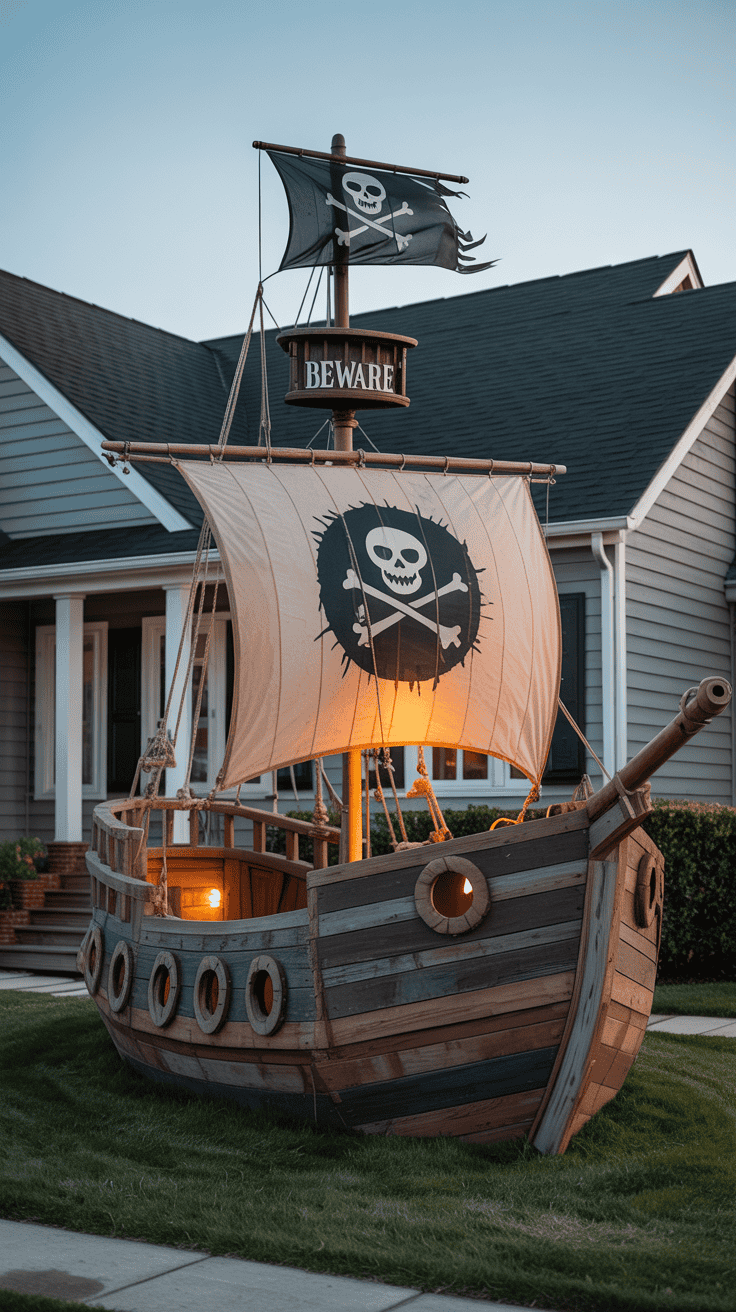
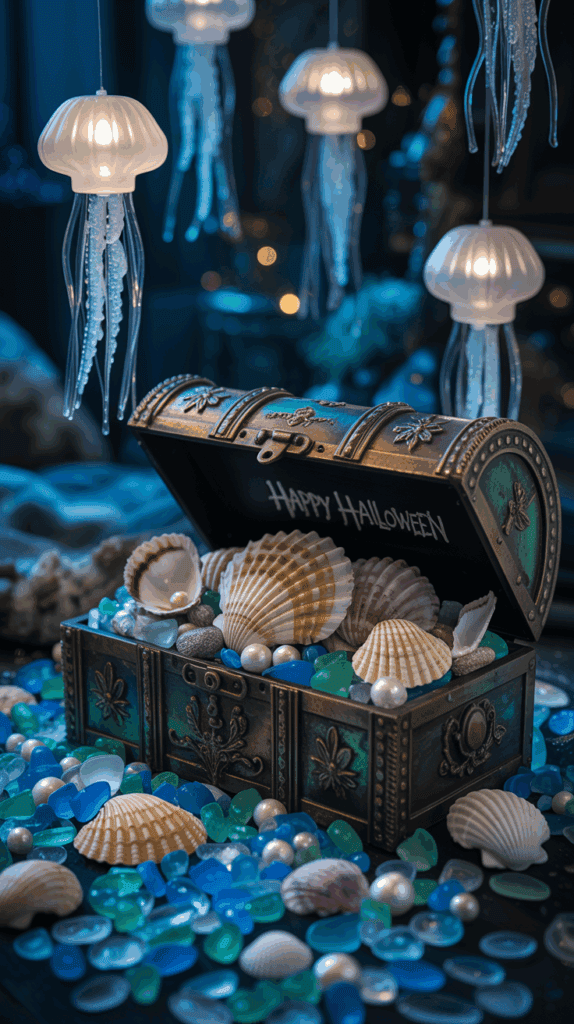
“Shipwreck” Snack Table Inspiration

Transforming your snack area into a playful “shipwreck” treat zone is easier than you might expect. I always start with a foundation that sets the mood—think rich blues and weathered textures.
- Start with a blue tablecloth (or any ocean-colored throw or sheet). If you want to get extra fancy, layer sheer aqua fabric or a mesh “fishing net” from the party store right on top. This gives that instant watery feel.
- Scatter driftwood accents across the table. You can use real driftwood from the craft store or even chunky sticks spray-painted a pale gray. I like to tuck a few faux pearls, small shells, and plastic sea creatures here and there.
- Edible ‘treasure’ is a must! Growing boys (and their friends) eat up anything shiny or bite-sized. Some of my go-to snacks for a mermaid shipwreck spread include:
- “Gold coin” chocolate candies in a glass jar or treasure chest box
- Blue gelatin cups with whipped cream and gummy fish floating inside
- Pretzel rods “driftwood sticks”, dipped in white chocolate and rolled in blue sprinkles
- Shell-shaped cookies (store-bought or from a simple box mix—no one will judge!)
- Popcorn “coral”—just toss popcorn with a few drops of blue food coloring, right in a large bowl
- Fruit pearls—tiny melon balls or grape halves in a clear dish
- Label your snacks with playful names like “Pirate Treasure,” “Siren Snacks,” and “Mermaid Pearls.” Handwritten tags taped to toothpicks make the table look extra thought-out.
- Glass bowls with rock candy sticks, or any sparkly treat, always catch the light and make the whole table shimmer.
I also keep it simple so my kids can help with setup. Sometimes, they even make tiny “flags” for the snacks with toothpicks and tape. It’s fast, easy, and makes them feel like true mermaid party planners.
Mermaid Lagoon Photo Backdrop
Every mermaid party (or family movie night) needs that one spot where everyone wants a photo! You don’t have to spend a lot. The best mermaid lagoon backdrops are created with a mix of affordable supplies and a little imagination. Here’s how I do it, step by step:
- Pick a wall or open space. Stick with one that gets good natural light. Move any furniture out of the way.
- Hang streamers in waves of color. I use blue, teal, and purple streamers—just tape them to the top of the wall and let them dangle to the floor. Overlap different shades for a layered, ocean look.
- Blow up bunches of balloons in ocean colors. Mix in a few silvers or iridescent ones for that “bubble” effect. Tape some to the floor, some to the wall, and even cluster a few at the top as if they’re floating to the surface.
- Dollar Store hacks: I always check the party or seasonal aisles for sea creature cutouts, craft netting, or even sparkly gift wrap that looks like water. You can tape these over parts of the backdrop for extra texture.
- Add a banner made out of cut paper shells or mermaid tails. Let your kids help decorate, and your backdrop becomes a family art project.
- Place a few beach props on the floor in front—a white or pale blue sheet, a toy treasure chest, plush sea creatures, or a pretty basket of fake pearls.
- Lighting matters! If you have a small ring light or even a bright lamp, set it a few feet away to make faces glow in your photos.
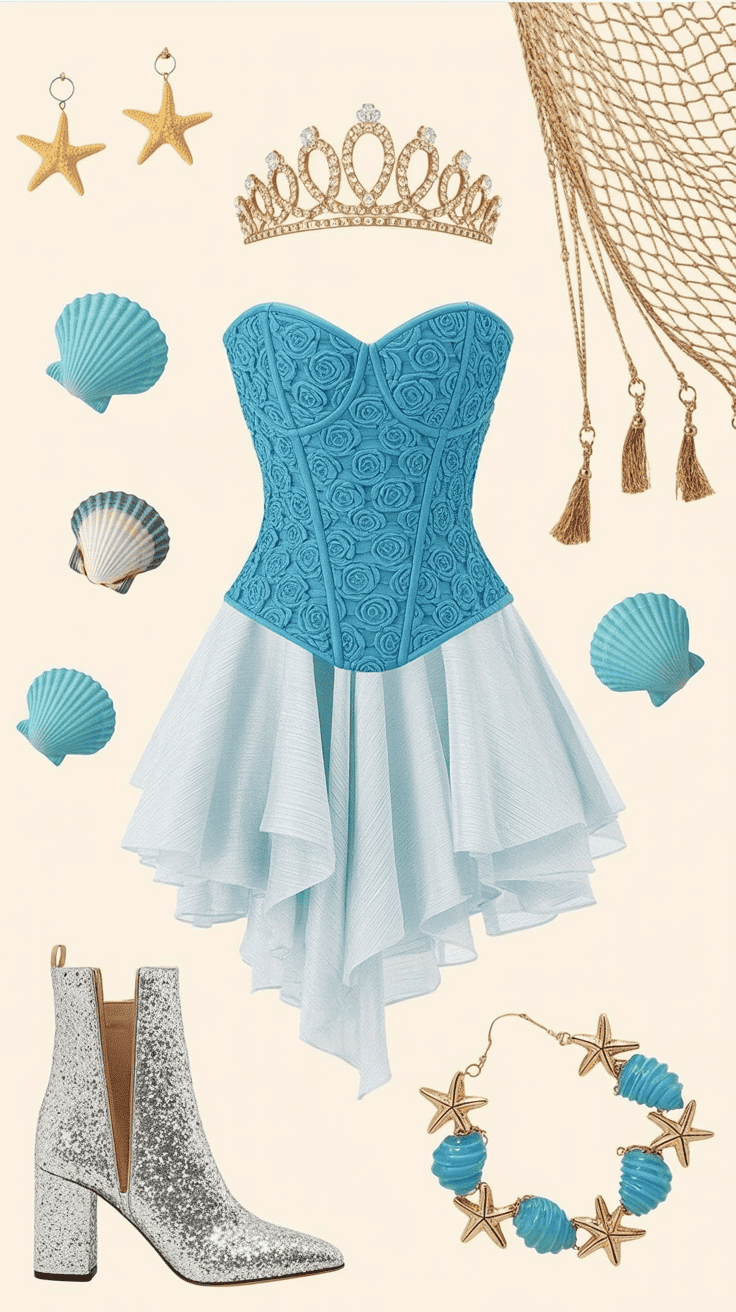
When it’s time for pictures, I encourage the kids to grab a seashell crown, a stuffed sea creature, or even just strike their silliest mermaid pose. For the best family photos:
- Shoot at eye level for kids so their costumes and smiles are front and center.
- Take a mix of posed and candid shots (the giggles and outtakes are always favorites!).
- Try to snap photos before little hands get sticky from the treats!
Pulling off a magical mermaid lagoon wall doesn’t have to be fancy to look amazing. The colors, layers, and happy faces are what everyone remembers. Plus, you’ll have those family photos to look back on—all from a setup you can finish in under an hour.
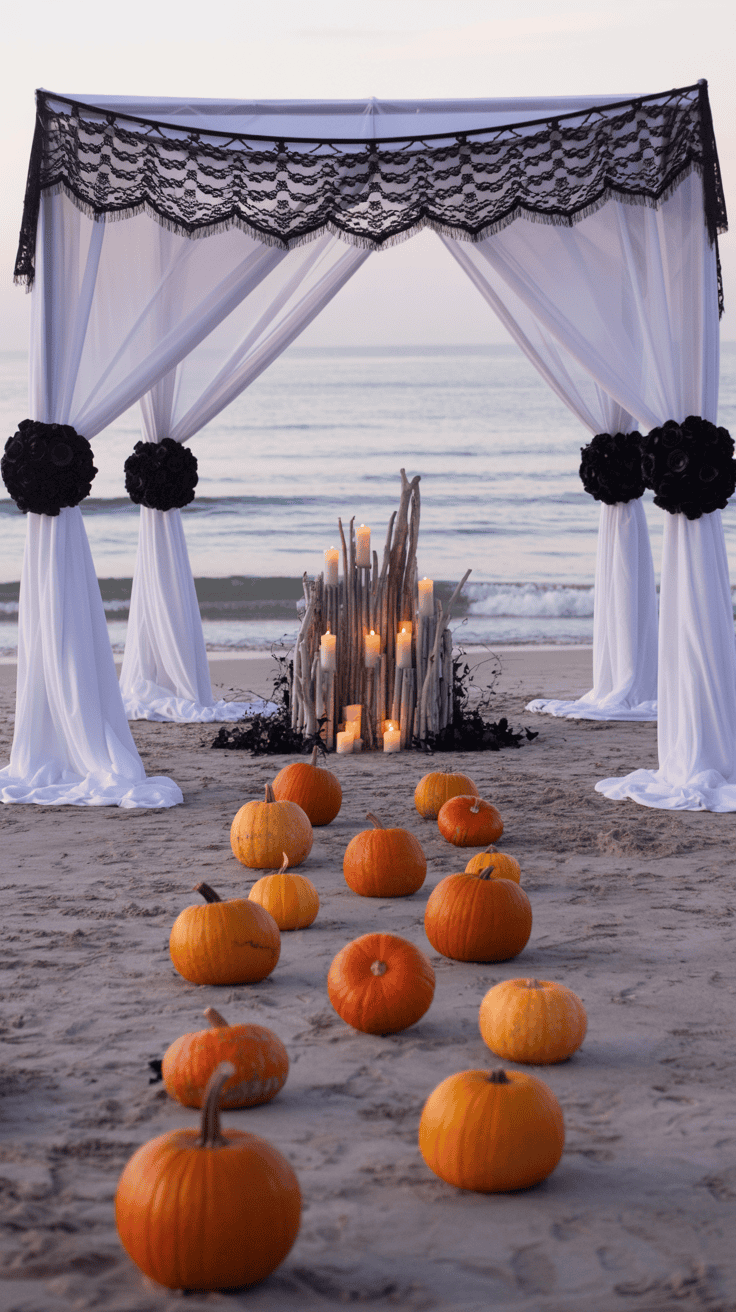
Simple Outdoor Mermaid Halloween Decor Ideas

When I want to take Mermaid Halloween Decorations outside, I get so excited! Outdoor spaces are perfect for a little extra sparkle and whimsy. My boys love seeing the porch and walkway light up with ocean-inspired charm, and every neighbor kid wants to come check it out. These ideas take almost no time to set up, but the effect is pure magic. If you’re short on time or working with eager little helpers, these projects are simple, fun, and super memorable.
Sparkling Seashell Pathway
Walking up to your home should feel like entering a seaside grotto! I love how a seashell pathway turns the front yard into a treasure hunt. The good news? You don’t need to spend a fortune, and you can pull it together with supplies from the dollar store and a bit of creative spirit.
Here’s how I like to do it:
- Gather Clean Seashells: Pick up a bag or two of craft shells, grab faux pearls (look for them in the bead section), and maybe throw in a few flat glass stones for even more shine.
- Add Glow Power: I use glow-in-the-dark paint or glow markers to coat some of the shells and stones. The effect is so pretty once the sun goes down! Just lay the pieces out on cardboard and let the paint dry fully before you place them outside.
- Line the Path: Arrange shells, pearls, and stones along the walkway, leading right up to your door. For more fun, sprinkle them around flowerbeds, tuck them under shrubs, or cluster them in small piles here and there.
- Secure Your Decor: If you have young kids like mine who like to collect everything, use a dot of hot glue to stick some shells to small rocks. This helps keep them from blowing away or being carried off by little hands right away!
Extra tips for a magical look:
- Mix in a few LED tealights or small solar lights between the shells. This makes everything glow and keeps the path visible and safe for trick-or-treaters.
- Scatter a few glittery pebbles or “gemstones” from craft kits to look like ocean treasure.
- Use a light dusting of ocean-blue or silver glitter on the ground for major sparkle.
Your pathway will catch the eyes of every kid on the block, and my boys get so excited every time they follow the “trail” home at night!
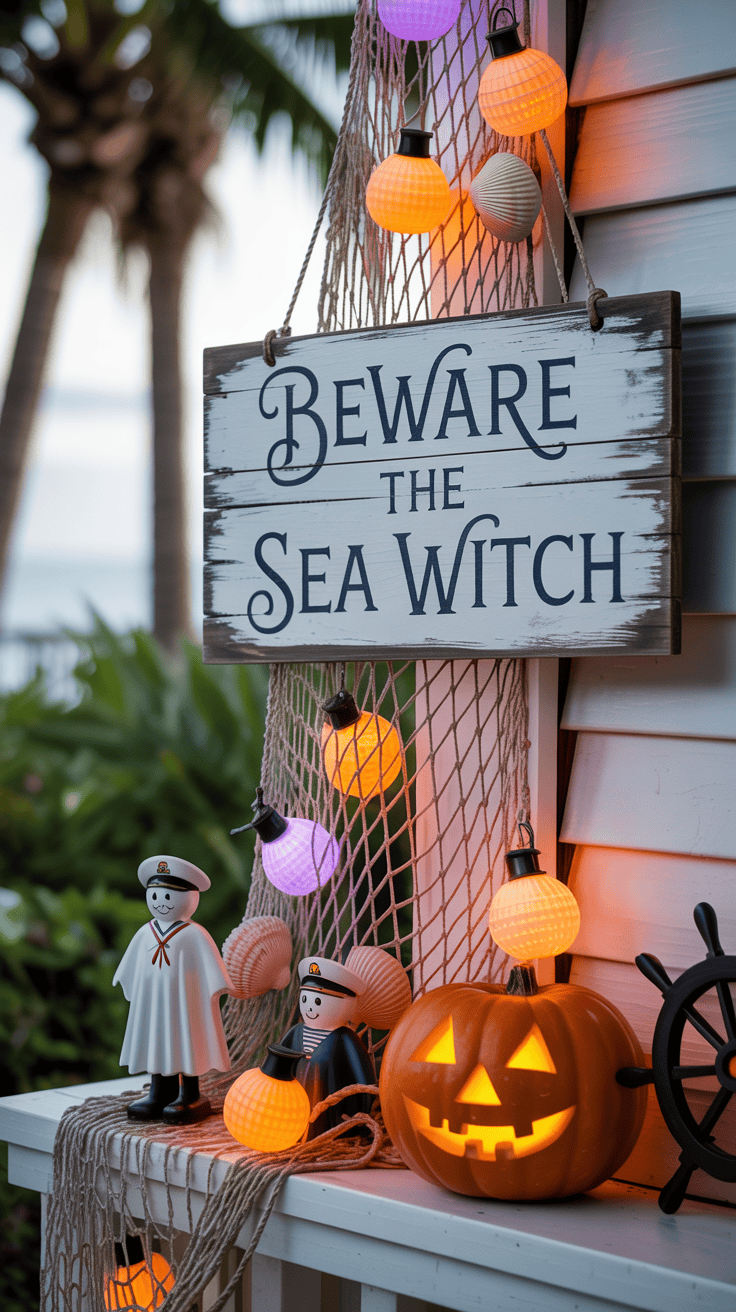
Enchanted Mermaid Porch Display
The porch is the stage for all things Mermaid Halloween, and with a few easy touches, it becomes a true showstopper. My kids help with every step, from stretching out netting to placing their favorite sea creatures, and it’s always a memory-maker.
Here’s how I pull together our porch mermaid look:
- Start with the Steps: Drape plastic or cloth fish netting around the railings or across the steps. Twist and tuck it so it has movement, just like in the water.
- Layer with Faux Seaweed: I cut strips of green plastic tablecloths or tissue paper, scrunch them, then hang or tape them to look like flowing seaweed. You can even let the kids braid some together for even more texture!
- Add Mermaid Props: Set out a couple of large plastic or cardboard mermaid tails (we make these from painted poster board), plush sea animals, or a decorative treasure chest filled with shells and shiny beads.
- Dress Up Planters: Pop a few shells or small fish toys in flowerpots, or stick a mermaid wand right into the soil for a silly touch.
- Finish With a Welcome Sign: A simple chalkboard or wood sign reading “Welcome to our Mermaid Lair!” gets everyone in the spirit.
Keeping things secure and safe is always a priority for moms. Make sure nothing blocks the walkway or steps. I use zip ties or twist ties for netting and soft decorations, so nothing slips underfoot. Heavy props (like filled treasure chests or weighted buckets) keep lighter items from blowing away, and I always double-check that nothing has sharp edges for little hands.
Quick Ideas for Kid-Friendly Mermaid Decor:
- Use foam cutouts for tails and sea creatures so they’re easy to carry and won’t crack if dropped.
- Avoid anything with real glass or tiny loose pieces, especially for porch displays at kid-height.
- Tape down pieces that sit on the steps so no one trips (washi tape in fun colors makes it cute and safe).
My boys love helping arrange the porch every year, and the morning after Halloween, they’re right outside checking if the ocean magic is still there. This setup is easy to adapt for any space, big or small, and always brings a little extra magic to your front door!
Tips for Stress-Free Mermaid Decorating With Kids

Getting kids involved in Mermaid Halloween Decorations feels like the very heart of the fun, but sometimes the mess and chaos can sneak up on you fast! I’ve learned a few things (the hard way) about making decorating day joyful for everyone—without worrying about glitter in your hair or paint splatters on the couch. If you love when your kids hop in to help but also want to keep things relaxed, these tips are for you.
Set Up a Decorating Zone
Picking the right spot is a lifesaver. My boys are hands-on from the start, so I like to pick an area where messes are easy to clean. The kitchen table works great, or even the back deck if the weather is nice. All I do is toss down an old tablecloth or large trash bag for a “work surface.”
- Give each kid their own tray or placemat for supplies.
- Keep wet wipes and a trash bin close by so cleanup is quick.
- Use aprons or even Dad’s old T-shirts—nobody gets upset if something spills!
A decorating zone makes it easy to dive into the fun and keeps the rest of your house safe from runaway glue and glitter.
Age-Appropriate Decorating Tasks
Letting little ones help is important, but matching tasks to their ages makes everything smoother. My youngest might sprinkle sequins, while his big brothers do the cutting or gluing.
Here’s how I break it down:
- Toddlers and preschoolers: Stickers, peel-and-stick jewels, or stamping
- Young kids: Drawing with markers, painting big paper tails, helping with glue (supervised)
- Older kids: Cutting out shapes, tying streamers, attaching decorations to walls or doors
Everyone has a job they can finish fast and feel proud of. The big bonus? There’s less fighting (usually!) and nobody feels left out.
Prep Supplies in Advance
Before we even shout “let’s decorate,” I prep as much as I can. I pre-cut tricky shapes (like tails or shells) and pour paints or glue into small cups. Each kid gets their own little pile of supplies, which cuts down on squabbles and keeps the pace moving.
- Split out sequins, stickers, and pearls into small bowls
- Give each kid a pair of easy-squeeze glue bottles
- Lay out paintbrushes, sponges, and water cups for cleaning
Everything is right at hand, so nobody is hunting for materials or dumping out the box just to find one little shell.
Plan for Short Bursts
Decorating with young kids works best in short, happy bursts. I set a timer for 20–30 minutes and let them know how long we’ll be working. Sometimes, we even turn it into a race—how many tails can you decorate before the bell rings?
- Quick breaks for snacks or dance parties keep energy high
- Praise every finished piece, no matter how wild it looks
Decorating is supposed to be a memory, not a marathon! If I see the crew getting wiggly or frustrated, we just pause and come back later.
Make Cleanup a Team Effort
This might be the most important trick of all. As soon as we say “all done,” I switch to clean-up mode. Even the youngest kids can help sort scraps into trash, put unused supplies away, or wipe up the table.
Here’s what I do:
- Crank up some music and race to pick up pieces together.
- Have everyone check their hands and faces for paint or glue.
- Stack finished masterpieces in a safe spot to dry.
Making cleanup part of the process teaches kids that decorating is fun from start to finish. Plus, it means you’re not left alone with a glitter bomb at the end!
Keep Your Expectations Playful
This is my biggest reminder to myself—kids’ art is rarely Pinterest-perfect. Mermaid Halloween Decorations might lean a little silly or wild, but those goofy sea creatures and sparkly shells are exactly what makes it special.
- Let kids choose their colors, even if it’s not “matchy”
- Celebrate the lopsided tails and wild-eyed fish
- Take pictures along the way, not just when it’s finished
When decorating feels playful, not stressful, everyone has a better time. The laughter and snapshots last a lot longer than any spills or splatters ever could!

Conclusion
Mermaid Halloween Decorations make every part of this season feel magical and easy, even with a house full of wild boys and busy days. The bright colors, sparkly touches, and fun sea creatures always bring out the smiles. My crew never tires of the way these quick projects turn our home into something special without a lot of fuss.
If you give any of these ideas a try, I’d love to see how your space transforms! Please share your favorite Mermaid Halloween Decorations or tips in the comments. Your own spin might just inspire another mom looking to add a wave of magic to her Halloween. Thanks so much for hanging out with me here—I hope this helps you feel brave and excited to make your family’s Halloween simple and enchanting. Happy decorating!
This post may contain affiliate links. Read the full disclosure here.