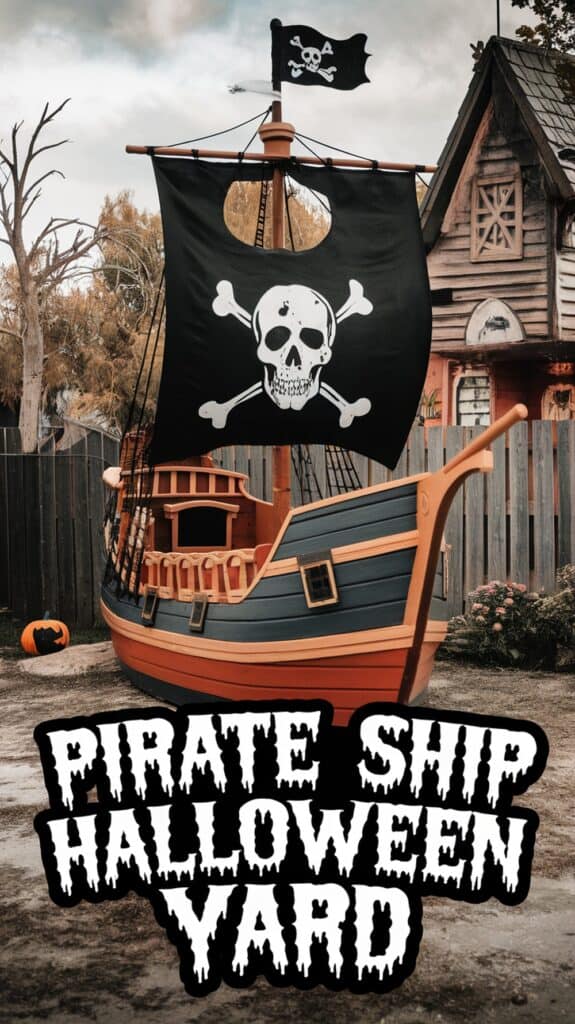
Halloween Pirate Ship Yard Decoration to Impress Neighbors
Hi there, fellow Halloween lovers! As a mom of three wild and adventurous boys, our house gets extra excited this time of year. Every October, we go all out on decorations, but last year’s halloween pirate ship yard decoration took things to a whole new level. We had so much fun turning our yard into a scene straight out of a pirate story, and let me tell you, it was a huge hit with the neighbors!
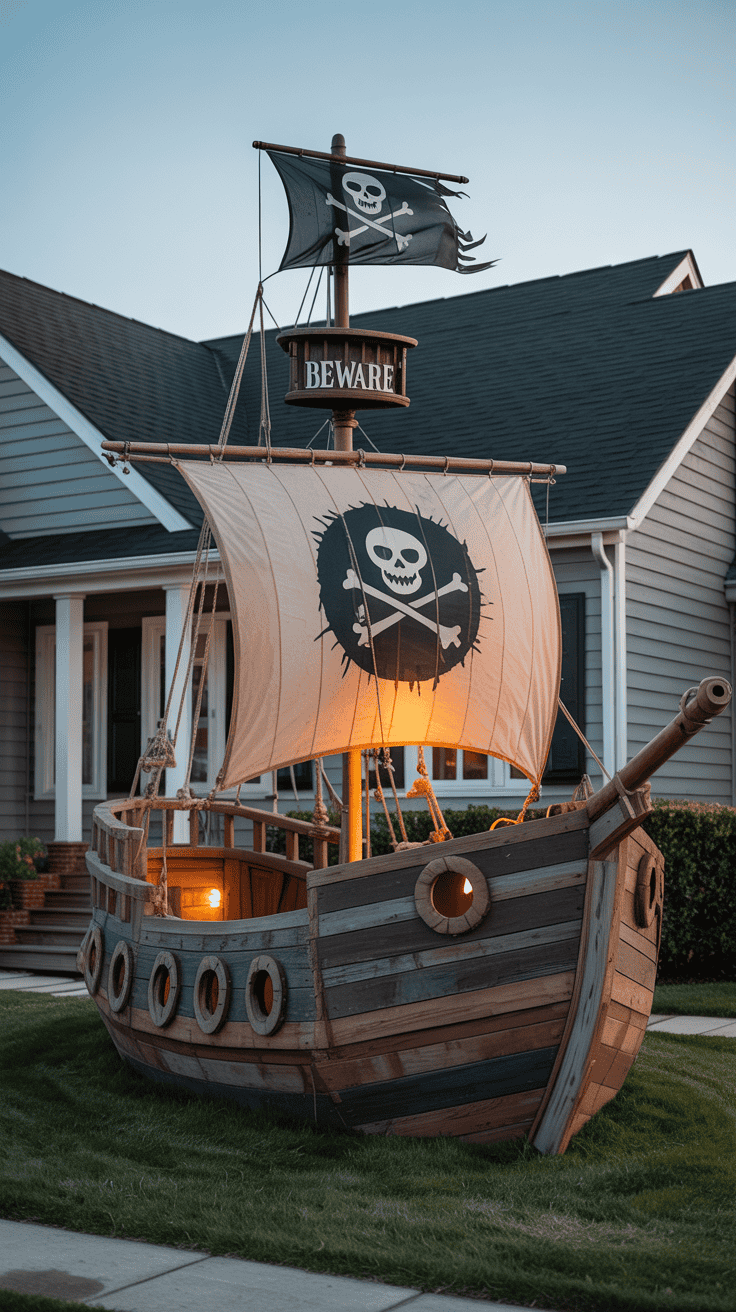
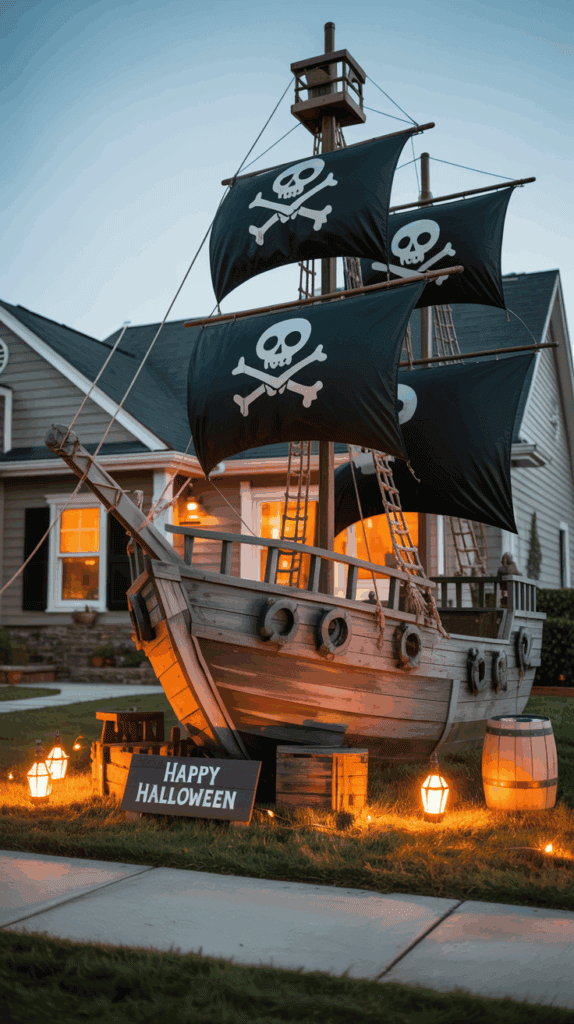
This pirate ship inflatable decoration is massive, detailed, and always the star of the block!
There’s something magical about seeing your kids’ faces light up (and hearing their giggles as they plot new pirate pranks). If, like me, you want to create some neighborhood buzz, you’re in the right spot. I’m sharing our favorite tips, tricks, and easy ideas, so your yard can become the treasure of the block too!
Dreaming Up the Ultimate Pirate Ship: Planning and Inspiration

Every great Halloween pirate ship yard decoration starts with a spark of imagination and a dash of good, old-fashioned fun. I’ll admit, once the idea hit me, my mind couldn’t stop running wild with scenes from pirate movies and picture books. If you want your yard to be the one everyone remembers, you need a plan that’s both child-approved and practical for busy parents.
Let’s break it down with easy steps and ideas, so your pirate ship vision can take shape without feeling overwhelming.
Imagining Your Pirate Ship: Getting the Kids Involved

I love turning the planning stage into a mini family party! With three young boys, there’s never a lack of bold ideas. Here’s how we kick off our Halloween decorating:
- Gather the crew: I call my boys to the table with snacks and colored pencils. We brainstorm what our dream pirate ship should look like. Does it shoot water balloons? Have a jail for “captive” pumpkins? All ideas go into the pot.
- Mood board fun: We flip through magazines and scroll Pinterest (carefully!) for pirate ship inspiration. It’s about finding what excites your kids the most—giant sails, a clever crow’s nest, maybe even a grinning skeleton at the helm.
- Assign parts: Each child picks an element to “captain.” One takes the sails, another the flag, the third handles the ship’s wheel or treasure chest. This makes them feel important and helps manage the chaos.
These brainstorming nights are noisy but packed with laughter. Plus, I find letting the kids guide the look means less fuss later—they feel invested from the beginning.
Sizing Up the Space and Setting the Scene
Your pirate ship needs a good “sea.” Before buying supplies, I walk the yard with a tape measure and get real about how big our vessel can be. This saves so much hassle down the line! I also look at the backdrop. Will a tree make a perfect pirate lookout? Is there room for a “dock” made of cardboard boxes?
Some handy points to remember:
- Measure twice, build once: Mark the outline of your ship with garden stakes and string. It helps everyone see where the final decoration will stand.
- Think about flow: I try to make sure there’s space for trick-or-treaters to walk around without tripping or squeezing past props.
- Anchoring ideas: Tall grass, a fence, or a corner by the porch can help hide support ropes or the “boring” parts of the structure.
Pro tip: Sometimes I sketch a quick map of our yard and let the boys add their own “islands” or traps for a true adventure vibe.
Picking Your Pirate Ship Style
Pirate ships can look all kinds of ways, so pick a style that fits your family’s vibe and your yard. Some like the classic “wooden planks and skulls” look, while others want colorful sails or a playful cartoon ship. We’ve tried a few styles over the years, and each one made the whole neighborhood buzz.
Here are three fun pirate ship styles to choose from:
| Style | What You’ll Need | Kid Appeal |
|---|---|---|
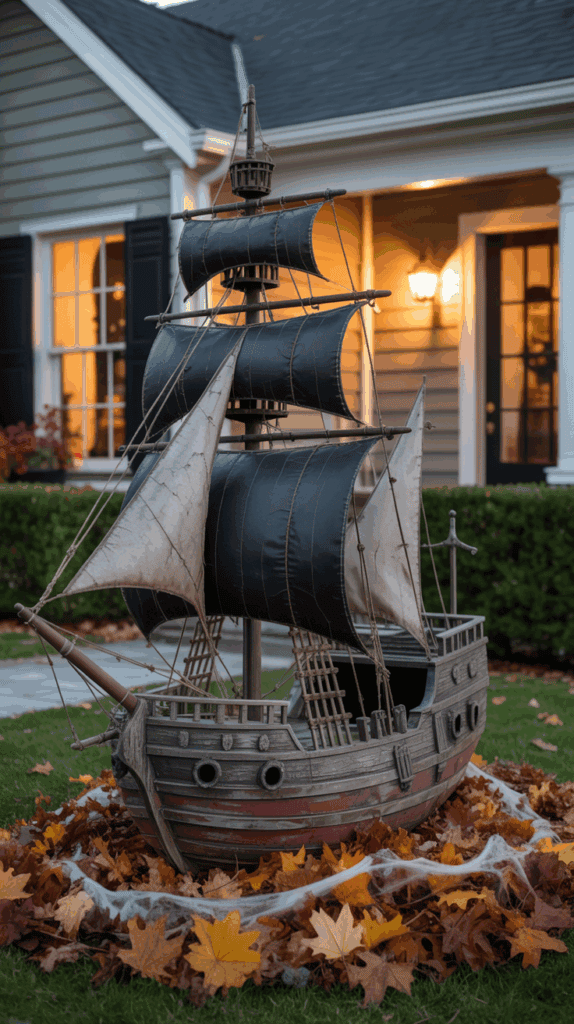
| Spooky & Rustic | Old pallets, brown sheets, plastic bones, black flags | Extra spooky, great for older kids |
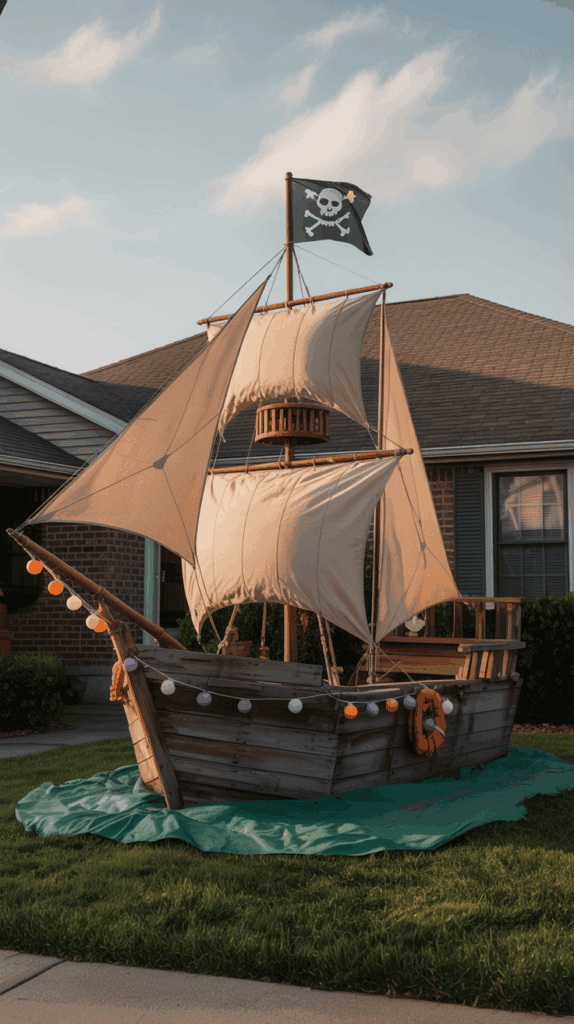
| Bright & Playful | Colored tarps, pool noodles, fake parrots, striped sails | Whimsical, perfect for little ones |
| Movie-Inspired | Cardboard cannons, treasure chests, ship wheels, dramatic sails | Eye-catching, epic photos |
We pick our style as a group, talking over what feels the most “us” that year. If you have young kids, that bright and playful look brings so many smiles!
Gathering Inspiration from Everywhere
I keep my eyes open for pirate ideas all year. Whether it’s a fun beach trip, a pirate birthday party, or even a quirky ornament in a gift shop, I snap a picture or jot a quick note. My boys love bringing home “treasures” to add to our pile. Sometimes, the craziest idea—like using pool noodles for railings or a broken umbrella as a mast—turns out to be the best part of the whole ship.
Some go-to sources I use for fresh pirate ship inspiration:
- Children’s books and movies (like “Peter Pan” or “Pirates of the Caribbean”)
- Social media groups for holiday decor
- Old costumes and props from family parties
- Dollar store finds (so many cheap trinkets become pirate loot!)
Building a unique Halloween pirate ship yard decoration really comes down to mixing your family’s favorite ideas with a few creative surprises. The planning step is where all the magic starts!
Building the Ship: Materials, Layout, and Assembly
When you set out to make a halloween pirate ship yard decoration that stirs up excitement on every block, you need a strong foundation. I found that building the ship is where all those wild ideas start to feel real. Picking the right materials and laying everything out brings the whole project to life. The good news is, you don’t need a carpenter in the family or a fortune in your bank account—just a little patience, some everyday supplies, and a healthy dose of Halloween spirit!
Choosing Materials That Work for Real Families
I wanted materials that could take a beating (boy-tested, after all), stay safe in October weather, and still look fantastic when the sun goes down. Most of these items can be picked up from the hardware store, garden center, or even the dollar store if you look at things with a little imagination.
Some tried-and-true materials for our pirate ship included:
- Cardboard boxes: Lightweight, easy to cut, and perfect for big shapes like hulls and cannons. I raid the recycling bin for any giant appliance boxes.
- Wooden pallets or scrap wood: Great for creating a sturdy base or “deck.” Many stores will let you have discarded pallets for free (score!).
- PVC pipes or broomsticks: These keep masts and railings upright and safe around excited kids.
- Plastic sheeting, tarps, or old sheets: They become sails and billowing backdrops. An old brown sheet is my go-to for rustic sails.
- Paint and markers: Black, brown, and gray cover a lot of pirate territory. I let the kids add their own “wood grain” with a fat marker for a funny touch.
- Zip ties, rope, or duct tape: These are my secret weapons. Zip ties work well for holding everything together if you’re in a hurry.
- Bricks or heavy rocks: I hide these at the base to keep our masterpiece upright even when fall winds pick up.
I also never say no to leftover pool noodles, broken umbrellas, or any cool things from the thrift store. Anything that can be stuck, glued, or tied down is fair game around here!
Mapping Out the Ship: Simple, Family-Friendly Layout
Before starting to tape and tie things together, I always “map out” the ship on the lawn. This keeps the project fun instead of frustrating. I grab sidewalk chalk (or string and stakes) and outline where the hull, deck, and masts should go. The kids like to jump “aboard” and practice their best pirate shouts, so the map gets a real workout before we build.
For a simple and showy pirate ship, here’s what usually works best:
- A long rectangle for the hull, with a narrow front for the bow
- Wide enough to hold a few kids for photos (about 4-6 feet across)
- Tall boxes or pallets at each end as “stern” and “bow”
- A PVC mast in the middle, strong enough for a lightweight sail
I sketch everything with the boys so we all know what goes where. Taking a few minutes to plan saves hours of “Mom, that’s not right!” later on.
Here’s a quick table with kid-friendly layout ideas:
| Ship Feature | What to Use | Pro Tip |
|---|---|---|
| Hull/Base | Cardboard, pallets | Add bricks for stability |
| Mast | PVC pipe, broomstick | Anchor in a bucket of sand |
| Sails | Sheets, tarps | Paint or draw on pirate logos |
| Deck Railings | Pool noodles, rope | Safe and colorful |
| Cannons | Paper rolls, paint cans | Stack near the “bow” |
Putting It All Together: Easy Assembly Steps
Ready to bring it to life? Assembly day is always loud and a little messy around our house, but that’s what makes it memorable. Here’s how I keep everyone busy (and the ship safe for play):
- Lay down the hull: Arrange your big boxes or pallets flat on the grass. Use rocks or bricks at the corners to keep the base steady.
- Build up the sides: Tape, zip tie, or tie tall pieces to each side for depth. If using cardboard, bend “flaps” inward for stability.
- Add the mast: Stick your PVC pipe or broomstick through the middle. I fill an old bucket with rocks and slide the mast in so it won’t wobble.
- Hang the sails: Drape sheets or tarps over the mast. Add pirate symbols—my kids love stenciling skulls or drawing funny faces.
- Secure the edges: At every spot the boys might pull or lean, I reinforce with tape or extra ties. Safety first, right?
- Final touches: Use rope for railing, a steering wheel from the toy box, or plastic tubs as “lifeboats.” Let the little pirates toss gold coins or stash plastic gems in buckets nearby.
If anything sags, rips, or leans, I don’t sweat it—pirate ships are supposed to look rough around the edges! The main goal is a halloween pirate ship yard decoration that survives wind, wild kids, and Halloween night.
Pro tip: Save leftover paint, rope, and decorations for next year, or for a last-minute “repair” if your crew plays a little too hard!
Tips for Quick Fixes and Weather-Proofing
Halloween weather likes to keep things interesting, so I always do a quick check after a rainy day or if it gets windy. I stash extra tape, ropes, and spare cardboard in the garage. Sometimes, the most boring piece (like a brick or two) is what keeps the whole ship upright through a stormy night.
Here’s how I keep everything looking sharp:
- Spray cardboard with a clear sealer to slow down soggy edges.
- Move anything lightweight inside when storms roll in.
- Anchor corners with heavy rocks or bags of play sand.
- Patch sails with duct tape or extra fabric strips if they tear.
Building the ship with real family life in mind means making peace with a bit of mess. I love how our ship comes together—even if it’s not perfect, it’s always full of laughter and memories.
Ready to set sail? The fun is just beginning!
Decorating for Pirate Perfection: Details That Make It Pop
Once the halloween pirate ship yard decoration is built and standing proud in your yard, this is when the magic really starts! This is where your pirate ship transforms from a fun homemade project into a show-stopping scene that people will stop and admire. I’ve learned that it’s the little details and finishing touches that truly make it shine. Whether it’s something silly that makes your kids giggle or a spooky prop that sends a shiver down your spine, adding those extra decorations can turn any backyard pirate ship into the neighborhood’s favorite photo spot. Here’s how I make our yard pirate-perfect every single year!
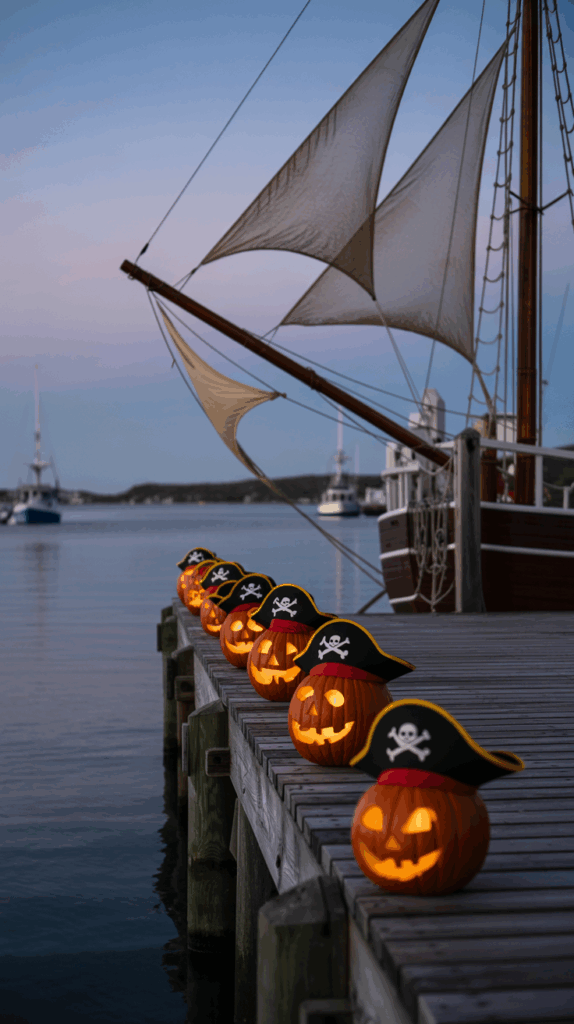
Setting the Mood with Lights and Lanterns
I’m convinced nothing brings a pirate ship to life quite like the right lighting. When dusk hits and those first trick-or-treaters wander up, a soft and spooky glow takes the whole decoration to a new level.
Some of my favorite ways to light things up include:
- String lights along the railings: I twist warm white lights (the kind you use for Christmas) along the edges of the ship and sails.
- Lanterns for that old-world feel: Battery-powered lanterns from the dollar store make perfect “ship lanterns.” I hang a few from the mast or place some near the bow.
- Spotlights on special features: Small garden spotlights aimed at our “treasure chest” or the main sail really highlight my favorite details after dark.
- Glow sticks in bottles: If you want a safe-but-creepy touch, put glow sticks into empty water bottles and drop them in the “sea” around your ship.
It’s simple, safe, and you won’t have to worry about fire hazards late at night. The soft lights make everything glow, and I always catch my boys sneaking out after bedtime to stare at their glowing pirate masterpiece!
Sails, Flags, and Banners That Catch the Eye

A pirate ship needs sails, but why stop there? Your sails and flags are like your ship’s personality—so have fun with them! I let my boys paint big pirate logos or silly faces on old sheets for our sails. Sometimes, we add stripes with masking tape and spray paint, or tie on extra fabric to flutter in the breeze.
For those perfect pirate touches:
- Hand-painted sails: Old sheets, permanent marker, and a steady hand makes for an instant conversation starter.
- Jolly Roger flag: You can buy one, but my crew loves making oversized skull-and-crossbones banners out of black trash bags.
- Mini flags and pennants: String up a line of little pirate flags (use felt or colored construction paper) between the mast and the deck.
- Ripped fabric strips: I cut up old clothes or scarves and tie them on as banners—it’s messy and wild, just like a real pirate ship at sea.
These splashy, colorful details make the ship look fun by day and dramatic at night, especially when the wind picks up.
Deck Details: Anchors, Ship Wheels, and Treasure
The ship’s deck is my secret favorite spot for decorating because there’s just so much room to play! I ask my boys what would make it more “piratey,” and their ideas keep getting wilder each year.
Some never-miss favorites:
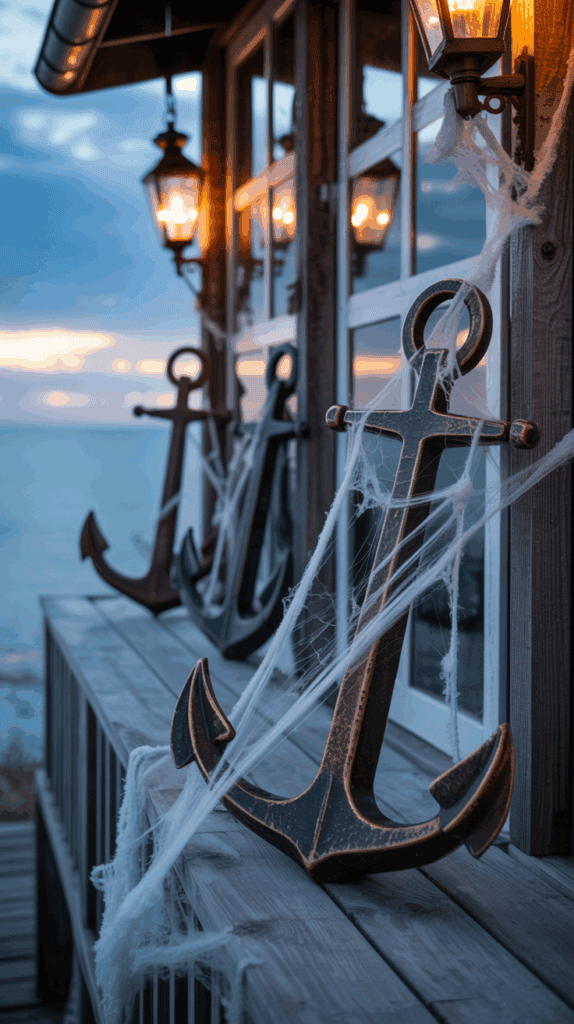
- Foam or cardboard anchors: Painted gray and tied off with chunky rope for that “we’re docking here” effect.
- DIY ship wheels: One year, we glued a plastic plate to a wooden dowel and painted it brown. Amazing how a simple idea can make the whole ship feel real!
- Plastic barrels or buckets: We use them as “rum barrels” or cargo. Fill them with leaves or small stones to weigh them down and keep things in place.
- Treasure chest: Every self-respecting pirate ship needs a treasure chest! Ours is an old storage bin covered in brown duct tape. We fill it with gold-painted rocks, plastic coins, and every shiny thing we can find.
Even a pile of scrap wood painted gold can stand in for loot. If it sparkles, it’s pirate treasure in our house!
Pirate Crew: Skeletons, Parrots, and More
A pirate ship without a crew is just a boat, right? This is the part where your yard really grabs attention. Adding a few playful or spooky characters turns your yard into a scene straight out of a pirate storybook.
Some easy (and budget-friendly) crew ideas:
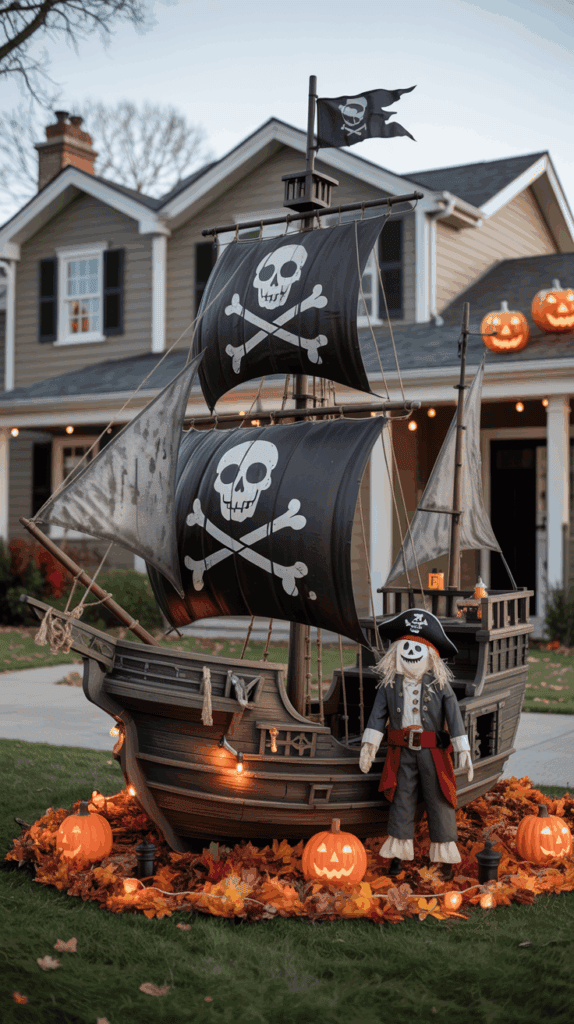
- Skeleton pirates: No need to get fancy. Dress up plastic skeletons from the dollar store with old scarves, hats, or even your kids’ outgrown Halloween costumes.
- Stuffed animals as pets: My youngest loves putting a stuffed parrot or monkey on the railing or mast. Sometimes we get crafty and make one out of felt or paper.
- Captain at the helm: A spare hat, a fake beard, and a mop as a “crew member” steering the ship.
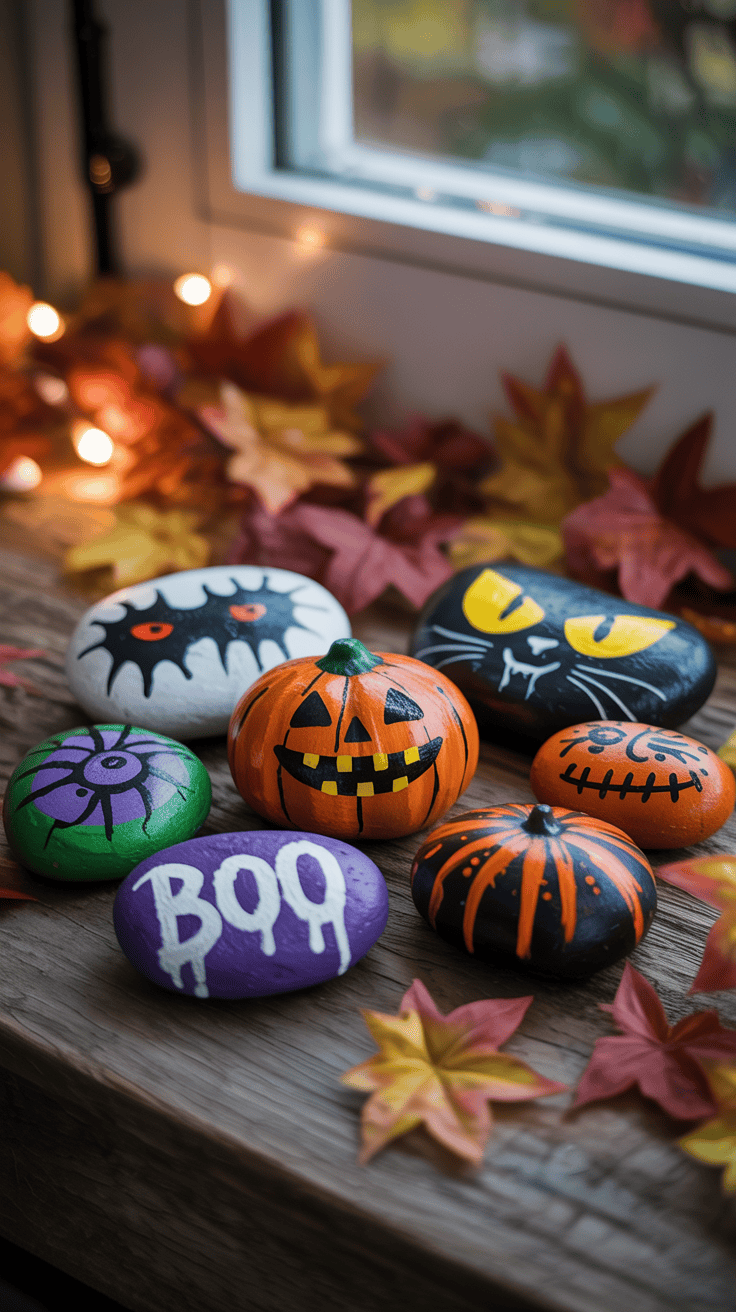
- Mischievous pumpkins: Paint faces or eye patches on pumpkins—these little guys become prisoners or stowaways!
I like to let the boys arrange their skeleton crew each day leading up to Halloween. It changes often, but that’s half the fun!
Seas and Surroundings: Bringing the Whole Scene Together
To finish everything off, you’ll want to set the whole pirate fantasy right into your yard. Making the “ocean” is simpler than it sounds, and it makes those photos even more magical.
Here’s how we create our perfect pirate setting:
- Blue tarps or fabric: Spread on the grass under and around your ship, these become instant “waves.”
- Plastic seaweed: Green streamers or shredded tissue paper are perfect for that “underwater” vibe.
- Cardboard sharks or fish: Quick to cut, easy to decorate, and always a bonus for imaginative play.
- Cardboard planks: Lay down a few on the “dock” so brave trick-or-treaters can “walk the plank” to their treats!
These extra touches give the whole yard a sense of adventure. Even a little dry ice in a bucket (safely out of reach) makes “fog” that rolls over your ocean and sends shivers up your spine.
Favorite Amazon Finds for Quick Pirate Decor
Sometimes you just need a few last-minute items to finish the look. Here are a few of my go-to favorites:
| Item Description | Why I Love It | Where I Use It |
|---|---|---|
| Plastic gold coins | Perfect for “loot” piles | Treasure chest, scattered around |
| Pirate hats & eye patches | Instantly transforms anyone into a pirate | For trick-or-treaters, skeleton crew |
| String lights | Adds nighttime glow | Around the hull, masts |
| Parrot figurines | Silly and eye-catching | On railings or by the wheel |
| Mini lanterns | Old-world charm, reusable | Hanging on masts, by the deck |
(click for links, and remember to check for fast shipping!)
Personal Touch: Let Your Family Shine
After all the effort, my advice is to always find a spot for a personal touch. Some years we hang up a sign with our family’s “pirate crew” names, other times my boys make “wanted” posters with their own goofy pirate faces. Anything that makes the halloween pirate ship yard decoration uniquely yours is what people remember most.
Let your creativity (or your kids’ wildest ideas) lead the way. A hand-drawn map tacked to the hull, oversized foam swords stuck in the “deck,” or even a line of boots set out for tiny trick-or-treaters goes a long way in making your pirate ship yard the talk of the neighborhood. The right decorations take your ship from good to unforgettable!
Interactive Fun: Games and Activities for Little Pirates
Building our halloween pirate ship yard decoration was just the start—the real joy kicked in when the yard turned into a playground for pint-sized pirates! I saw fast that no pirate ship is complete without a little swashbuckling fun and some hands-on adventure. Kids want to play, pretend, and laugh with their friends. I wanted to make sure every little visitor found more than decorations; they found a spot to live out their pirate dreams for a while. If you love watching your kids use their wild imaginations, you’ll want these playful activities ready and waiting.
Pirate-Themed Yard Games
Because not every kid wants to stand around looking at decorations, I mix in simple pirate games that work for all ages. The best part? Most don’t need anything fancy, just your own backyard and a good sense of humor!
Some of my boys’ favorite yard games:
- Walk the Plank: A wooden board laid flat on two cinder blocks becomes the “plank.” The littlest pirates giggle the hardest as they try to balance across. If you want extra laughs, toss a blue sheet below as “shark-infested waters.”
- Pirate Bean Bag Toss: Grab a cardboard box, cut out big “portholes,” and decorate it with pirate designs. Kids toss bean bags or rolled-up socks through the holes to “bombard the enemy.”
- Cannonball Relay: Black balloons (called “cannonballs” by my crew) get carried across the lawn using big wooden spoons. If the balloon pops, it’s back to the starting line!
- Treasure Hunt: Hide plastic coins or tiny toys in your “ship” or around the yard. A hand-drawn treasure map ups the excitement. Siblings love teaming up to claim the loot first.
These games keep the action lively and energy burning, which is a lifesaver if you’re hosting the neighborhood kids.
Creative Pirate Crafts on the Deck
When it feels like everyone’s sweaty and needs a break, I switch to pirate crafts. A little shaded craft table next to our pirate ship is all it takes for a steady flow of giggles and creativity.
Some easy pirate crafts for your shipyard party:
- DIY Pirate Hats: Black construction paper, elastic string, and a bit of chalk for skulls and crossbones. Each kid personalizes their own hat to wear or take home.
- Eye Patch Table: Pre-cut felt circles or squares, string, a glue stick, and some gem stickers. This might be the easiest party craft ever!
- Mini Spyglass: Empty paper towel tubes, markers, and tape. The kids color their own spyglasses and set off to look for “enemy ships.”
- Treasure Chest Decorating: Recycled containers, gold foil stickers, and shiny beads. Each child makes a tiny treasure chest to fill.
Parents love that these crafts don’t need any tricky supplies, and the kids walk away with a wearable badge of their pirate status!
Swashbuckling Photo Booth
I never skip the pirate photo booth, because nothing says “memory” like a goofy family picture. The pirate ship makes the perfect backdrop, and I set out a few silly props in a basket.
My go-to items for the photo station:
- Pirate hats and bandanas (made or bought)
- Toy swords and foam cutlasses (trust me, you want them soft)
- Felt beards and mustaches on sticks
- Giant gold coins or a treasure chest prop
- Parrot plushies for shoulders
With a few props, you’ll get cute photos whether it’s wild action shots or big family grins. I snap extra pics for parents who forget their phones (which is hard to believe, but it happens!).
Make-Believe and Pirate Stories
When the sun gets low and everyone’s a little tired, I gather the kids on the “deck” with blankets and a flashlight. We share pirate stories—sometimes from picture books, other times made up on the spot. My boys are always competing for the silliest or spookiest tale.
Some story starters that get big laughs:
- “Captain Stinky Socks and the Lost Lollipop”
- “The Skeleton Crew Who Loved Broccoli”
- “The Secret Treasure of Grandma’s Cookie Jar”
For older kids, I let them act out a pirate scene or lead their own silly “trial” with fake punishments. (My youngest always sentences me to tickles!)
Pirate Costume Parade
If your party has trick-or-treaters coming by, why not host a little pirate parade? I get the kids to march around the yard, wave their hats and flags, and yell their loudest “Arrrr!”—neighbors join in and it’s a hit every year!
Some things I put out for the parade:
- Ribbon “medals” for best pirate hat or silliest strut
- Extra eye patches and hats for anyone who forgot to dress up
- A box of scarves and pirate sashes to share
Kids love showing off and getting a little clap or silly prize at the end.
Pirate Snack Station
Nothing keeps the fun going like easy snacks for busy hands! I set up a simple snack stand right by the ship.
Here are a few pirate-themed snack ideas my boys can’t resist:
- “Cannonballs”: chocolate donut holes
- Cheese stick “swords”
- Goldfish crackers in cupcake liners
- Apple slices with peanut butter as “planks”
- Juice in clear cups, labeled as “pirate grog” (with a splash of blue food coloring for fun)
Finger foods are easiest, since the kids are busy darting back and forth on the yard. Just be sure to keep some wipes close by for sticky fingers.
Pirate Activity Table Cheat Sheet
For quick planning or if you want to set up a few stations at once, here’s a handy table:
| Activity | Supplies Needed | Mess Level | Age Range |
|---|---|---|---|
| Walk the Plank | Wooden board, cinder blocks | Low | 3–10 |
| Bean Bag Toss | Box, bean bags or socks | Low | 3–10 |
| Pirate Hat Craft | Paper, chalk, elastic | Low | 4–10 |
| Treasure Hunt | Coins, map, buckets | Medium | 3–12 |
| Snack Station | Donuts, cheese, fruit | Low | All ages |
| Story Time | Blankets, flashlight, books | None | 3–9 |
With these fun, simple activities, your halloween pirate ship yard decoration becomes the talk of the block—not just something to see, but a place where memories sail right into your kids’ hearts.
Tips for Safety, Weatherproofing, and Cleanup

Now for the “mom mode” moment that comes with any halloween pirate ship yard decoration! When you’ve got three adventurous boys (and usually a dozen friends charging the deck), safety and cleanup mean as much as spooky vibes. I want our decorations to wow the neighbors, but I also want everyone to get home with all toes and fingers intact. Plus, our pirate ship takes a beating from fall weather, so I’ve learned some tricks to keep it looking sharp until Halloween’s end. Let’s get into the nitty-gritty—no one needs a yard full of soggy cardboard or a trip hazard surprise!
Keeping Everyone Safe Around Your Pirate Ship
Kids see a pirate ship and they will climb, touch, jump, and swing. That’s just how it goes in our yard! I turn my “mom radar” up to full volume and do a yard check with these points in mind:
- Anchor everything well: I bury the ends of ropes, secure wooden planks, and weigh down props with bricks or sandbags. If it looks like a pirate might take off with it, it needs extra support.
- Watch for sharp edges: Before the first kid sets foot on deck, I check for splinters, loose nails, and poke out or cover any wire or staples with tape. I keep the pointy stuff far away from the main play areas.
- Choose safe materials: Pool noodles for railings and soft foam for cannons mean bumps won’t turn into bruises. Cardboard edges get an extra layer of colored duct tape just in case.
- Pathways clear: I make sure trick-or-treaters have a wide open walk. No ropes across the yard, no low-hanging props by sidewalks, and nothing blocking the main entrance.
- Nighttime checks: After sunset, I light up every pathway and deck area. Battery lanterns and string lights mean no one’s tripping in the dark, and I skip real candles so nothing catches fire.
When in doubt, I walk the whole yard with the boys and “test” everything—if they can break it or trip on it, we patch it up before Halloween night!
Weatherproofing Your Pirate Masterpiece
Let’s be honest—October weather tosses curveballs. We’ve had windy nights, random rain, and even a surprise snowfall before our big pirate party! So I always prep our halloween pirate ship yard decoration for any weather that might blow through.
Here’s my easy weatherproofing checklist:
- Cardboard armor: Spray or brush a clear water sealer over all cardboard parts. It buys a few extra days before things get soggy and soft. If it’s going to really pour, I bring the lightweight pieces into the garage overnight.
- Sturdy frames: I reinforce tall masts with PVC pipes or broomsticks, then tie them to something solid like a fence post or small tree. A flexible mast is a safe mast, but I don’t want it snapping in half.
- Sail safety: Sails get extra grommets (you can poke these through fabric and use zip ties or rope to secure) so they don’t rip away with the first wind gust. Old sheets hold up well, especially if you double up fabric.
- Weighted props: I love using bricks or heavy rocks hidden inside barrels and boxes. They keep things in place during strong gusts and storms.
- Plastic over paper: Little pirate flags, treasure maps, and banners last longer if I run them through a laminator or wrap them in clear packing tape. Works like a charm.
If the forecast looks wild, I keep a “pirate repair kit” in a basket by the door: duct tape, scissors, extra rope, and extra garbage bags. That way, I’m not searching for supplies when the rain comes at midnight!
Simple and Stress-Free Cleanup
I’ll admit, once the last pirate leaves and the candy buckets are empty, the thought of a big cleanup makes me want to run away to sea! Over the years, I’ve found some ways to make it quick, easy, and even a little bit fun (if you get the whole family involved).
Some of my favorite cleanup tips:
- Sort as you go: I keep one big bin for “keep” items (decorations, lights, reusable costumes) and another for “toss” piles (anything soggy, torn, or ruined). The boys love arguing over what counts as pirate treasure and what’s going to the curb.
- Peel off tape and ties: I cut off old tape and remove zip ties from wood and PVC pieces. These can be reused for future projects if they stay in good shape.
- Stack and store: Bigger pieces like masts and planks stack neatly behind the shed or in the garage. Sails, flags, and banners get washed, folded, and packed away.
- Clean up the yard: We do a final sweep for tiny beads, coins, or scraps so the lawnmower doesn’t spit out pirate loot come spring. The kids make a contest of “who finds the most treasure”—works every time.
- Push leftover cardboard to recycling: If it’s dry, it’s easy. If it’s wet, I layer it in the outdoor bin with leaves or yard waste.
I frame the cleanup as the “great pirate ship takedown.” We pretend we’re dismantling a real ship before the navy arrives! With a little teamwork and music blasting, the whole process takes less than an hour.
Go-To Supplies for Safe, Weatherproof, and Easy Decorating
I keep a stash of favorite supplies that make everything safer, stronger, and easier to pack up at the end. If you’re wondering what to buy ahead, here’s the list I grab every October:
| Supply | Why I Love It | Where I Use It |
|---|---|---|
| Duct tape | Weather-resistant, strong | Seams, edges, patching sails |
| Zip ties | Quick and sturdy connections | Joining pipes, rails, banners |
| Heavy-duty rope | For tying large props | Anchoring masts, railings |
| Clear spray sealer | Shields against rain | Spraying cardboard, foam |
| Bricks/rocks | Discreet but heavy | Weighing down ship base, barrels |
| Battery lanterns | Safe, no flame | Lighting walkways, deck area |
| Large storage bins | For saving decorations | Cleanup and storage |
Having these simple supplies makes a huge difference, whether you’re building the pirate ship, keeping it upright during a fall storm, or getting your yard back to normal after the fun ends.
If you keep safety, weather, and cleanup in mind from the very start, your halloween pirate ship yard decoration will impress the neighbors and leave everyone asking, “How did you pull that off?” And best of all, you’ll have more time to enjoy the fun parts—like joining your kids for one last adventure on the high seas!
Conclusion
Looking back on our halloween pirate ship yard decoration, I can honestly say it brought so much joy to our family and the neighborhood. My boys turned into fearless pirates every day, and the laughter outside made all the taped cardboard and late-night setup worth it. Seeing kids from down the street join in, waving their makeshift swords and pausing for photos on the deck, made my heart happy.
If you want your yard to be the place everyone remembers, just go for it! Start with your own halloween pirate ship yard decoration, big or small, and let your kids’ imaginations lead the way. Your neighbors will love it, and your own family will talk about those silly, adventurous nights for years.
I would love to see what you and your family create! Share your pirate ship pictures or ideas for next Halloween in the comments. Thank you so much for reading and letting me share our pirate adventure. I hope your Halloween is filled with fun, memories, and maybe a little treasure-hunting too!
This post may contain affiliate links. Read the full disclosure here.