Halloween Rock Painting Ideas for Kids and Coastal Craft Days
As a mom of three lively boys, Halloween at our house is always full of high energy, sticky fingers, and so many laughs. We look forward to starting new traditions every year, but Halloween rock painting ideas are always a big hit in our family. There’s something so simple and joyful about handing my kids a pile of rocks, a few paints, and watching their imaginations go wild.
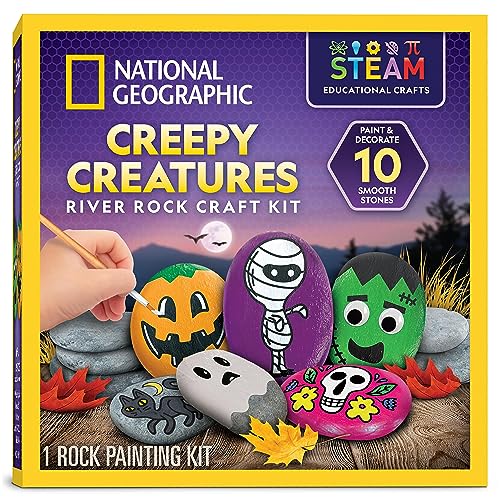
We used this Halloween rock painting kit (National Geographic!) — fun, easy, and great for little beach artists!
I love how easy it is to set up, and it fits perfectly for family craft days (especially here on the coast where you can find the best pebbles on beach walks). If you’re searching for a fuss-free and fun way to celebrate this season, these ideas bring out big smiles and make sweet memories. Trust me, your kids will remember these little painted treasures long after the last pumpkin has disappeared!

Getting Started with Halloween Rock Painting
If you ask my boys, the best part of starting any fun family activity comes from the messy, colorful chaos at the very beginning. Getting set up with Halloween rock painting ideas is easier than you might think. With just a little time and a handful of supplies, you can turn an afternoon into something magical. I promise, you don’t need to be an artist or have a fancy workspace—just a few basics and an open table. The memories and smiles come so quickly!
Gathering the Right Rocks

Let’s talk about the rocks. Living on the coast, we collect pebbles during our beach walks, but any smooth stone will work. Here’s what I look for when picking rocks for painting:
- Smooth surface: Easier for little hands to cover with paint.
- Various sizes: Small ones are great for tiny ghosts, while bigger rocks make perfect pumpkins or silly faces.
- Clean and dry: Always wash rocks with warm soapy water first. Set them outside or by a sunny window to dry fully before getting started.
You’ll find the best rocks just steps from the shore, but don’t worry if you’re not near a beach. Local garden centers or home improvement stores often sell bags of river rocks that work perfectly!
Essential Supplies for Kids
Don’t get pulled in by expensive kits unless you want to. For years, we’ve kept it simple. Here’s what you’ll need to get started:
- Acrylic paints (bold oranges, greens, purples, blacks, and whites are great for Halloween themes)
- Paintbrushes (a mix of thick and thin brushes helps with detail and coverage)
- Permanent markers for details and outlines
- Old T-shirts or aprons to protect clothes
- Paper towels, water cups, and a tray or old newspapers for easy cleanup
I always set up our “painting station” at the kitchen table or out on the porch. When the weather is nice, there’s nothing better than painting outside!
Prepping Rocks for Painting

Before the painting starts, have your kids help get the rocks ready. This step can feel a bit like washing veggies before dinner! Line up the rocks, hand out paper towels, and let the kids dry each one. It’s simple, but it makes them feel involved and proud—plus, paint sticks so much better to clean rocks.
If you want the colors to pop, paint a layer of white acrylic as a base coat. This helps the designs look brighter and more even. Let the base layer dry for at least 10 minutes before adding more color.
Making It a Family Event
Halloween rock painting ideas are perfect for cozy nights in or small get-togethers. To keep everyone happy:
- Put on a fun Halloween playlist. A little music sets the mood!
- Offer snacks that are easy to grab (popcorn or apple slices are winners in our house).
- Set a big sheet or plastic tablecloth under your workspace for stress-free cleanup.
Encourage everyone to paint their own ideas, even the wiggliest kids. We sometimes paint the same themes, but the personalities always show! When everyone is creating together, it feels less like a project and more like a celebration.
Quick Reference: Supplies Checklist
Here’s a handy table you can print or screenshot for your next craft day:
| Item | Notes |
|---|---|
| Smooth rocks | Washed and dried, various sizes |
| Acrylic paints | Halloween colors, non-toxic preferred |
| Paintbrushes | Variety of sizes for kids’ hands |
| Permanent markers | For details and outlining |
| White acrylic paint | Makes a great base coat |
| Paper towels | For quick messes |
| Water cups | For rinsing brushes |
| Old shirts/aprons | Keeps clothes clean |
| Table covering | Old sheet, newspaper, or plastic cloth |
Getting started with Halloween rock painting ideas honestly takes less time than finding the scissors on a busy school morning. Once the setup is done, you’ll see just how quickly the smiles start. And the painted little creations always feel like tiny treasures waiting to be shared or hidden for others to find!
Classic Halloween Rock Painting Designs Kids Love

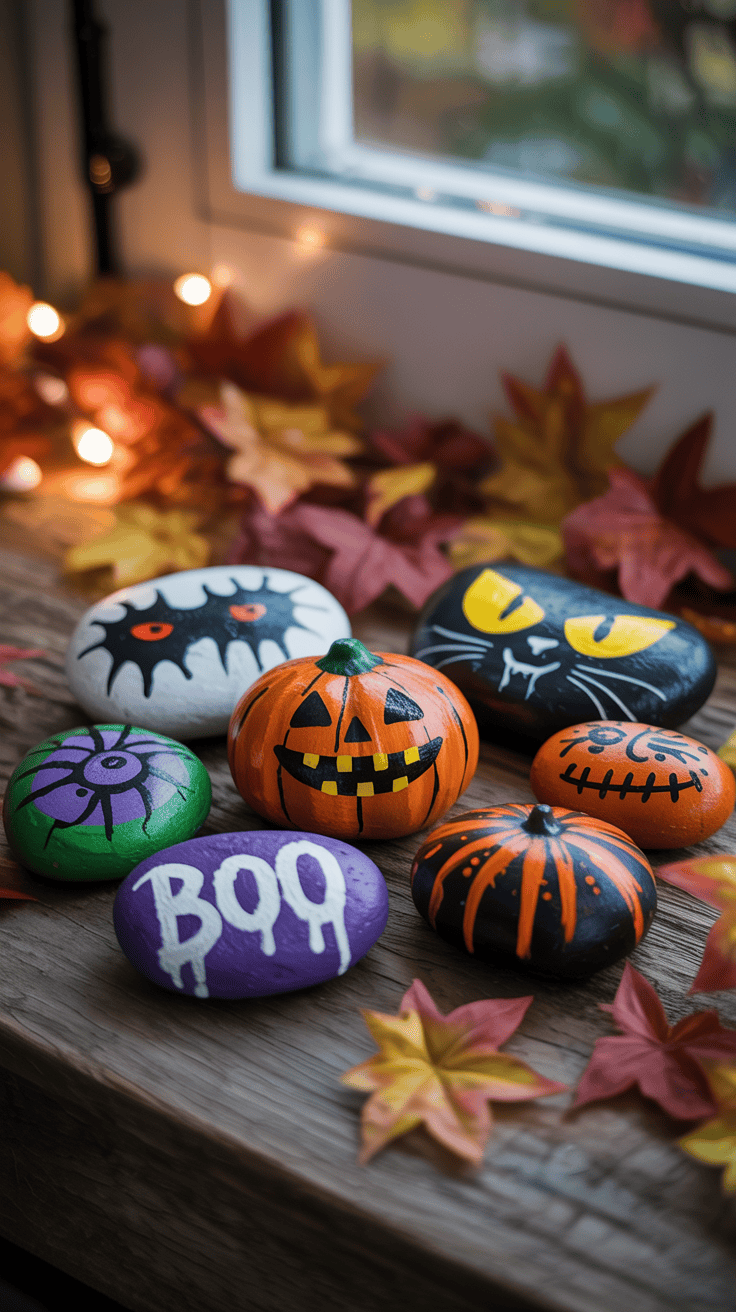
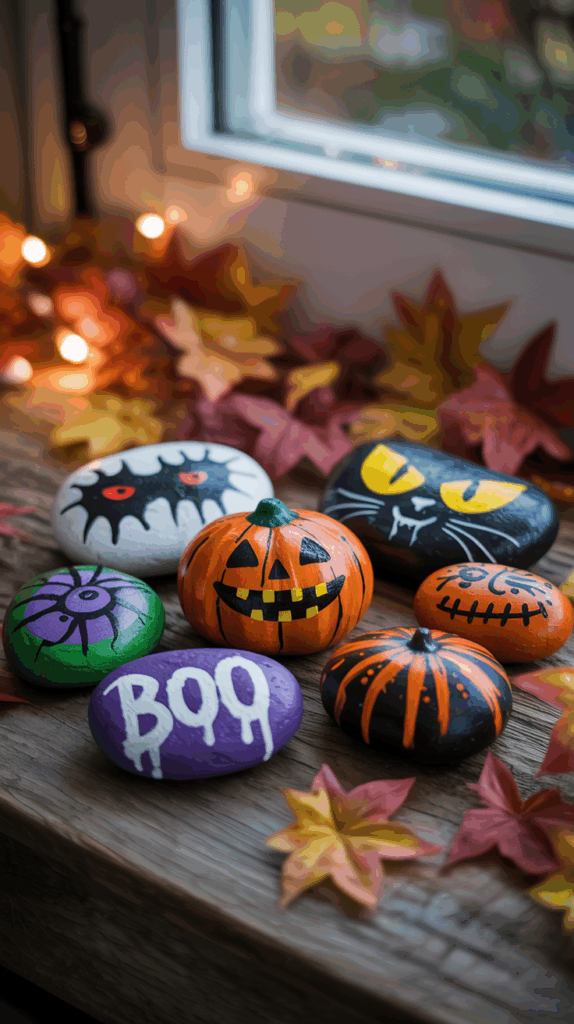
Every October, my boys get all wide-eyed about scary stories and silly costumes, but nothing beats sitting down as a family with simple Halloween rock painting ideas. There’s a special magic in classic designs—the ones kids already know and love. When I pull out the paint bottles and show them we’ll make pumpkins, ghosts, or black cats, the excitement level shoots sky high! These are designs every child can recognize, and even the youngest ones feel proud when they see their finished mini masterpieces. Painting these simple favorites helps everyone join in, no matter their age or skill level.
Pumpkin Faces That Pop

Pumpkins are always the star of Halloween in our house. The bright orange paint, silly or spooky faces, and easy shapes make them perfect for little hands. My youngest loves just painting a big, round orange blob, and honestly, that’s enough to make it feel festive. For older kids who want to go all out, add faces, teeth, or goofy grins with a black marker.
A few tips to get the best pumpkin rocks:
- Use a thick coat of orange acrylic paint as the base.
- Once dry, add triangle eyes, a toothy smile, or eyebrows for extra character.
- A little green at the top for a stem finishes it off.
- Sprinkle a bit of gold or yellow for a glowing effect.
We line these up on the windowsill or tuck them around our porch for neighbors to find. Pumpkins always feel cheerful—even on cloudy days!
Boo-tiful Ghosts

Ghosts make for easy and super cute Halloween rock painting ideas. I always tell my boys they can be silly or spooky, and there’s no wrong way to paint a ghost! We grab smooth oval rocks, paint them with white, and let them dry before adding faces.
For our favorite ghosts:
- Paint the whole rock white (use two coats for the brightest ghost).
- Add simple oval or circle shapes for eyes and a mouth with a black marker or paint.
- Try drawing little arms or swirls at the bottom for a “floating” look.
- Sprinkle on a bit of glitter while the paint is wet to give your ghost some sparkle.
Ghost rocks look adorable in the garden or peeking out of a candy bowl. They always give our family a giggle!
Black Cats on the Prowl
My middle son always votes for black cats at Halloween. The shape is simple, and the result is one of those classics everyone instantly knows. You don’t need lots of detail—the deep black and bright yellow eyes really stand out.
To paint a black cat rock:
- Start with a solid black base coat.
- Use a thin brush for pointy triangle ears and a tail.
- Add two yellow or green oval eyes. A dot of black inside each makes them pop.
- For extra style, use white paint to add whiskers and a tiny nose.
We place these little cat rocks near our door, and every time I walk by, I catch those big eyes staring at me!
Spooky (but Friendly) Monsters

Some kids love a hint of mischief, and monster rocks are perfect for it. Monsters bring out big imagination—my boys always come up with designs wilder than anything I could plan. This is where bright colors and mismatched eyes come out in full force.
Monster painting ideas:
- Use any wild color for the base: purple, green, even pink.
- Let kids add big googly eyes or paint on lots of tiny eyes.
- Encourage zigzag mouths, squiggly arms, or silly horns.
- Add dots, stripes, or even use stickers for tongue and teeth details.
There’s so much freedom with monsters. Every rock turns out different and shows off each child’s personality!
Candy Corn Creations
Candy corn rocks are simple but really pop, especially when set on a plate at snack time. The bold stripes are easy for little painters and always make the kitchen look more festive.
To make candy corn rocks:
- Find triangle-shaped stones if possible (but oval or round also work).
- Paint the tips white, a thick stripe of orange in the middle, then yellow at the base.
- Let each layer dry before adding the next so the colors stay neat.
Once dry, pile these rocks into a candy jar or set them out as table decorations. They invite comments (and maybe cravings for the real thing).
Table: Classic Design Quick Tips
For a fast cheat sheet on these much-loved classics, here’s a quick table you can glance at during your painting session:
| Design | Base Color(s) | Key Details | Fun Add-Ons |
|---|---|---|---|
| Pumpkin | Orange, green | Black triangle eyes, grins | Gold highlights |
| Ghost | White | Black eyes/mouth | Glitter edges |
| Black Cat | Black, yellow | Pointy ears, whiskers | Green eyes |
| Monster | Any bright color | Crazy eyes, zigzag mouths | Stickers, stripes |
| Candy Corn | White, orange, yellow | Thick stripes | Smiley faces |
Ideas to Spark Your Child’s Imagination
Every family has their favorites, but the real joy comes from tweaking these classics. I love seeing how one simple idea turns into something new in my boys’ hands. Maybe your pumpkin gets a pirate hat, or your ghost has in-line skates! Halloween rock painting ideas don’t need to be perfect—they just need to bring out happy, creative energy in your kids.
I keep extra googly eyes, glitter, or little bits of ribbon in a nearby basket to toss on the table. You’d be surprised what a tiny scrap of felt or shiny sticker can do to turn a simple painted rock into a family memory you’ll treasure every October.
Coastal Twist: Beach-Inspired Halloween Rock Painting
I love giving our Halloween rock painting ideas a little twist by mixing in the fun of the beach! Living near the coast, it just feels natural to pull in some ocean vibes for fall family crafts. Even if you’re miles from the sea, coastal-inspired designs bring a fresh, unexpected look to your Halloween line-up. These ideas capture Halloween spirit with a splash of sandy fun, shells, shimmery paint, and all those simple joys you find after a day at the shore. Let’s dive into a few ways I take our family’s rock painting sessions beyond the basics to make beachy, Halloween-inspired treasures!
Seashell Pumpkins and Sandy Ghosts
One of my favorite ways to mix Halloween with the seaside is by making pumpkins and ghosts feel like they came straight off the shore. I usually hunt for small, flat shells and a handful of fine beach sand before we start. Here’s what we do for a coastal feel:
- Paint the rocks classic orange or white.
- While the paint is still a bit wet, press shell fragments around the top to make “pumpkin” stems or “ghostly” hats.
- Use craft glue to add a sprinkle of sand at the base of each rock. This gives a natural shoreline effect that feels magical to the kids.
- For a finishing touch, we sometimes paint on wavy lines or use blue and teal shades to hint at seafoam.
Kids love seeing their classic designs get a wavy, seaside upgrade. The shells practically glow next to Halloween oranges, and the texture from the sand adds a little extra sparkle.
Beachy Monsters, Crabs, and Mermaid Pumpkins

If your family likes things a little whimsical, there’s so much room to have fun with Halloween themes and coastal life. I like to challenge my boys to combine their love of sea creatures with monsters or pumpkins. It always leads to giggles!
We usually start with:
- Beach monsters: Paint a rock in sea glass green or ocean blue. Add googly eyes, silly claws (like tiny crab pincers), or even tentacle shapes.
- Mermaid pumpkins: Paint a basic orange shape, then give it a “tail” with sparkly blue and green glitter or scalloped fish scales along the bottom.
- Crabby Halloween: Use red or orange paint, then add small shell pieces for claws. Draw on little faces and spider legs for a mix between a scary crab and a classic Halloween spider!
These playful combos get the kids talking about their favorite beach memories while making something new for the holiday.
Driftwood and Coral Accents
Sometimes I like to take a quick walk on the sand before we sit down to craft. I collect tiny pieces of driftwood, smooth glass, or even a little faux coral from the craft store. These extras add instant coastal charm to any rock.
Kids can glue driftwood bits to the side of their pumpkin or cat rocks to create “brooms,” “tails,” or even a creepy Halloween fence. Coral pieces make wild hair for a monster, or a neat headdress for a beachy witch. Just keep the pieces small and lightweight so they’re easy to stick.
Ocean Colors for Unexpected Style

If you’re tired of the standard Halloween orange and black, think about adding a splash of ocean-inspired shades. A quick brush of turquoise or blue-green can totally change the whole look!
Popular color combos for coastal-inspired Halloween rocks include:
- Teal, sand, and white for a breezy, pastoral vibe
- Seafoam greens paired with bright pumpkin orange
- Weathered gray backgrounds with pops of glitter or shimmering paint
- Shell pinks and soft corals for softer, spooky designs
If you want something extra shiny, metallic paints in silver and pearl work wonders. They remind me of those early fall days at the beach when the sunlight hits the water just right.
Table: Simple Supplies for a Coastal Halloween Rock Paint Day
Here’s a quick list for when you want to add that coastal twist. Keep these extras ready for your next festive painting session:
| Item | Use or Effect |
|---|---|
| Shell fragments | Pumpkin stems, hats, or accents |
| Beach sand | Textured bases, shore effects |
| Driftwood pieces | Brooms, tails, or monster hair |
| Sea glass | Shimmery embellishments |
| Glitter & metallic paint | Ocean shimmer, mermaid scales |
| Teal & seafoam paint | Beachy backgrounds or details |
Letting Kids Mix Coastal and Classic
My favorite part about coastal-inspired Halloween rock painting is that there are no rules. The boys love grabbing a handful of shells or a scoop of sand to sprinkle over their spooky ghosts or grinning pumpkins. Sometimes our monsters have starfish “hats,” and sometimes our ghosts look like they’re riding waves.
I always encourage the kids to use their imagination and think about how Halloween and the beach can come together. It’s simple and fun, and the results are always one-of-a-kind. Even a small shell glued to the top of a pumpkin rock sparks a little extra joy. Watching my kids come up with wild, beachy stories while they paint has become one of our most memorable Halloween traditions!
Halloween Rock Painting for Parties and Community Fun
When you find a fun project that works for family, it’s only natural to want to share it with friends, neighbors, and your wider community! I’ve noticed that Halloween rock painting ideas shine brightest when they’re part of a party or a local gathering. Kids light up seeing their creations displayed, traded, or hidden for others. A simple paint set, a bunch of rocks, and a smile can turn any event into a memory-making moment. Here’s how we’ve made these playful activities the center of our October get-togethers, both big and small.
Rock Painting at Kids’ Halloween Parties
Halloween parties can sometimes get a little wild with all the sugar and costumes, so I love adding an activity that’s hands-on and a bit calming. Rock painting brings focus and laughter. Even the shy kids will jump in when they see the paint and stones ready to go!
I like to set up a simple paint station at the edge of the party. All you need is:
- A table covered in newspaper or a simple plastic cloth
- Bowls of clean, dry rocks (all different sizes if possible)
- Trays of paints and a jar of brushes
- Baby wipes and a few aprons for sticky hands and messy shirts
To make it a big hit, we choose a few themes. Pumpkins, ghosts, and silly-faced monsters are always favorites, but sometimes we’ll add stickers, googly eyes, or glow-in-the-dark paint for extra flair. Some years, I’ve even let the kids “swap” their finished rocks like tiny works of art or set up a contest for silliest face or spookiest design.
Nothing brings people together like a shared table and bright colors! The best part? Everyone leaves with a happy keepsake instead of just a sugar rush.
Community Halloween Rock Hunts

This idea might be my favorite. Picture this: you and your kids hide painted rocks at the playground, library, or along your favorite sidewalk. Later, neighbors and local families set off to find them! Halloween rock painting ideas turn into a real community treat.
Setting up a rock hunt is easy:
- Paint a big batch of rocks with your kids. Let them dry.
- On the back, write a tiny message like “Keep me!” or “Happy Halloween!” (Older kids love helping with this.)
- Early on party day or Halloween morning, hide them in safe, public spots—along paths or tucked by benches.
- Share a note in your neighborhood group or community Facebook page. Give a hint or two. Watch the excitement grow as families search!
These hunts help kids get outside, share surprises, and enjoy a bit of seasonal magic. We’ve had neighbors post about finding our pumpkin rocks weeks after Halloween, which always makes my boys beam with pride.
Adding Rock Painting to School or Scout Events
Most teachers and troop leaders are searching for simple, affordable activities this time of year. I’ve hosted several Halloween rock painting sessions at school fall festivals and Scout meetings, and they’re always popular! Here’s my tried-and-true approach:
- Pre-sort rocks into small paper bags or baskets so each child gets their own set.
- Offer 3-4 paint colors that work well together. Limiting the palette helps prevent a muddy mess!
- Bring permanent markers or paint pens for faces and finishing touches.
- Create a “drying station” using cupcake trays or empty egg cartons to keep wet rocks tidy.
Kids love to see their finished work on display. At our last event, we set up a big bowl labeled “Share a Spooky Rock!” By the end of the night, it was overflowing with bats, candy corns, and tiny pirate pumpkins—all painted by proud little hands.
Rock Painting Competitions for All Ages
Sometimes, a little friendly competition makes a party even more exciting! From toddlers to grandparents, everyone gets a kick out of a Halloween rock painting contest. We usually do this during bigger family gatherings or co-op meetups.
How to keep it fun and fair:
- Divide kids into rough age groups, or create “family teams.”
- Set a clear time limit (30-45 minutes keeps the energy up).
- Give each person a “theme” (pumpkin, ghost, or wild card).
- Set judging categories like “Funniest Face,” “Most Creative,” or “Spookiest Design.”
- Have everyone vote by secret ballot, then hand out homemade ribbons or tiny treats.
It’s amazing how a small prize—a sticker, lollipop, or extra batch of cookies—brings out the playful spirit. Nobody leaves empty-handed, and the laughter is what everyone remembers.
Displaying Painted Rocks at Community Events
If you want to encourage kids and families to join in, put their creations on proud display! I’ve set up small tables or even straw bales at town trunk-or-treats and local markets. Just line up the painted rocks or cluster them in little baskets for people to admire.
Some fun display ideas:
- Line a garden path or walk with jack-o-lantern rocks.
- Use a basket labeled “Take One, Leave One” for swapping.
- Create a “Rock Gallery” on a fence, using clothespins and strong twine.
- Invite event-goers to vote for their favorites by adding a sticker to the display table.
Seeing their art appreciated by others gives kids a huge boost. My boys will stand nearby and “tour” their rocks for anyone who shows interest. It turns a simple afternoon project into something special for the whole community.
Easy Party Favors with Painted Rocks
Forget plastic trinkets—painted rocks make the sweetest party favor! I put together little “goodie bags” with a hand-painted Halloween rock, a packet of stickers, and maybe a Halloween pencil or two. They’re simple but feel so personal.
Quick tips for favor bags:
- Wrap each rock in tissue or pop them into tiny gift bags.
- Add a note: “Made by [child’s name] for you!”
- Tuck into lunch sacks or pass out at the end of the party.
Parents always thank me for skipping the junky toys, and the kids love getting something made just for them. It’s a treat that lasts long after the last piece of candy is gone.
Making Halloween Rock Painting a Tradition
The real magic comes when you do these activities year after year. Your painted rocks start to feel like old friends. Neighbors look forward to spotting them around town, and your own kids remember which ones they made each season. Halloween rock painting ideas grow into community memories—one colorful, happy rock at a time!
Displaying and Sharing Your Spooky Creations
Once your family has created a pile of Halloween rock painting ideas, the next step is sharing the fun! I get just as excited about displaying our haunted pumpkins and goofy ghosts as I do about painting them. Painted rocks are small, but they turn any space into a Halloween celebration. This part of our tradition brings so many smiles, not just to us, but also to neighbors, teachers, and anyone who spots a spooky stone tucked somewhere special. Below are some of my favorite ways to show off and share your kids’ Halloween rock masterpieces with a little seasonal magic!
Easy Ways to Show Off Painted Rocks at Home
Showing off what your kids made is one of the best parts. I like to sprinkle Halloween painted rocks around the house just like I’d decorate with pumpkins or garlands. Here are some fast, family-friendly ways to display your collection:
- Line them along bedroom windowsills or the kitchen counter for a cheery, seasonal touch.
- Cluster a group on the front porch to welcome trick-or-treaters and visitors.
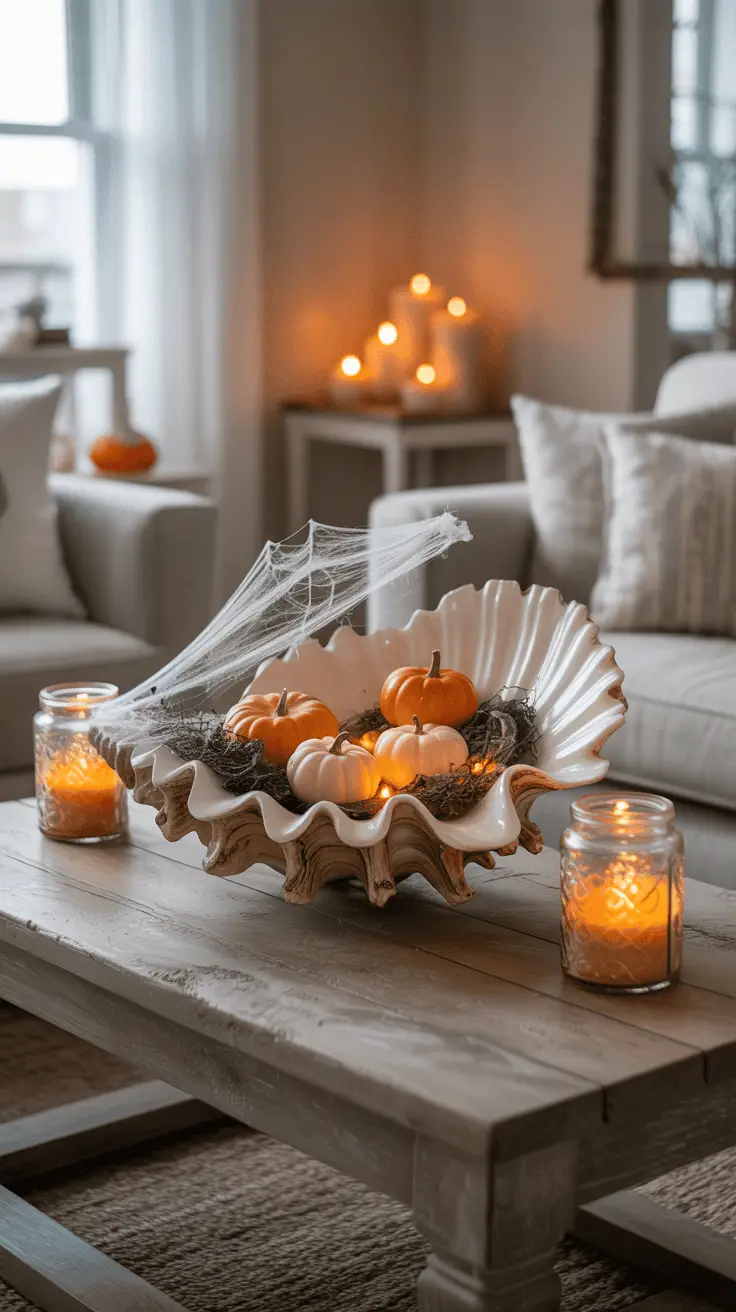
- Make a “spooky centerpiece” by piling rocks into a glass bowl or onto a wooden tray in the middle of your dining table.
- Add them to potted plants, either inside or outside. A little ghost or candy corn peeking out of a mum or fern is always a hit.
- Attach a few favorite rocks to a ribbon or twine, then drape it across a mantel or entryway. Use hot glue or strong tape if you want the rocks to stay put.
Every year, my boys pick their top few to place on our mailbox. It’s such a simple way to tell the whole neighborhood, “Halloween is here!” without buying any new decorations.
Sharing with Friends and Neighbors
When we run out of space at home (which happens every October), it’s time to spread the spooky spirit around. Painted rocks are like little treats that last way longer than candy.
- Leave a rock or two by a friend’s front steps as a surprise.
- Tuck one in a neighborhood “little library” box or on a local trail.
- Send a few in the mail to grandparents, teachers, or cousins.
If you want to make it even more special, wrap the rocks in tissue and add a child’s handwritten note. It turns simple rocks into sweet, thoughtful gifts. I still remember when my youngest’s pumpkin rock made it all the way to Grandma’s kitchen windowsill!
Setting Up a Rock Swap Table
Rock swaps are such a fun idea for playdates, classroom parties, or neighborhood get-togethers. Each child brings a few painted rocks, mixes them up in baskets, and then gets to pick a new “treasure” or two to take home.
Here’s what works best for easy swapping:
- Place baskets or trays on a kid-height table.
- Have a grown-up help spread out the rocks so all the designs show.
- Let each child pick their favorites to trade (or just admire).
- Offer small paper bags for easy carrying.
Kids are so proud when their art gets chosen. Sometimes my boys even spot their rocks hanging out on a friend’s porch the next week—pure joy!
Hiding Spooky Rocks for Neighborhood Hunts
Hiding painted rocks is an absolute winner in our house. The thrill is right up there with finding Easter eggs! This can be as big or small as you like.
Some easy ways to organize a hunt:
- Choose a local park or walking path with safe, easy hiding spots.
- Decide on a start and finish time, so everyone has a fair shot.
- Give each child a set number of rocks to hide.
- Set ground rules (stay on trails, no climbing, take only one per person).
- Invite friends or neighbors to join in!
To keep things organized, I sometimes make quick clue sheets or simple maps. You might even offer a tiny reward for finding the most rocks (a sticker or homemade spooky cookie is more than enough).
Turning Painted Rocks into Gifts and Party Favors
Once Halloween parties pop up on the calendar, our painted rocks become my go-to party favor. They’re much more personal than plastic toys and feel extra special when kids know each one was hand-painted.
Some fun ways to turn rocks into gifts:
- Slip one into a clear bag with a ribbon and a handwritten tag.
- Add a Halloween sticker or small pack of crayons to make a mini “fun pack.”
- Tape a magnet to the back for a fridge-ready decoration.
If you’re hosting a party, set aside a bowl of painted rocks and let guests choose one to take home. I always hear parents mention how much they love a reusable, creative favor!
Creating a Family Art Gallery
A mini art gallery is a fun way to celebrate your kids’ hard work. Transform any hallway or entry wall by adding simple shelves or shallow trays to display painted rocks year after year. Label rocks with names and dates, or even make it a tradition to take a “gallery photo” every October.
You can also use an empty picture frame (with no glass) and glue on clips or string for hanging rocks by ribbons. Kids get such a kick out of seeing their work displayed like true artists!
Table: Quick Display Ideas for Painted Halloween Rocks
I often forget just how many ways you can display these spooky masterpieces until I jot down a list. Here’s a table of easy favorites to help jog your memory next time the kitchen counter is overflowing:
| Display Spot | Display Tip | Extra Touch |
|---|---|---|
| Windowsill | Stand rocks upright or staggered | Add small string lights |
| Porch or mailbox | Cluster with pumpkins or mums | Swap rocks out weekly |
| Dining table | Clear bowl or wooden tray | Mix with mini gourds |
| Flower pots | Nestle between soil and leaves | Pair with fall flowers |
| Fridge (with magnet) | Attach small magnet to back | Display kids’ names |
| Hall gallery | Wall shelf or picture ledge | Label by year or artist |
Spreading Kindness with Painted Rocks
One last thing—these rocks are more than decorations! We love using our Halloween rock painting ideas to spread a little joy each year. Sometimes we add a quick message to the back, like “You’re spook-tacular!” or “Have a fun Halloween!” and leave them in places where someone might need a smile. It’s a tiny way to teach kids about kindness and sharing, and the surprises make the season feel magical.
Sharing painted rocks is simple, but it always brings people closer together. Whether you line your steps with silly goblins or send a witchy pumpkin to a friend, these creations have a way of turning even the cloudiest October day into something special.

Conclusion
Halloween rock painting ideas have brought so much joy and connection to our family over the years. Nothing makes me smile like the messy hands, giggles, and proud faces as my boys line up their spooky and silly rocks on the porch. These small projects fill our home with laughter and give us memories that last well beyond the holiday.
If you’re looking for a simple way to bring your family together and add magic to your fall, I hope you’ll try some of these Halloween rock painting ideas. Share your creations with neighbors, friends, or even strangers along a park trail. It’s the kind of tradition that grows bigger and brighter each year.
Thank you for spending time here and letting me share what works for our family. I’d love to see your painted rocks and hear how your craft days went! Tag me or share your photos in the comments—these little masterpieces deserve to be celebrated and shared far and wide. Happy Halloween from our busy, paint-splattered home to yours!
This post may contain affiliate links. Read the full disclosure here.