Coastal Christmas Crafts for a Creative Beach-Inspired Holiday
There’s something magical about combining the cozy warmth of Christmas with the breezy, relaxed vibe of the beach! As a mom of three energetic boys, I’m always looking for creative ways to make our holidays special without spending a fortune or losing my sanity in the process.
Coastal Christmas crafts have become our family’s favorite way to celebrate the season with a unique twist that reflects our love for the ocean!
Turn your finished crafts into a beautiful seasonal display with these handmade seaside Christmas decor ideas!!
Whether you live by the sea or just dream of sandy shores, bringing coastal elements into your Christmas decor creates such a fresh and beautiful atmosphere! These beach-inspired projects are perfect for keeping little hands busy during winter break, and honestly, they’re so much fun that you’ll want to make them yourself. Let me share some of my absolute favorite coastal Christmas crafts that have transformed our holiday celebrations!
Seashell Ornament Magic
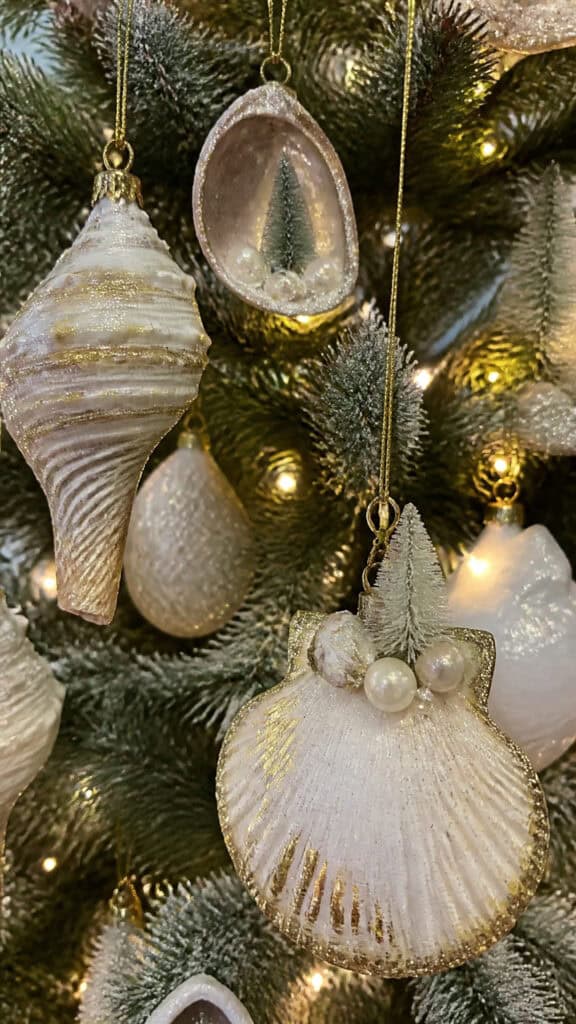

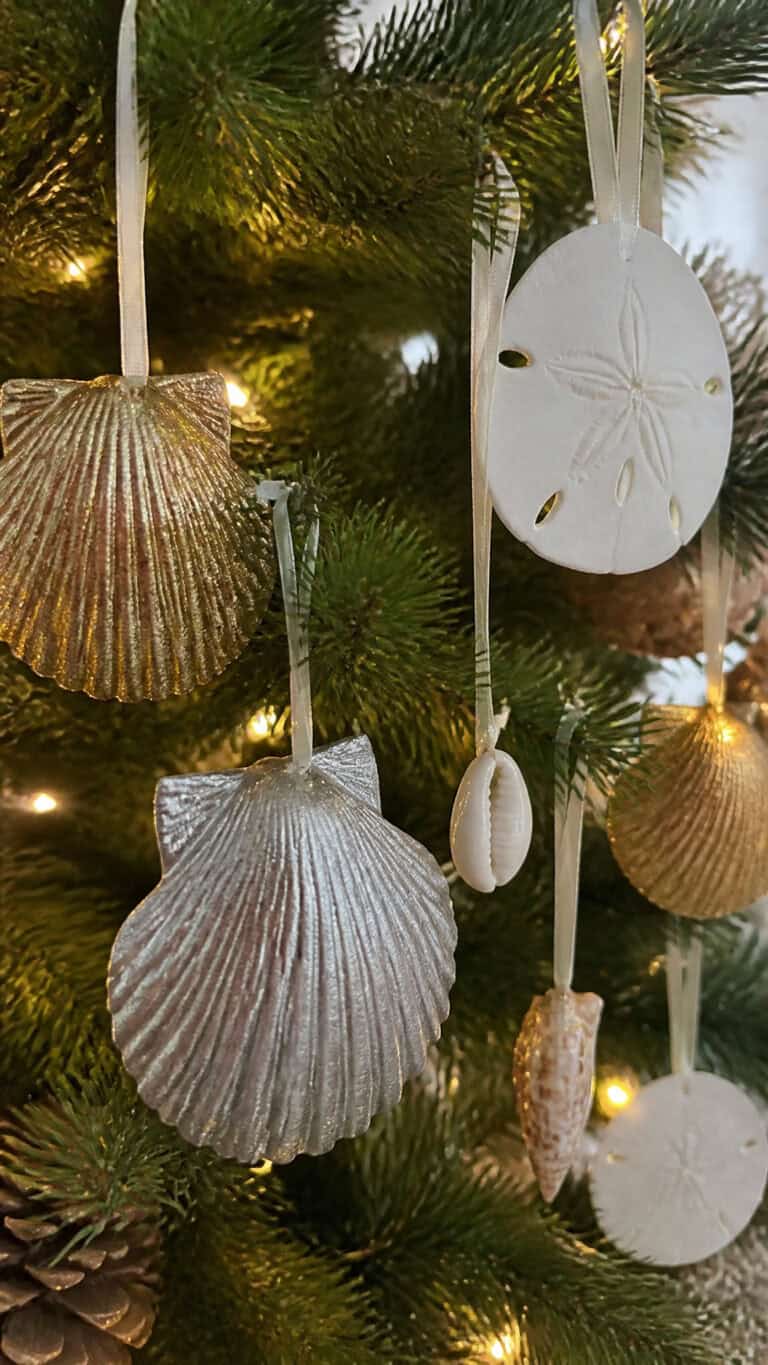
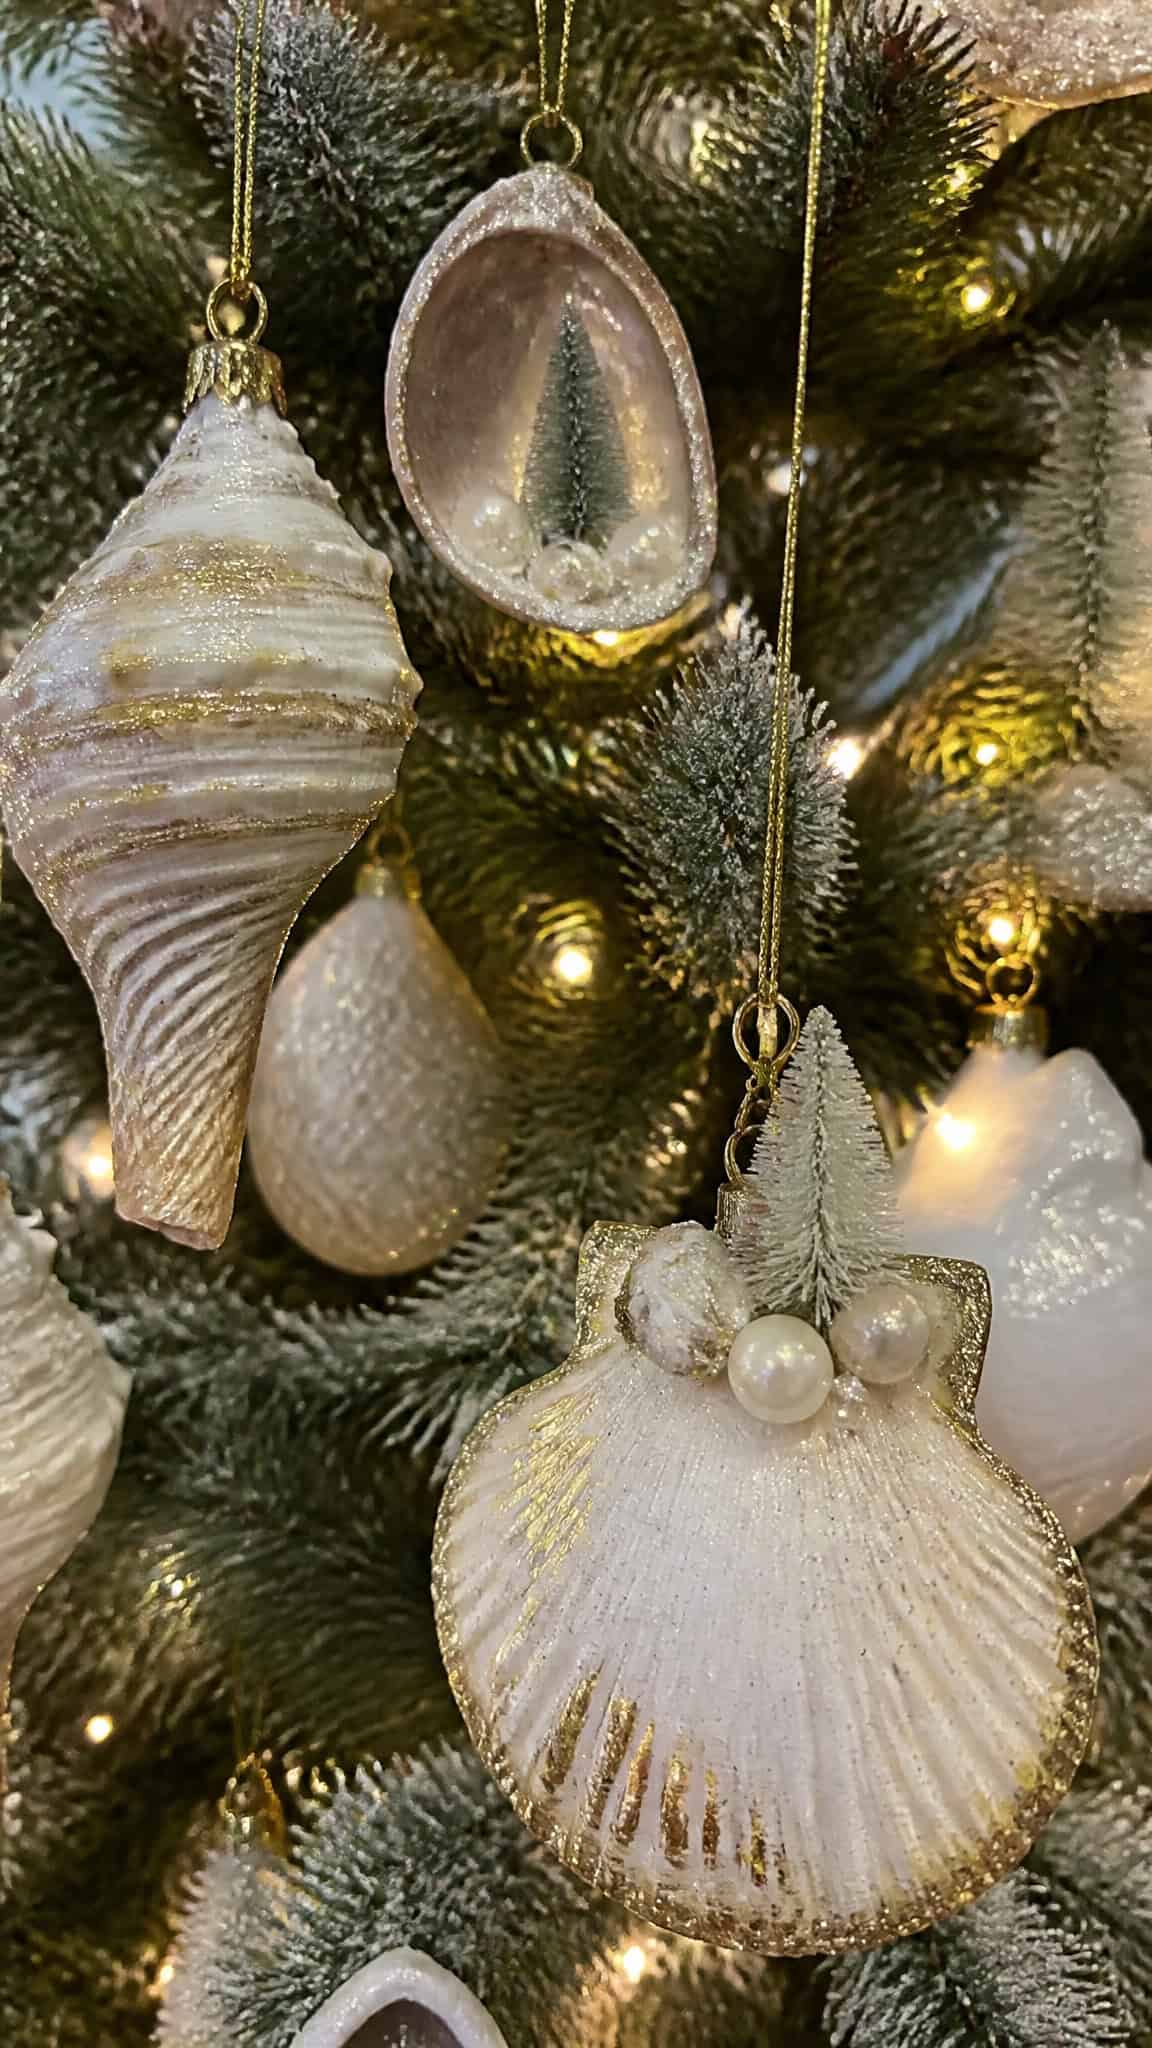
Seashell ornaments are probably the easiest and most stunning coastal Christmas crafts you can make with your kids! I love these because they’re practically free if you’ve collected shells during summer beach trips. My boys and I spent an entire rainy afternoon last December turning our shell collection into beautiful tree decorations, and they turned out absolutely gorgeous!
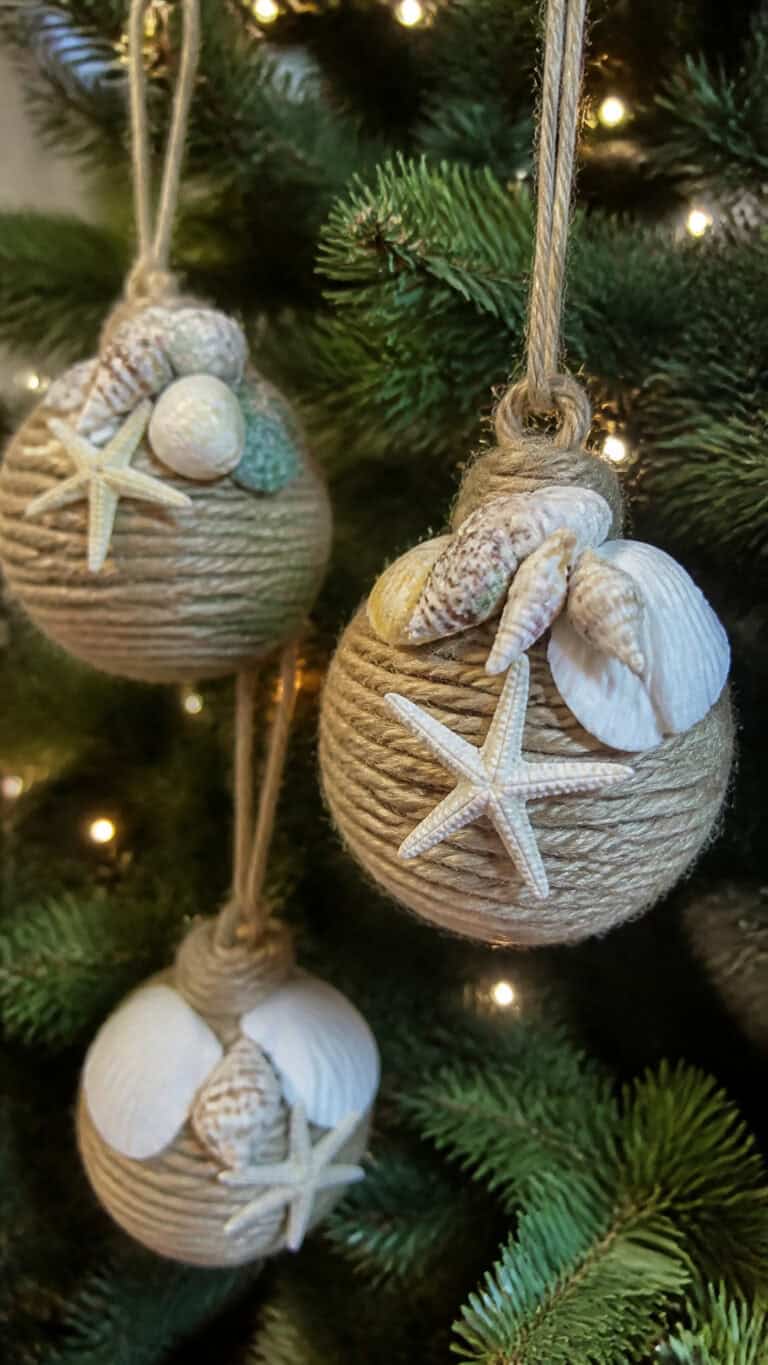
Start by cleaning your shells thoroughly with warm soapy water and letting them dry completely. You can use any shells you have – scallop shells, clam shells, sand dollars, or even tiny spiral shells work beautifully! For hanging, simply hot glue a small ribbon loop to the back of larger shells, or drill a tiny hole through smaller ones to thread fishing line or twine through.
The decorating possibilities are endless and so much fun! Here are some of my favorite ways to embellish shell ornaments:
- Paint them with metallic gold, silver, or white acrylic paint for an elegant look
- Add glitter with mod podge for extra sparkle (my boys’ favorite option!)
- Glue tiny artificial snow or white pompoms inside larger shells
- Attach miniature bottle brush trees with hot glue
- Write the year or family names with paint pens
- String multiple small shells together to create garland-style ornaments
One trick I’ve learned is to seal painted shells with clear acrylic spray to protect your work and add shine! These ornaments also make wonderful gifts for teachers, neighbors, or grandparents. My mother-in-law still displays the shell ornament my oldest made for her three years ago!
Driftwood Christmas Tree Alternatives
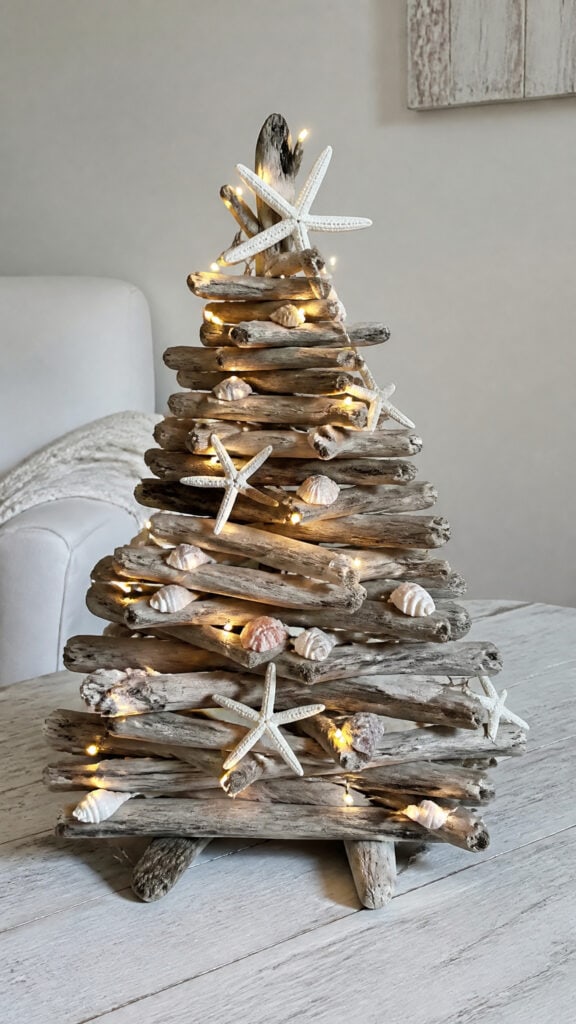
If you’re looking for a show-stopping centerpiece that screams coastal charm, driftwood Christmas trees are absolutely it! These have become my go-to coastal Christmas crafts for tabletop displays, and they never fail to get compliments from visitors. The best part is that each one turns out completely unique based on the driftwood pieces you find!
You can create these in any size, from tiny desktop versions to large floor displays. For a simple version, arrange driftwood pieces in graduated lengths and stack them horizontally, securing with hot glue or wire. I like to drill small holes and thread them onto a central dowel or sturdy branch for stability. My middle son loves helping me arrange the pieces from longest to shortest!
Once your basic tree structure is complete, the decorating is where these really come to life! We’ve made several over the years, and each one has its own personality. Add starfish, small shells, or sand dollars between the branches. Wrap battery-operated fairy lights around the driftwood for a magical glow in the evening. You can also hang tiny ornaments from small hooks or wire.
For the tree topper, I love using a large white starfish, a sand dollar, or even a small piece of coral! Some people add a nautical rope bow, which looks amazing too. These driftwood trees work perfectly on mantels, side tables, or as dining table centerpieces. They’re also surprisingly sturdy, which is important when you have three boys running around the house!
Nautical Rope Wreath Creations
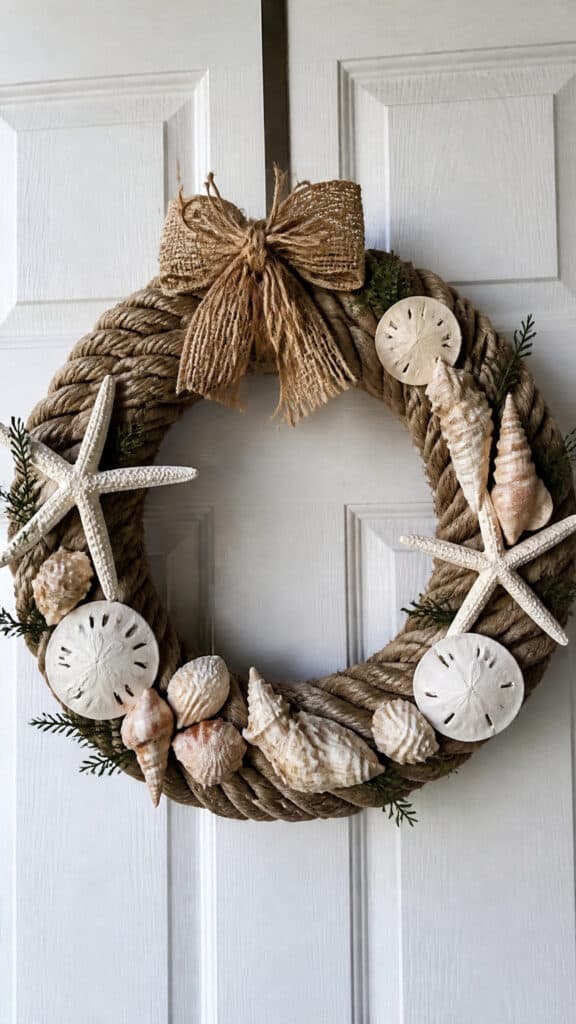
Wreaths are such a classic Christmas decoration, but adding a coastal twist makes them so much more interesting! Nautical rope wreaths have become one of my signature coastal Christmas crafts, and they look absolutely stunning on our front door. They’re easier to make than you’d think, and they hold up beautifully through the entire holiday season!
Start with a basic foam or wire wreath form from any craft store. Then wrap the entire form with thick nautical rope or manila rope, securing the ends with hot glue. This takes a bit of time and patience (perfect for naptime crafting!), but the result is so worth it! You can also use a pre-made grapevine wreath if you want to skip this step and just add coastal embellishments.
The decorating phase is where you can really let your creativity shine! I love mixing different coastal elements to create visual interest and texture. Here’s what works beautifully on rope wreaths:
- Large white or natural starfish as focal points
- Clusters of different sized shells arranged in groups
- Preserved sea fans or coral pieces
- Nautical rope bows or jute ribbon
- Small pieces of driftwood tucked into the wreath
- Artificial greenery like eucalyptus or pine for Christmas color
- White or blue ornament balls for added dimension
- Small wooden anchors or ship wheels
I typically arrange my larger pieces first, then fill in gaps with smaller shells and decorative elements. Hot glue is your best friend for this project! One wreath usually takes me about an hour to complete, and it’s such a relaxing creative outlet. These wreaths also transition beautifully into year-round beach decor if you remove the obviously Christmas elements!
Beach Glass Candle Holders
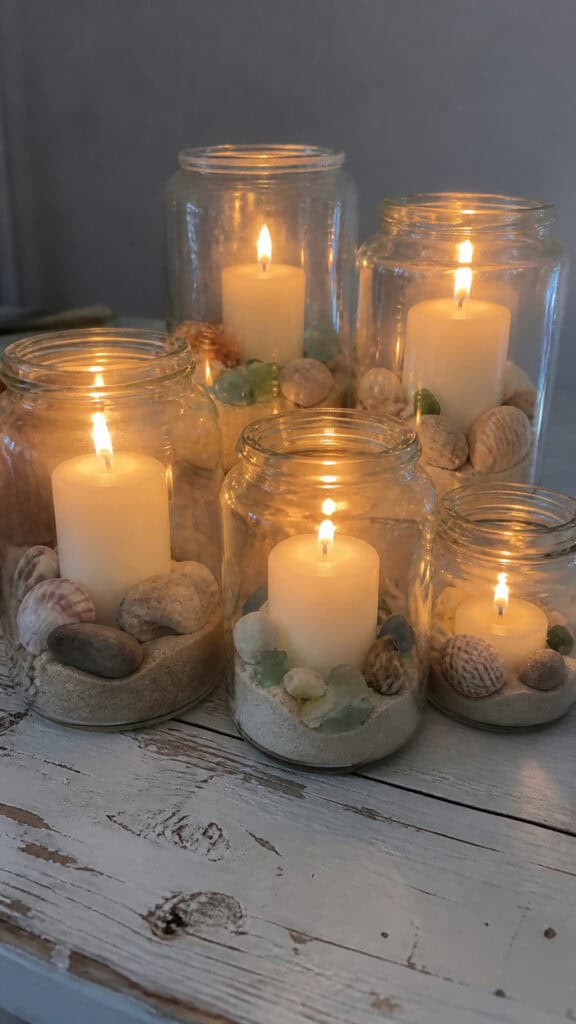
There’s something so peaceful about the soft glow of candles during the holidays, and these beach glass candle holders are among my favorite coastal Christmas crafts for creating ambiance! They’re incredibly simple to make, which is perfect when you’re juggling three kids and a million holiday tasks. Plus, they make your home feel like a cozy coastal cottage!
The basic concept is super straightforward – you’re essentially creating beautiful vessels filled with beach treasures that hold candles. Start with clear glass containers in various sizes. I use everything from mason jars to cylindrical vases to old candle jars I’ve cleaned out. The variety in heights and widths creates such a nice display when grouped together!
Fill your containers with layers of coastal elements. I love using white sand as a base layer, then adding small shells, smooth beach pebbles, bits of sea glass if you have them, and even small pieces of coral. You can create distinct layers or mix everything together – both look amazing! Then nestle a pillar candle, votive, or tea light right in the center.
For extra coastal charm, tie jute twine or thin rope around the rim of the jar and attach a small shell or starfish! You can also wrap the outside of the jar with netting or burlap for texture. I like to create several of these in different sizes and group them on our coffee table or mantel. The candlelight shining through the glass and shells creates the most beautiful warm glow in the evening!
Safety note from one mom to another – always supervise candles around kids, or use battery-operated LED candles instead! They look just as pretty and you don’t have to worry about little hands getting too curious.
Starfish and Ornament Garland
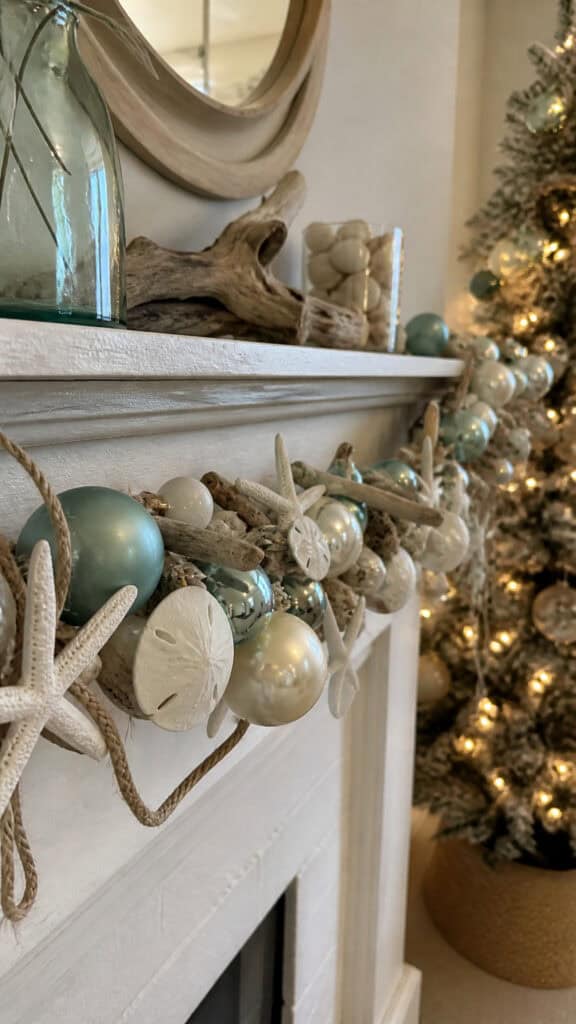
Garlands are such a versatile decoration, and creating coastal-themed versions has become one of our most enjoyable coastal Christmas crafts! My boys love helping string things together, and this project keeps them entertained for quite a while. These garlands work beautifully draped across mantels, wrapped around stair railings, or even adorning your Christmas tree!
The beauty of this project is that you can customize it completely based on what materials you have available! I typically start with a base of natural jute twine or white cotton rope – something sturdy enough to hold your decorations but flexible enough to drape nicely. Cut your rope longer than you think you’ll need because it’s easier to trim than to add more later!
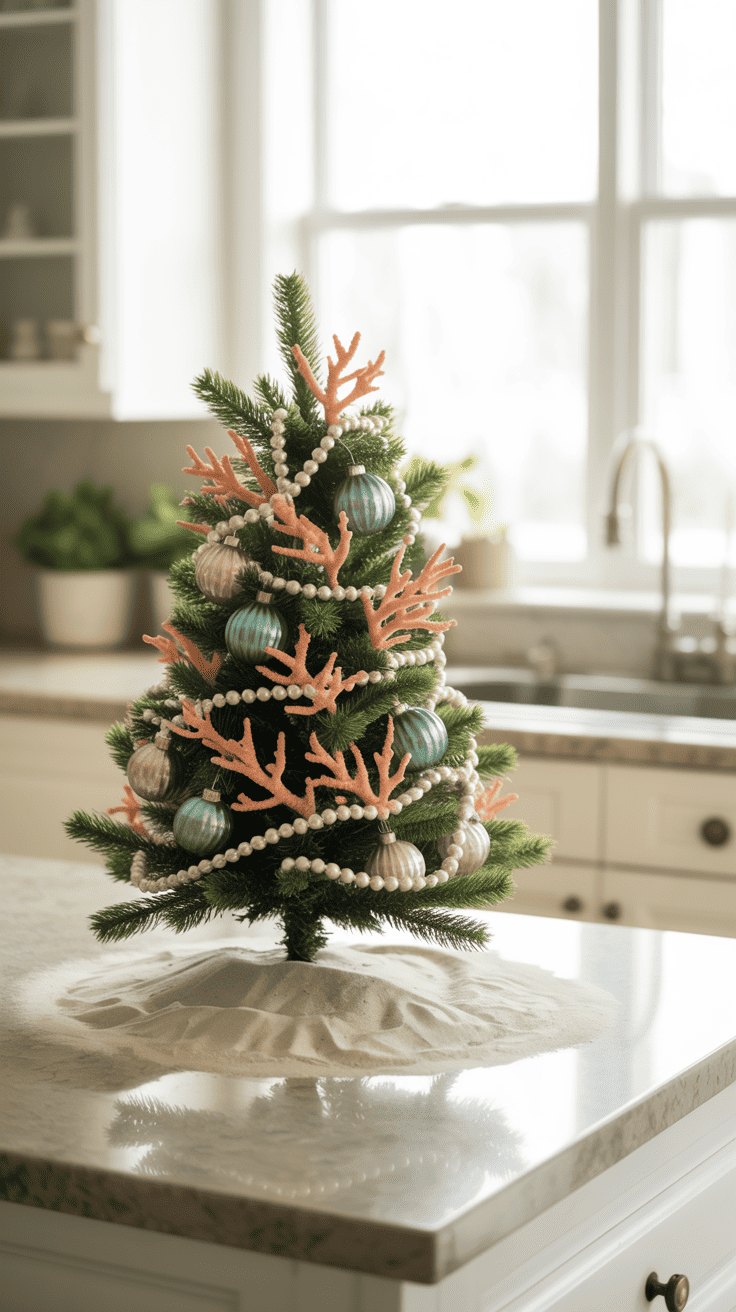
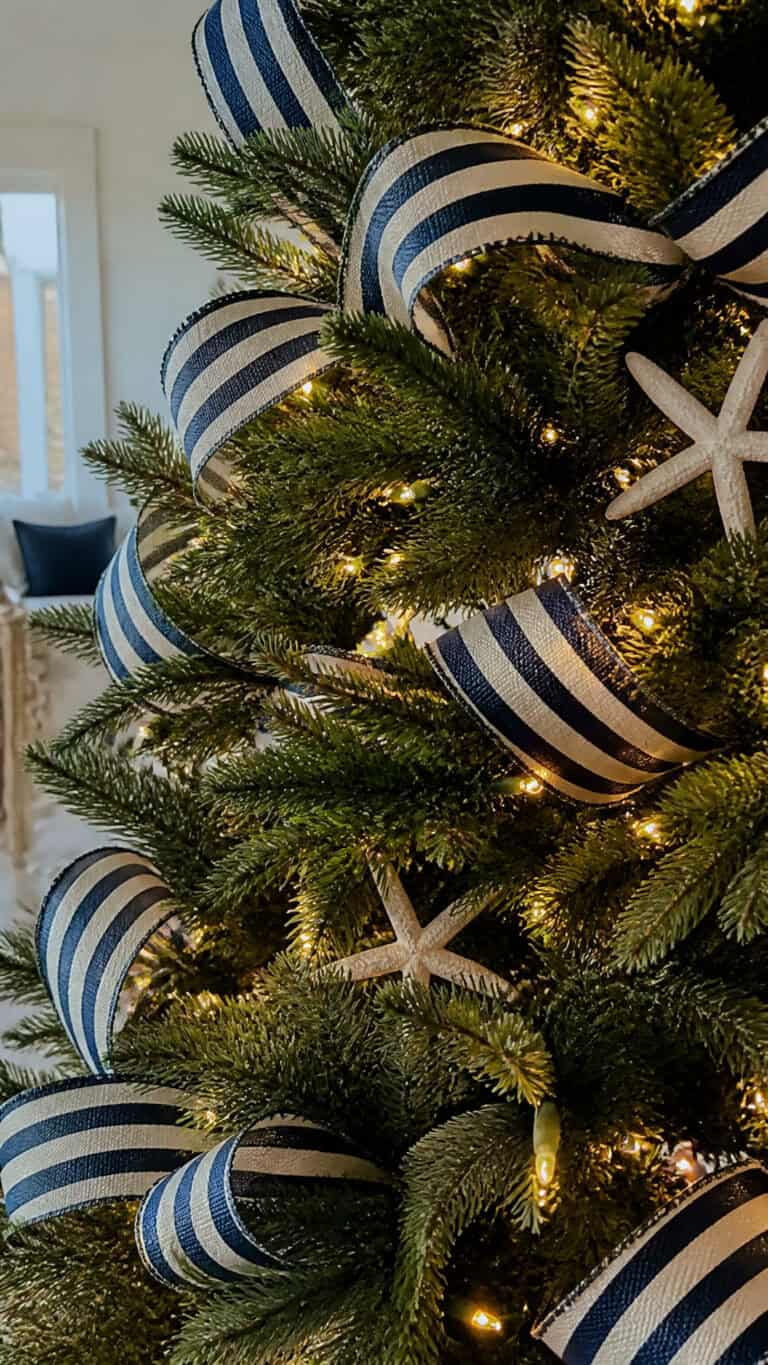
Now for the fun part – gathering your coastal elements! White starfish in various sizes work wonderfully as the main focal points. You can find affordable artificial starfish at craft stores, or use real ones if you have them. Alternate these with regular Christmas ornaments in coastal colors like white, cream, aqua blue, seafoam green, and sandy beige. The combination of traditional ornaments with beach elements creates such a perfect coastal Christmas vibe!
To attach everything, I use several methods depending on the item. For starfish, I thread the twine through the arms or hot glue them directly onto the rope. For ornaments, simply tie them on at intervals using their hanging loops. You can also add:
- Small pieces of driftwood drilled with holes for threading
- Large shells with drilled holes
- Sand dollars (real or artificial)
- Wooden beads in white or natural tones as spacers
- Small bundles of dried beach grass or pampas grass
- Fabric strips in nautical stripes or coastal patterns
Space your larger elements about six to eight inches apart, then fill in with smaller items! The result is a stunning garland that brings that beachy Christmas feeling to any space in your home.
Sandy Snow Globe Jars
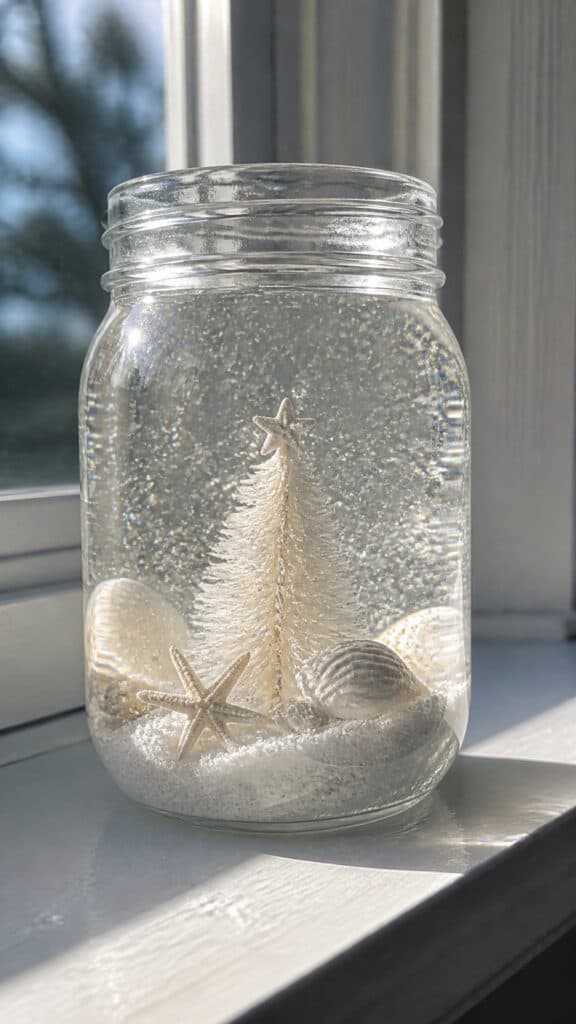
Snow globes are such a classic Christmas decoration, but we’ve put a coastal spin on them that my boys absolutely adore! These sandy snow globe jars are perfect coastal Christmas crafts that combine the magic of snow globes with beach vibes. They’re also fantastic for gifting to teachers or family members who love the ocean!
You’ll need clean glass jars with tight-fitting lids – mason jars work perfectly! Instead of traditional snow globe liquid, we’re creating a dry version that’s much easier and less messy to make. Start by gluing your coastal scene elements to the inside of the jar lid using strong waterproof glue or hot glue. Let this dry completely before moving forward!
For the scene inside, get creative with miniature elements! Small bottle brush trees painted white or left natural, tiny starfish, miniature shells, small pieces of coral, or even little plastic sea creatures all work wonderfully. My boys love creating little beach scenes with tiny treasures! You can also add small figurines like Santa in beach attire or coastal animals.
Here’s where it gets fun – instead of water and glitter, fill your jar with fine white sand or craft sand mixed with white or iridescent glitter! This creates a beautiful effect when you shake it. The sand and glitter swirl around your coastal scene just like snow in a traditional globe. Screw the lid on tightly and you’re done!
To finish, I like to decorate the jar lids with paint, fabric, or ribbon. Hot glue some small shells around the rim or tie twine around the neck of the jar with a small starfish attached! These look adorable displayed on windowsills where the light catches the glitter, or grouped together on a shelf. My youngest loves shaking his over and over to watch the sandy snow fall!
Coastal Christmas Centerpiece Bowls
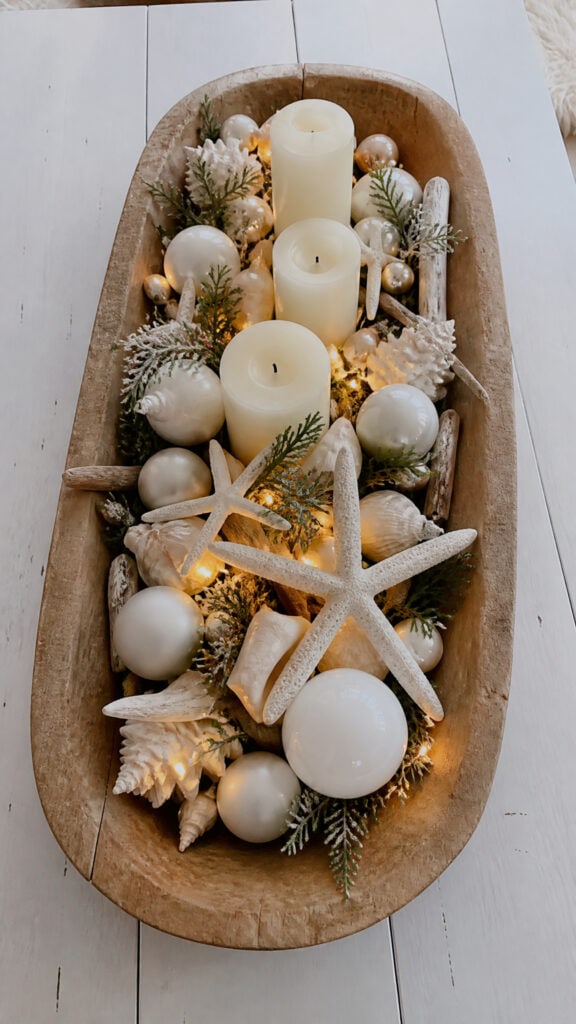
When it comes to easy yet impressive coastal Christmas crafts, you can’t beat a beautiful centerpiece bowl! These are literally my go-to when I need something festive but don’t have much time. With three boys constantly needing snacks, help with homework, and referee services, I need decorating solutions that look amazing but come together quickly!
Start with a large, wide bowl or wooden dough bowl – the more rustic and weathered looking, the better for that coastal vibe! Clear glass bowls also work beautifully because you can see all the layers of treasures inside. The size depends on where you’re displaying it, but I find that bigger is usually better for these arrangements because you can really pile on the coastal goodness!
Now comes the fun part – filling your bowl with all things coastal and Christmas! I love creating layers and height variations for visual interest. Start with a base layer of white or cream elements, then build up from there. The key is mixing different textures, sizes, and heights to create dimension!
Here are my favorite elements to include in coastal centerpiece bowls:
- White or cream pillar candles in varying heights (or LED versions for safety!)
- Large white starfish positioned prominently
- Assorted shells in different sizes and shapes
- Sand dollars tucked throughout
- White or frosted pinecones for that Christmas touch
- Pieces of driftwood for height and texture
- White or blue ornament balls scattered throughout
- Artificial snow or Epsom salt for a snowy effect
- String lights woven through for magical glow
- Sprigs of evergreen or eucalyptus for color and scent
- White coral or sea fan pieces
The beauty of these centerpiece bowls is that there’s no wrong way to arrange them! I typically place my tallest elements (candles or driftwood) toward the back or center, then arrange everything else around them. Fill in any gaps with smaller shells or ornaments. These look stunning on dining tables, coffee tables, or console tables, and you can easily refresh them throughout the season by rearranging elements or adding new pieces!
Bringing the Beach Home for the Holidays
Creating coastal Christmas crafts has truly transformed how we celebrate the holidays in our home! These beach-inspired projects bring such a unique and personal touch to our decorations, and honestly, they’re so much more meaningful than anything I could buy at a store. Plus, the memories we’ve made crafting together as a family are absolutely priceless – even if there’s glitter and hot glue everywhere!
Whether you’re a seasoned crafter or just starting out, these coastal Christmas crafts are totally doable and so rewarding! Start with one or two projects that speak to you, gather your supplies, and let your creativity flow. Your home will have that beautiful, relaxed coastal vibe that makes the holidays feel extra special. Now if you’ll excuse me, I need to go supervise three boys who just discovered my shell collection – wish me luck!
This post may contain affiliate links. Read the full disclosure here.