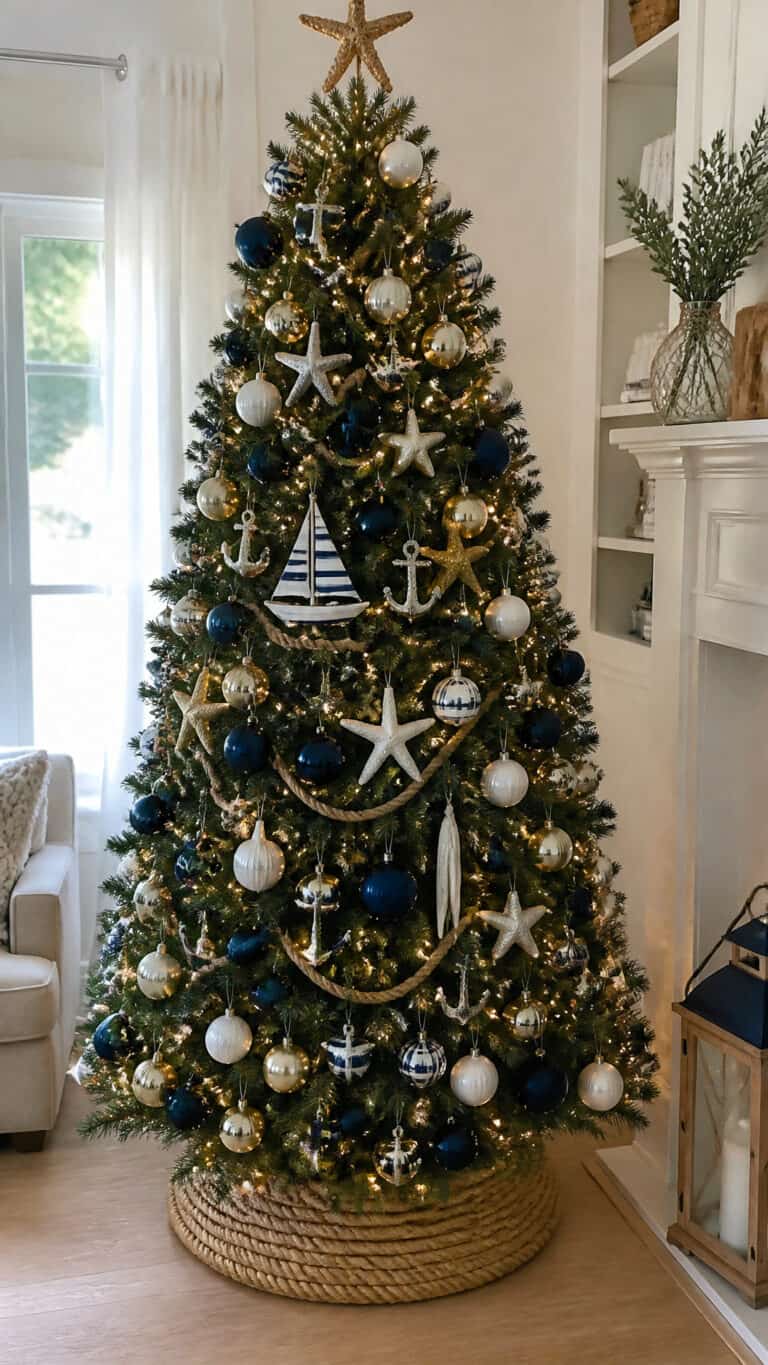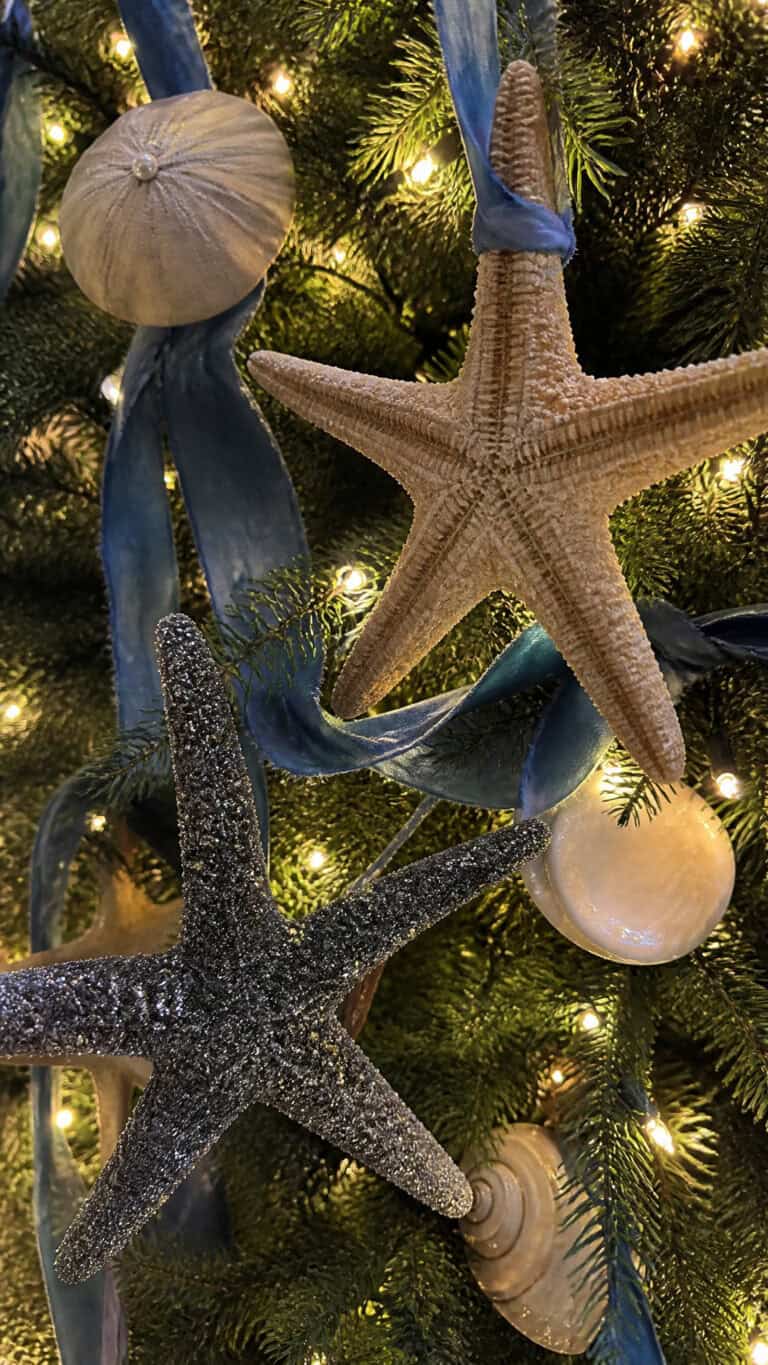
How To Make Nautical Christmas Decor DIY Projects for the Holidays
There’s something magical about combining the cozy warmth of Christmas with the breezy charm of nautical themes! As a mom of three energetic boys, I’m always looking for creative ways to make our home feel special during the holidays without spending a fortune or countless hours on complicated projects.
Nautical christmas decor diy projects have become my secret weapon for creating a unique holiday atmosphere that reflects our family’s love for the ocean!
Mix your maritime projects with these DIY coastal Christmas decorating ideas for a warm and festive home!!
Whether you live by the coast or just dream of sandy beaches year-round, bringing nautical elements into your Christmas decorating adds such a fresh and unexpected twist to traditional holiday decor! The best part is that many of these projects use simple materials you might already have at home, and they’re forgiving enough that even with three little helpers (or three little tornadoes, depending on the day!), you can create something beautiful together as a family.
Rope-Wrapped Ornaments with Coastal Flair
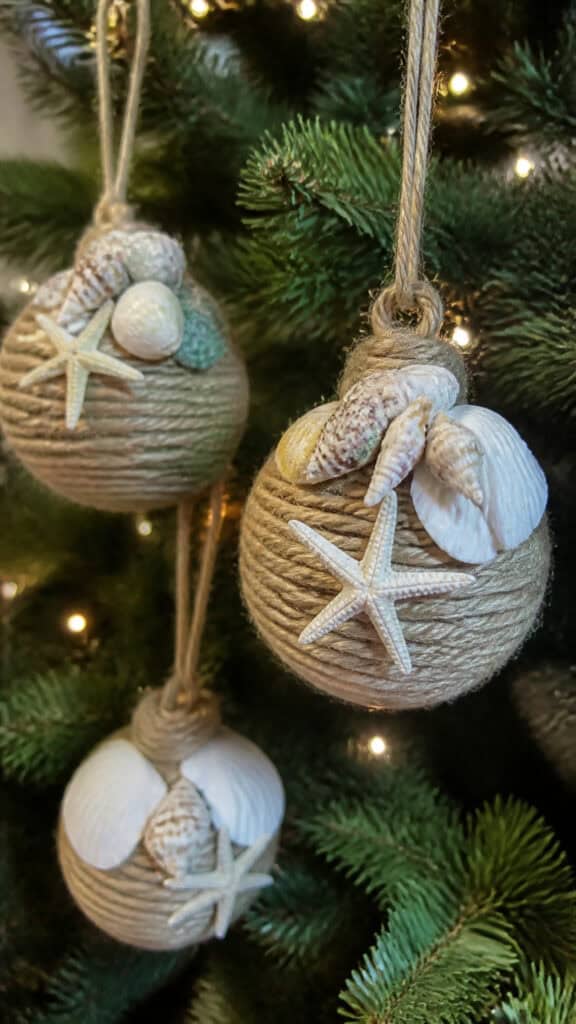

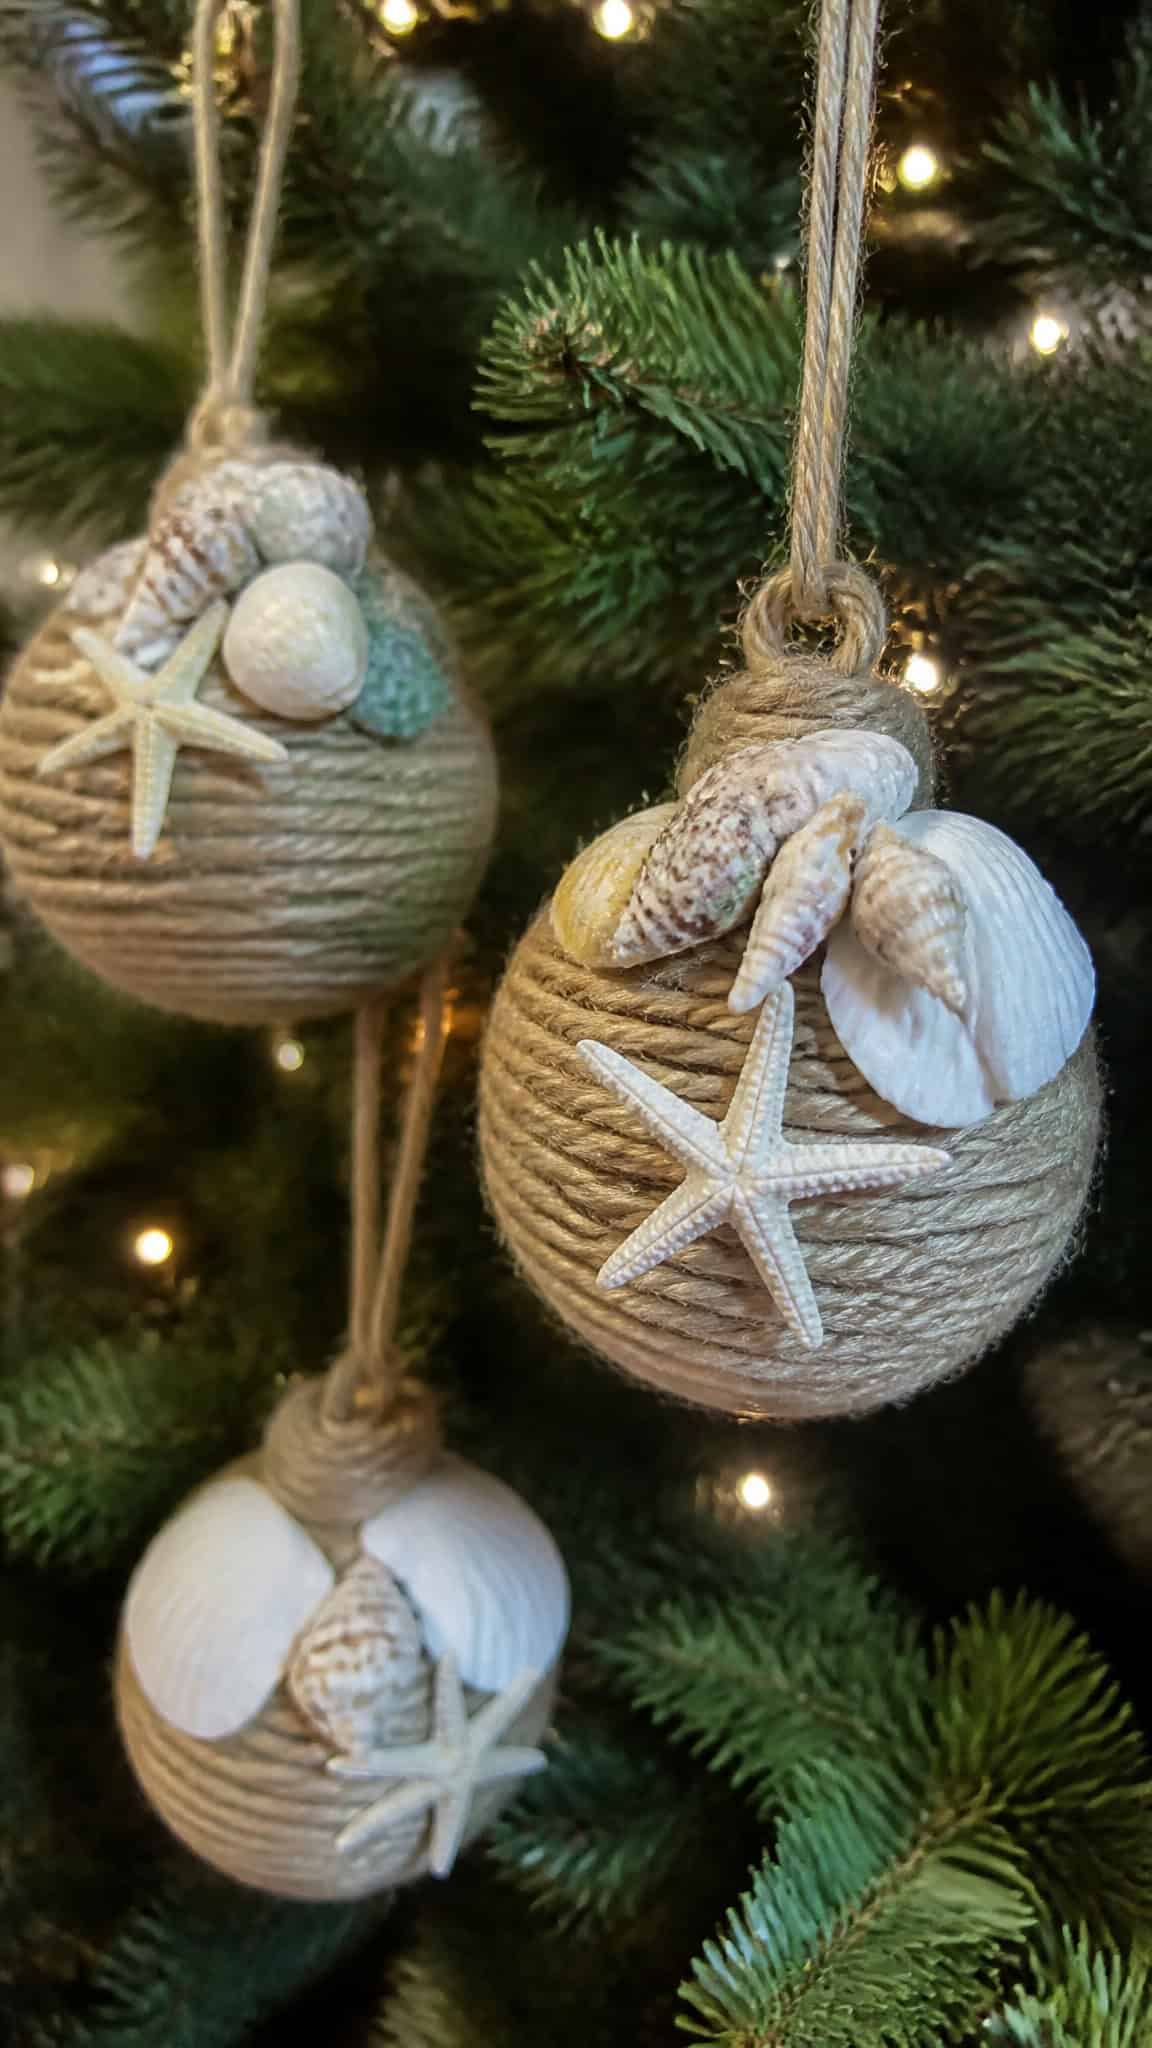
These rope-wrapped ornaments are absolutely adorable and so simple that my boys can help without me worrying about a crafting disaster! You’ll need clear or solid-colored ball ornaments, thin nautical rope or jute twine, hot glue, and small embellishments like tiny shells, starfish, or miniature anchors from the craft store.
Start by removing the ornament cap and applying a small dot of hot glue at the top of the ornament. Press the end of your rope into the glue and begin wrapping it tightly around the ornament in a spiral pattern. Keep the rows close together so no gaps show through! Apply small dots of glue every few wraps to keep everything secure as you work your way down.
Once you’ve covered the entire ornament (or just a portion if you prefer a partial wrap design), secure the end with more hot glue and trim any excess rope. Now comes the fun part that my kids love – decorating! Use hot glue to attach small shells, a miniature anchor charm, or even a tiny piece of driftwood to create your coastal look. You can also tie a loop of thin rope through the top for hanging instead of using the original ornament cap for an extra nautical touch!
These ornaments look stunning clustered together on your tree, and they’re perfect for gift-giving too! I made a batch last year for my boys’ teachers, and they were such a hit. The natural texture of the rope adds such warmth to your tree and pairs beautifully with traditional red and green or a more coastal blue and white color scheme.
Driftwood Christmas Tree Centerpiece
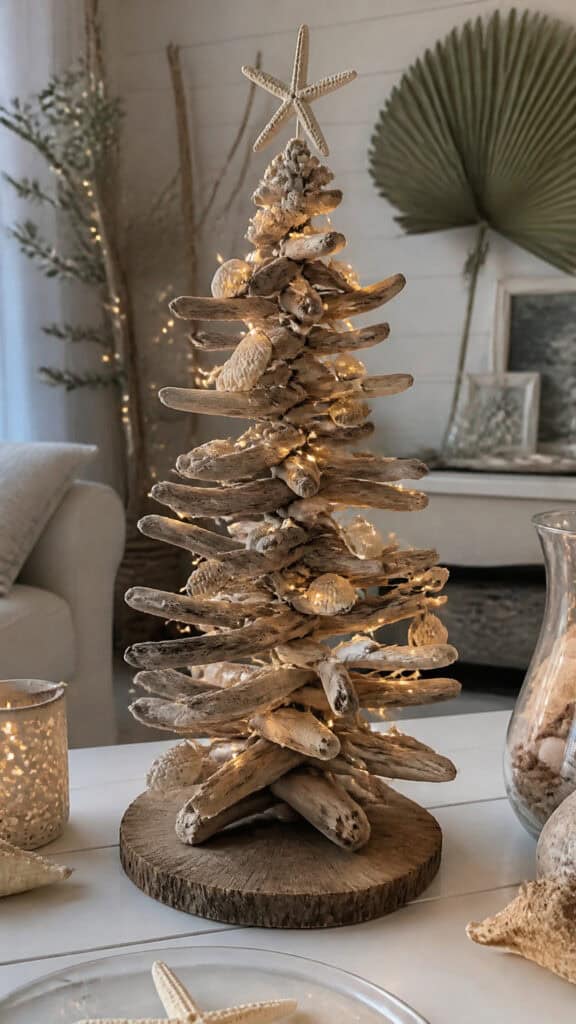
This project has become my absolute favorite nautical christmas decor diy creation! It’s a showstopper that looks like you spent hours on it, but honestly, it comes together pretty quickly. You’ll need several pieces of driftwood in varying lengths (or regular sticks if you don’t have access to driftwood – just soak them in a bleach solution for that weathered look!), a wooden base or thick slice of wood, a drill, strong glue or a glue gun, and decorations like small ornaments, fairy lights, and a star for the top.
Arrange your driftwood pieces from longest to shortest to create a triangle tree shape. The largest piece should be about 12-18 inches long for a nice tabletop size. Drill a hole in the center of your wooden base, and drill corresponding holes in the center of each driftwood piece. You can stack them on a wooden dowel inserted into the base, or simply glue them in a stacked formation directly onto the base.
Once your tree structure is assembled, wrap it with battery-operated fairy lights – the warm white ones look absolutely magical with the natural wood! Then add small nautical ornaments like tiny life preservers, mini rope knots, or shell decorations. I love tucking in small pieces of fishing net between the branches for extra texture!
Top your tree with a rope-wrapped star or a starfish, and you’ve got yourself a gorgeous coastal centerpiece! This looks amazing on a dining table, mantel, or entry console. My middle son insists we keep ours up year-round because he loves it so much, and honestly, I’m tempted because it’s just that cute!
Anchor and Rope Wreath for Your Front Door
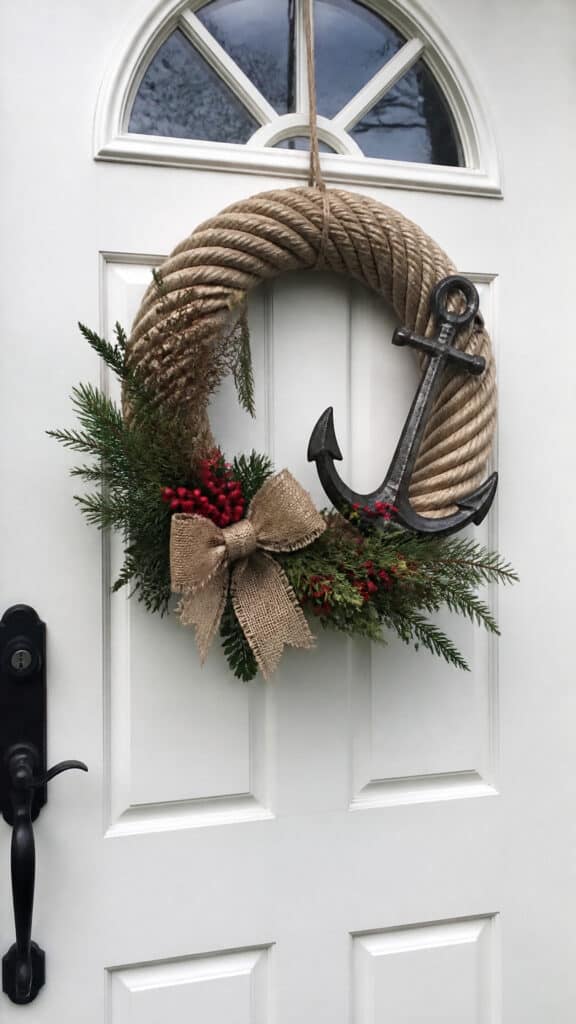
A nautical wreath is such a welcoming way to greet holiday guests, and it’s a perfect weekend project! For this nautical christmas decor diy wreath, you’ll need a grapevine or foam wreath form, thick nautical rope (about 20-30 feet depending on your wreath size), a decorative anchor (wooden or metal), hot glue, wire or zip ties, and optional greenery like eucalyptus or pine branches, plus some red berries or small ornaments for pops of Christmas color.
Begin by wrapping your rope around the wreath form, securing it with hot glue or wire at intervals to keep it from slipping. You want to cover the entire form with rope, wrapping it tightly and evenly. This takes a bit of patience, but it’s actually pretty relaxing once you get into a rhythm! I usually do this part after the boys go to bed with a Christmas movie on – it’s my peaceful crafting time!
Once your wreath is fully wrapped, it’s time to add your focal point. Wire or glue your anchor securely to the bottom or side of the wreath. Then add your greenery by tucking sprigs of eucalyptus, pine, or cedar into the rope wraps and securing with glue. The contrast between the natural rope and fresh greenery is just gorgeous!
Add finishing touches with clusters of red berries, small pinecones, or miniature ornaments in coastal colors like navy, red, and white. You can also tie a beautiful bow with burlap or striped ribbon at the top! Hang this beauty on your front door with a sturdy wreath hanger, and prepare for compliments from every neighbor who walks by. Mine has survived rain, wind, and my boys’ soccer balls being accidentally kicked at it – it’s a durable decoration!
Mason Jar Lighthouse Luminaries
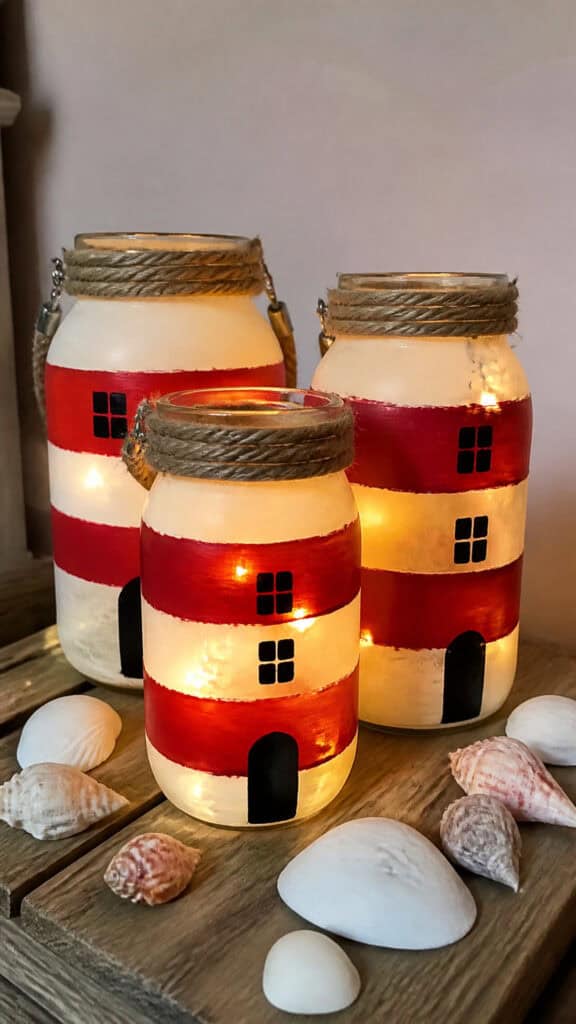
These little lighthouse luminaries are probably the cutest thing ever, and my youngest absolutely loves helping paint them! You’ll need mason jars (any size works, but quart-sized are perfect), red and white acrylic paint, painter’s tape, black permanent marker or paint pen, battery-operated tea lights or fairy lights, and optional embellishments like rope or small shells.
Clean your mason jars thoroughly and let them dry completely. Use painter’s tape to create horizontal stripes around the jar, leaving gaps between each strip of tape. Paint the exposed sections with red paint (two coats usually does the trick), and let it dry completely before carefully removing the tape. You’ll have beautiful red and white stripes just like a classic lighthouse!
Once the paint is dry, use a black permanent marker or paint pen to add windows near the top of your lighthouse and a door near the bottom. You can make them as simple or detailed as you’d like! I keep mine pretty basic because, let’s be honest, with three boys running around, I need projects that don’t require a steady hand and perfect concentration!
Wrap a piece of rope around the neck of the jar and tie it in a knot or bow for extra nautical charm. Drop a battery-operated tea light or a strand of fairy lights inside, and watch your lighthouse glow! These look amazing lined up on a mantel, grouped on a dining table, or placed along a staircase. They’re also wonderful nightlights for kids’ rooms during the holidays – my boys each have one on their dressers, and the soft glow is so comforting at bedtime!
Seashell and Starfish Garland
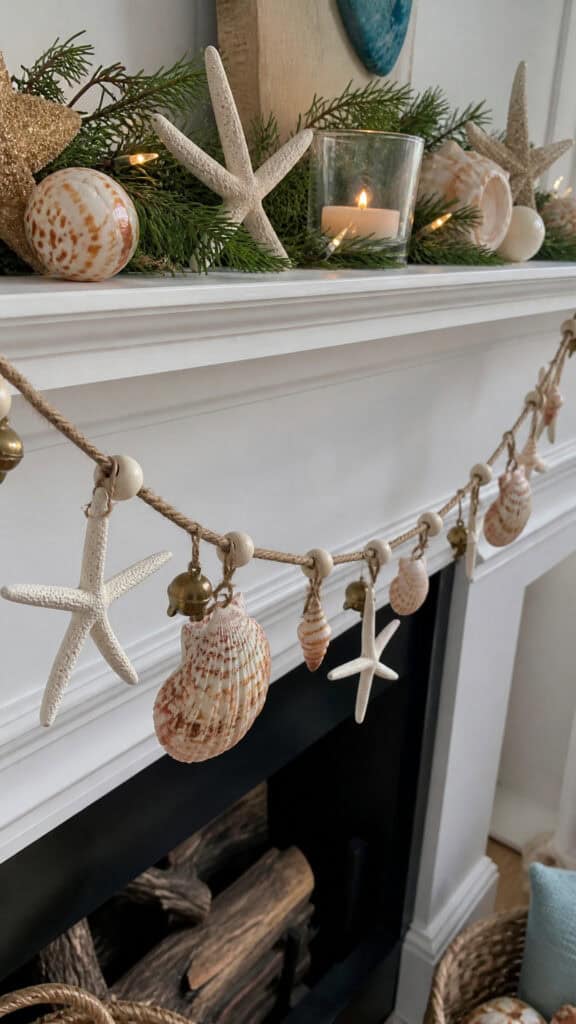
This garland is such a simple way to add coastal Christmas charm to any space, and it’s definitely kid-friendly! Gather an assortment of seashells (we collect ours during summer beach trips, but you can buy them at craft stores too), starfish, jute twine or thin rope, a drill with a small bit, and optional additions like wooden beads, small bells, or cranberries for pops of red.
First, you’ll need to drill small holes through your shells and starfish if they don’t already have natural holes. This is definitely an adult-only step! Use a small drill bit and work slowly to avoid cracking the shells. Drill near the top edge of shells so they’ll hang nicely, and through one arm of each starfish. If you’re nervous about drilling, you can also use hot glue to attach shells to the twine, though drilling creates a more polished look.
Cut your twine to your desired garland length, adding extra for hanging loops at each end. Thread your shells, starfish, and any additional decorations onto the twine, spacing them evenly or clustering them in groups – whatever looks good to your eye! I like to add wooden beads between some shells and tie small knots to keep everything in place.
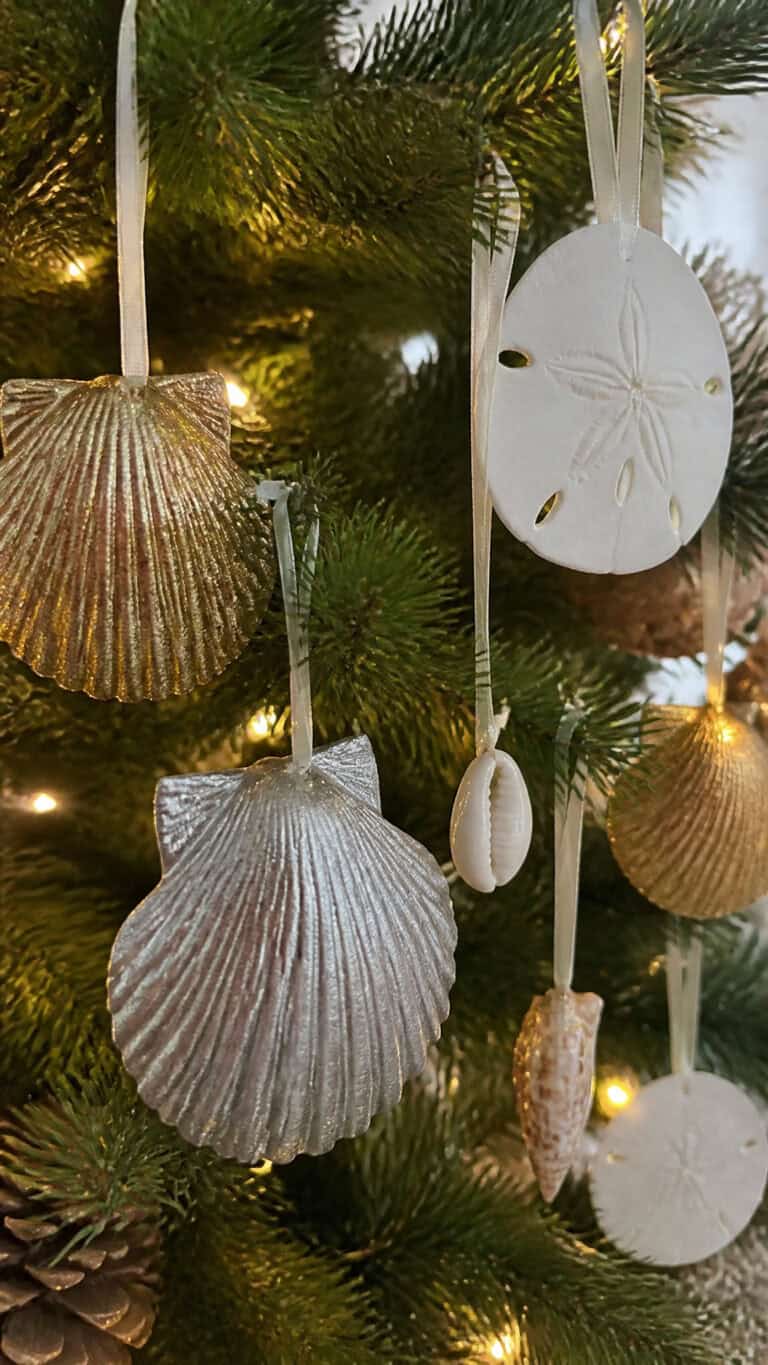
For a more Christmas-y feel, spray paint some of your shells with metallic gold or silver paint, or add small jingle bells between shells. You can also weave in some evergreen sprigs or eucalyptus for extra holiday flair! Drape this garland across your mantel, along a banister, around a doorway, or even on your Christmas tree. It brings such a beautiful beachy vibe to your holiday decorating, and every time I look at ours, I’m reminded of happy summer beach days with my boys!
Nautical Rope Christmas Stockings
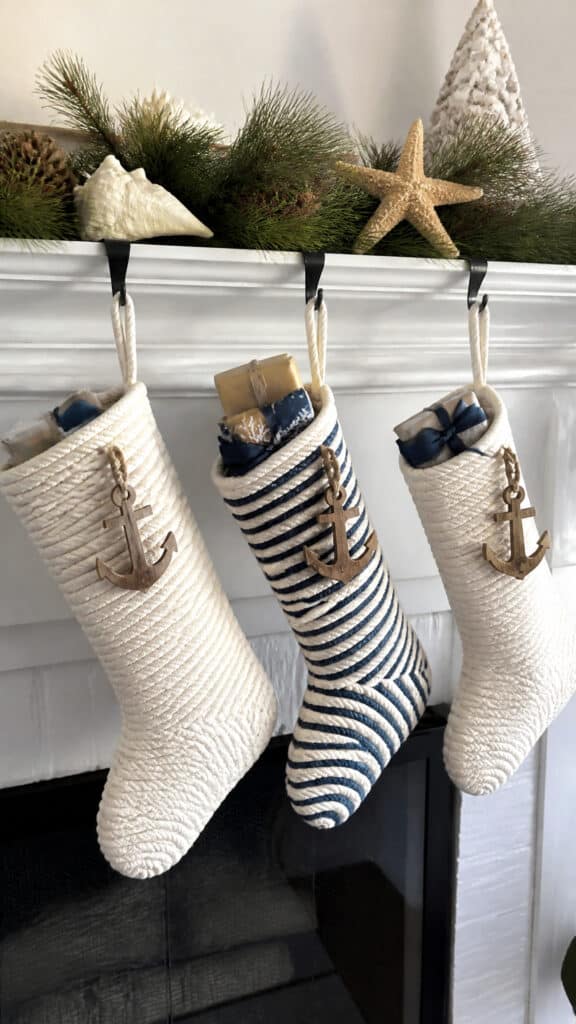
These rope stockings are so unique and add such amazing texture to your holiday decor! You’ll need thick nautical rope (about 25-30 feet per stocking), a hot glue gun with plenty of glue sticks, felt or fabric for the stocking liner, scissors, and decorative elements like anchors, shells, or personalized name tags.
Start by drawing a stocking template on paper – just trace an existing stocking or draw your own shape! Cut out your template and use it to cut two pieces of felt or fabric for the lining. Sew these pieces together (leaving the top open, of course!) to create the inner stocking that will actually hold the gifts. This liner is important because the rope stocking alone will have gaps that small toys could fall through – learned that one the hard way!
Now for the fun part! Starting at the toe of your stocking, begin coiling your rope in a tight spiral, hot gluing as you go to secure each row to the previous one. Work your way up and around the foot of the stocking, then up the leg. This takes time and quite a bit of glue, but the result is so worth it! The rope creates this gorgeous chunky texture that looks professionally made.
Once you’ve created your rope stocking shape, glue or stitch it to your fabric liner. Add a loop of rope at the top corner for hanging, and decorate with nautical embellishments! I attached wooden anchor tags with each of my boys’ names, and added small shells around the cuff. You could also weave in some greenery, add a starfish, or keep it simple with just the beautiful rope texture. These stockings are heavy-duty enough to hold plenty of goodies, and they’re definitely conversation starters when guests see them hanging on our mantel!
Sailboat Ornament Fleet
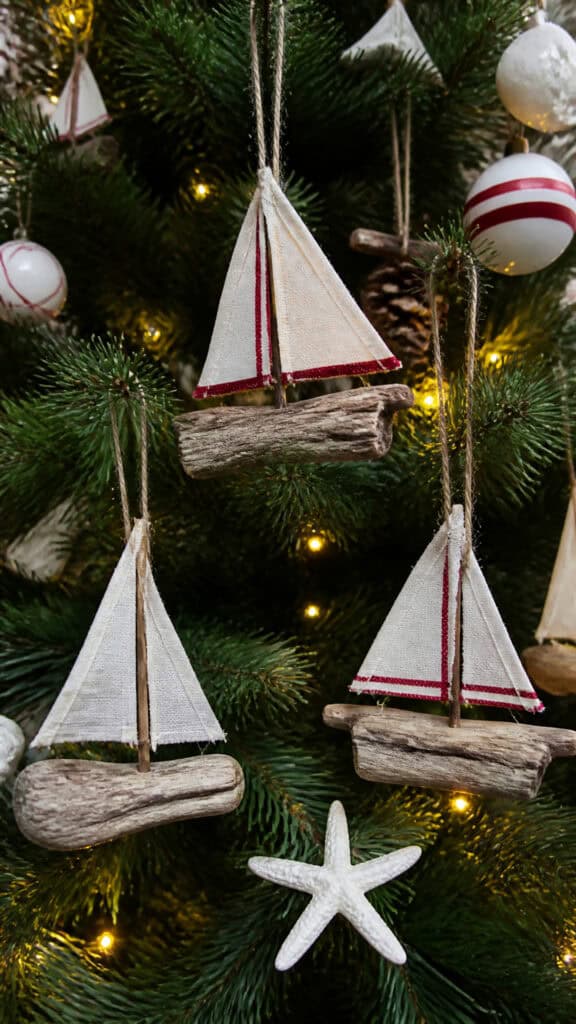
These little sailboat ornaments are absolutely precious and surprisingly easy to make! My boys had so much fun creating their own fleet of tiny boats. You’ll need small pieces of driftwood or wooden craft sticks, white fabric or felt for sails (old white t-shirts work great!), thin wooden skewers or toothpicks for masts, hot glue, twine for hanging, and optional decorations like small flags or numbers for the sails.
Cut your driftwood into small boat-shaped pieces, about 3-4 inches long, or simply use wooden craft sticks as-is for a simpler version. These will be your boat hulls. Cut triangular sail shapes from your white fabric or felt – you can make them any size, but I find that sails about 2-3 inches tall work perfectly for ornament-sized boats.
Poke your skewer or toothpick through the sail to create the mast, threading it through near one edge of the triangle. Apply hot glue to the bottom of the mast and insert it into the driftwood hull (you might need to drill a small starter hole if your wood is hard). Make sure it’s standing up straight, and hold it until the glue sets. You can add a second smaller sail above the first one if you want a more elaborate design!
Tie a piece of twine around the top of the mast for hanging, and add any decorative touches you like! We painted red stripes on some sails, added tiny fabric flags, and even used a permanent marker to draw numbers on others like real racing sailboats. These look adorable hanging on the tree, and they’re also sweet gift toppers or package decorations! I love that each one has its own personality, especially the ones my boys made – they’re perfectly imperfect and absolutely treasured in our family!
Set Sail on Your Nautical Christmas Journey
Creating nautical christmas decor diy projects has brought so much joy to our holiday season, and I hope these ideas inspire you to add some coastal charm to your own home! The beauty of these projects is that they’re flexible – you can adapt them to match your skill level, available time, and personal style. Whether you tackle all of these projects or just pick one or two favorites, you’ll end up with unique decorations that tell a story and create memories with your family!
My boys still talk about the ornaments we made together last year, and they’re already asking which projects we’ll do this season! There’s something special about handmade decorations that store-bought items just can’t match. So grab your glue gun, gather your supplies, and get ready to create some beautiful nautical magic this Christmas! Your home will have that perfect blend of holiday cheer and coastal cool that makes the season feel extra special. Happy crafting, mama!
This post may contain affiliate links. Read the full disclosure here.