Sea Shell Art Ideas That Turn Into Pretty Summer Decor
When summer rolls around, many people want their homes to feel just as bright and fresh as the season outside. Sea shell art ideas bring that breezy, coastal look indoors, turning simple shells into unique decor!
With a few shells from your last beach trip, you can create pieces that capture the warm, relaxing vibe of summer. Whether you’re decorating a living room or adding a touch of charm to your porch, these sea shell art ideas make it easy to fill your home with seasonal beauty.
Benefits of Decorating with Sea Shell Art
Using sea shell art ideas for summer decor does more than just add a seasonal touch. Each piece brings something special to a space, blending nature, creativity, and memories. Decorating with shells sets an easy-going mood that feels light and sun-soaked—perfect for warm weather. Beyond looks, sea shell art has some real benefits that can make decorating feel more personal and meaningful.
Natural Beauty Right from the Beach
Sea shells come in endless shapes, colors, and textures straight from the ocean. Their natural beauty is hard to match with store-bought decor. When you fill a bowl with shells or mount them in a frame, you bring the calming look of the shore into your home.
- Every shell is unique, so even simple sea shell art ideas turn into one-of-a-kind accents.
- Subtle whites, creams, blush pinks, and sandy browns match almost any color scheme.
- Sea shell art adds organic shapes and flowing lines that soften and warm up modern rooms.
Budget-Friendly Summer Decor
Making your own sea shell art doesn’t drain your wallet. Most supplies are free or low-cost, especially if you collect shells from a recent beach visit.
- A handful of shells and a little glue can turn into eye-catching wall art.
- You can reuse old photo frames, jars, or candle holders to create new looks.
- Little to no extra materials needed, so most projects cost less than buying seasonal decor.
Eco-Friendly and Sustainable
Sea shell art ideas fit well with eco-conscious living. Instead of buying more plastic or mass-produced decor, you use natural pieces that last for years.
- Repurposing found shells keeps extra waste out of landfills.
- No need for harsh chemicals or synthetic materials.
- Upcycling shells gives them new life, turning beach finds into lasting memories.
Add a Personal Touch
Sea shell art feels personal, especially when you use shells you picked up yourself. Every shell can be tied to a moment, a place, or a special day at the beach.
- Displaying your own shell finds tells a story that store-bought items can’t match.
- Kids love to help gather and arrange shells, adding family memories to your home.
- Hand-made shell projects invite conversation when friends visit, making each piece more meaningful.
Decorating with sea shell art ideas isn’t just about filling space. It’s about making your home warmer, greener, and more connected to your favorite summer moments. Each shell brings a bit of the beach indoors, letting the season linger long after the last sunset.
Essential Supplies and Prep for Sea Shell Art Projects
Before jumping into fun sea shell art ideas, you’ll need the right supplies and a bit of prep work. Getting your shells ready makes every project easier and helps you create art that lasts. A few simple steps will take your beach finds from sandy souvenirs to smooth, clean pieces ready for summer decor.
Gathering Sea Shells Responsibly
It’s tempting to fill your pockets with every pretty shell you see, but thoughtful collecting keeps beaches beautiful for everyone.
- Only take shells that are empty and abandoned. Leave living creatures, like crabs or snails, in their natural home.
- Be mindful of local rules about collecting. Some beaches don’t allow shell gathering, or they limit the amount you can take.
- Choose clean, whole shells when possible. Try to pick up shells with interesting shapes, natural holes, or unique colors for more variety in your projects.
- Avoid taking rare or large quantities of shells, especially from protected areas.
Sustainable collecting means you can enjoy sea shell art ideas for years without harming the shore.
Basic Supplies for Sea Shell Art Ideas
Once you’ve gathered your shells, a few basic tools and materials open up all kinds of creative options. You don’t need to buy fancy equipment—just grab simple supplies you probably already have at home.
Here’s a basic checklist to get started:
- Clean sea shells (sorted by size and color)
- White glue, hot glue, or craft adhesive
- Small paintbrushes (for glue or paint)
- Acrylic paint and brushes (optional for adding color)
- Tweezers or tongs (useful for handling tiny shells)
- Toothpicks and cotton swabs (for detail work)
- Scissors
- Old newspaper or a drop cloth (to protect your workspace)
- Sandpaper or nail file (for smoothing rough edges)
- Protective sealer or clear varnish (to keep shells looking fresh)
Depending on your project, you might also want picture frames, small jars, rope, or canvas.
Cleaning and Preparing Sea Shells
Sea shells may look pretty when you find them, but a quick clean brings out their best. Cleaning gets rid of sand, salt, and any lingering odors.
Follow these steps for shiny, safe-to-use shells:
- Soak the shells in a bucket of warm, soapy water for several hours.
- Scrub gently with an old toothbrush to remove sand, dirt, or algae.
- For stubborn spots, soak shells in a mix of half water, half white vinegar for up to an hour.
- Rinse shells well with clean water to remove any soap or vinegar.
- Let the shells dry thoroughly on a towel. Sun drying works great.
If you want a glossy look, a thin coat of clear varnish or spray sealant adds shine and seals in color. For a soft, natural finish, leave them as they are.
Safety First
Sea shell art is a safe hobby, but a little caution goes a long way, especially if kids are helping.
- Always wash your hands after handling found shells.
- Watch for sharp edges or broken pieces that can cut skin.
- Supervise young helpers when using glue guns or strong adhesives.
- Use glue and paint in a well-ventilated area to avoid breathing in fumes.
Prepping your supplies not only makes your projects easier, it helps make every sea shell art idea look better and last longer. With the right start, you’ll be ready to turn those beach finds into eye-catching decor for any room.
Easy Sea Shell Art Ideas for Beginners
If you’re new to making sea shell art, start with simple projects that don’t call for a lot of tools or experience. These beginner-friendly sea shell art ideas will help you turn your beach finds into pretty decorations for summer, no art degree required. You’ll be surprised how a few shells and some glue can add that breezy, relaxed style to your space.
Sea Shell Picture Frames
Picture frames decorated with sea shells bring sunlight and memories to any room. This is one of the best sea shell art ideas for beginners since you can use a plain frame and a handful of shells.
What you’ll need:
- Plain wood or plastic frame (old frames work great)
- Clean, dry sea shells (try to pick flat or curved ones)
- Strong glue (white glue for small shells, hot glue for larger ones)
- Optional: a little sand or small pebbles
Steps:
- Place your shells around the edge of the frame to decide what looks best before gluing.
- Glue each shell in place, working one section at a time.
- Fill in gaps with tiny shells, pebbles, or even a sprinkle of sand for extra texture.
- Let it dry fully. Add a photo from your favorite beach trip and show it off.
These frames work well for vacation photos, summer parties, or as a gift.
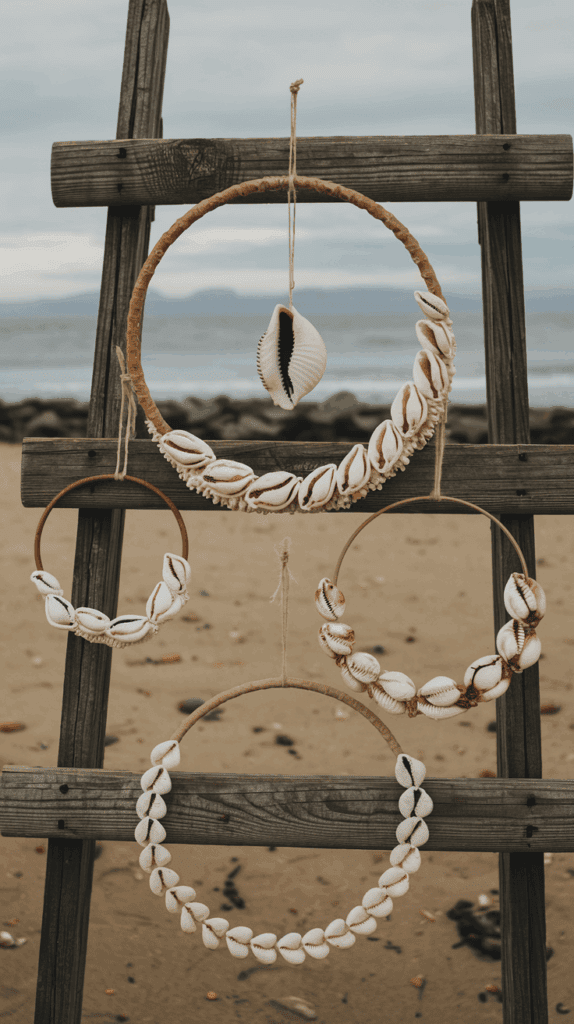
Sea Shell Wind Chimes
Sea shell wind chimes bring soft beach sounds right to your porch or balcony. They use natural shell holes or small drilled holes to string the shells together. The finished piece moves and tinkles every time the breeze blows.
What you’ll need:
- A collection of shells (look for ones with holes, or use a small hand drill)
- Strong thread, fishing line, or thin twine
- A stick, piece of driftwood, or a metal ring for the top
- Scissors
Simple steps:
- Lay out your shells and plan the order for each hanging strand.
- Cut several lengths of thread or line. Tie a shell at the bottom of each strand.
- Add shells every few inches, tying knots to keep them spaced.
- When ready, tie each finished strand to your stick, driftwood, or ring. Make sure the lengths vary to create a balanced look.
- Hang up your wind chime outside and enjoy the soft, natural music.
Keep the look simple, or add beads and pieces of sea glass for extra color.
Simple Sea Shell Candle Holders
Candle holders dressed up with sea shells add a cozy glow to summer nights. They’re quick to make and look beautiful grouped on a table or window.
What you’ll need:
- Small glass jars or votive holders
- Sea shells (choose smaller, flatter ones for best results)
- Strong glue (hot glue works best for glass)
- Tea light or battery candle
Making your holder:
- Wash and dry your glass jar well.
- Dot glue onto the outside of the jar, then gently press a shell into place.
- Continue around the jar, mixing shell sizes and shapes.
- Let dry until the shells are secure.
- Place a tea light or battery candle inside.
For a beachy touch, add a little sand or a raffia ribbon around the top. These also make cute party favors or gifts.
With these easy sea shell art ideas, you can bring a bit of the shore home, even if you’re miles from the beach. Each project is simple, quick, and lets you show off your favorite shell finds in a new way.
Creative Sea Shell Art Projects for Home Decor
Take your summer decorating up a notch with sea shell art ideas that go beyond the basics. These projects use shells in more detailed and decorative ways, turning your beach finds into pieces that catch the eye and start conversations. With a few extra supplies and some imagination, you can create art that’s as bold or as subtle as you want. These sea shell art projects look great in living rooms, bedrooms, or anywhere you want a hint of summer.
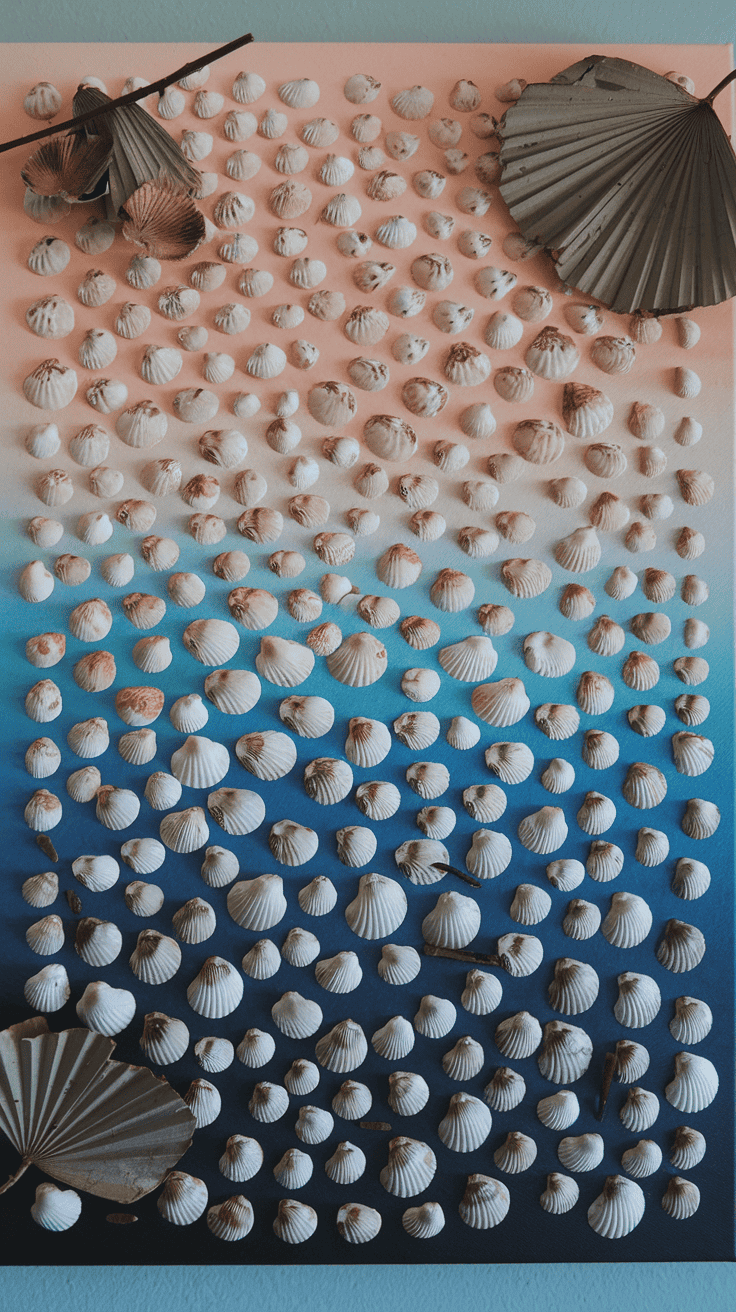
Sea Shell Wall Hangings and Shadow Boxes
Wall hangings and shadow boxes filled with shells bring natural beauty to any wall. These sea shell art ideas let you choose how dramatic or simple you want the final look to be.
Wall hangings are perfect if you want something light and breezy:
- Use a driftwood stick or sturdy dowel as your base.
- Attach strings of shells, beads, or even feathers for movement and color.
- Mix in textured rope or jute for a boho or nautical vibe.
- Hang your finished piece in a hallway, bathroom, or above a bed.
Shadow boxes make it easy to display your favorite shells in a more contained space:
- Pick a deep frame or box with a glass front.
- Arrange shells by size, color, or in a pattern for a neat display.
- Add sand, tiny beach pebbles, or a mini photo in the background for a personal touch.
- Press the shells into place with glue so they stay put for years.
Both of these options work well in sets. Display two or three together for big impact. These pieces look especially good when you mix different shell types or add a pop of navy blue or coral paint as a backdrop.
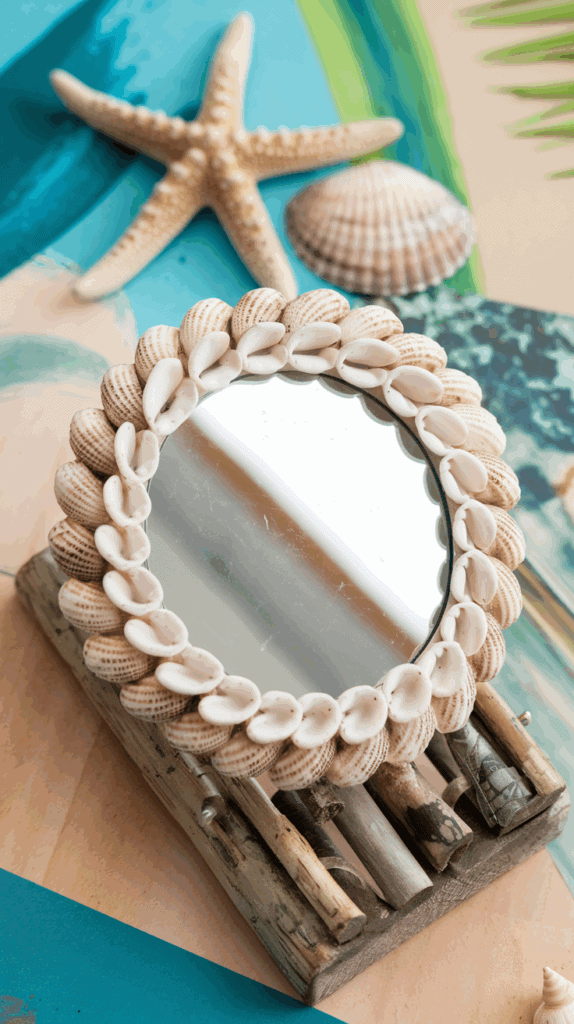
Sea Shell Mirrors
Mirrors framed with sea shells instantly bring light and a coastal style to any space. This sea shell art idea can transform even the plainest mirror into a unique piece that feels straight out of a seaside cottage.
Steps for making a sea shell mirror:
- Start with a round or rectangular mirror (thrift store finds work great).
- Sort shells by size to help with placement.
- Glue larger shells around the frame first, spacing them evenly.
- Fill in gaps with smaller shells, tiny starfish, or pieces of sea glass for texture.
- For extra twinkle, add glitter, pearl beads, or metallic paint highlights.
Hang your sea shell mirror in an entryway, above a vanity, or in a powder room. The shells catch natural light and make the whole space feel brighter and more open. This project doubles as pretty summer decor and a functional piece for every day.
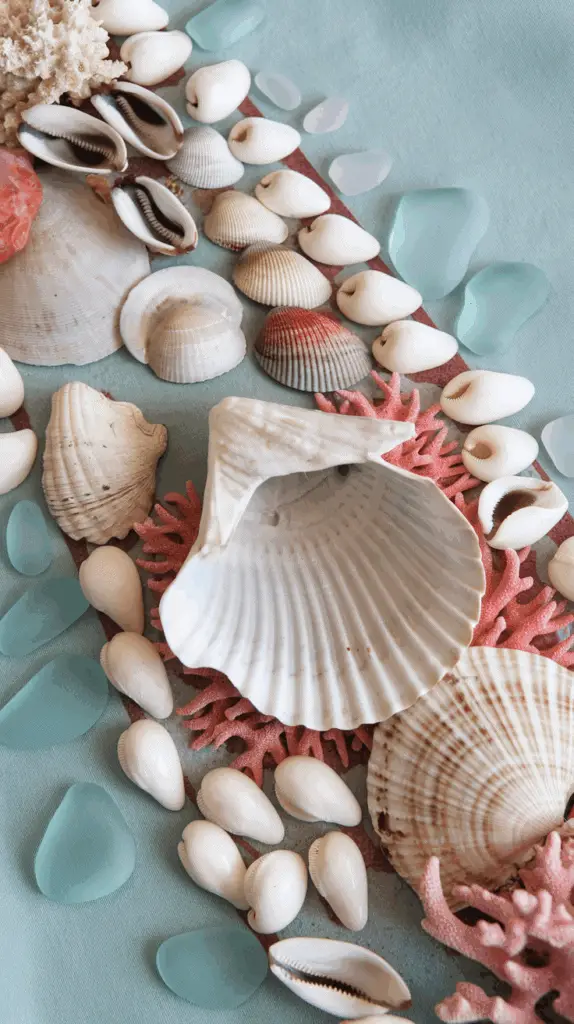
Sea Shell Table Centerpieces
Bring summer to your table by turning shells into stunning centerpieces. These sea shell art ideas make the most of fresh finds and simple items you have at home.
Ideas for table centerpieces:
- Fill a clear glass bowl or vase with layers of shells, sand, and bits of driftwood. Place a candle in the middle for a soft glow at night.
- Arrange larger shells like conch or scallop in a rustic wooden tray, mixing in small succulents, moss, or faux pearls for color.
- Line shells up along a burlap runner across the table for casual, beachy style at dinners and parties.
Try these quick tips for an extra-special look:
- Add fairy lights inside glass vessels with shells for twinkling light.
- Stick to one color theme—white shells in a blue glass bowl feel crisp and fresh.
- Use mirrored trays so shells and candles reflect more light.
Centerpieces made with shells last all season long. They give your space a relaxed, collected-over-time look, letting summer memories stay close long after your feet leave the sand.
These sea shell art ideas give you lots of ways to personalize your space. Try one or try them all—each project brings its own charm and a splash of summer style to your home.
Tips for Styling and Displaying Sea Shell Art in Your Home
Sea shell art ideas aren’t just about what you make—it’s about how you use them to shape the mood of your home. The right placement and styling help your decor feel breezy, bright, and beautiful all summer long. You want your sea shell art to blend with what you already have, while still standing out as something special. Mix, match, and move things around for a space that truly feels like your own little getaway.
Coordinate Colors for a Cohesive Look
Color is key when displaying sea shell art ideas. While shells naturally feature creams, whites, and blush tones, you can play these up or pair them with bolder colors.
- Pair with soft blues, greens, or sandy beige to mimic the coast and keep things soothing.
- Try pops of color—like sunny yellow pillows or navy throw blankets—to highlight the shells’ natural tones.
- If painting shells, stick with colors already found in your space for a unified effect.
- Glass bowls, blue glass vases, or linen runners pull in extra color while keeping shells center stage.
Color pulls your design together and makes even the simplest shell art feel stylish, not cluttered.
Choose Prime Placement for Sea Shell Art
Where you display your sea shell art changes the entire vibe of a room. Group pieces in spots that catch the eye but don’t overwhelm other decor.
- Entry tables and mantels: A bowl of shells or a framed photo tells guests your home is summer-ready from the moment they walk in.
- Coffee tables: Place sea shell centerpieces or trays where you relax.
- Bathroom shelves: Shells add a coastal spa feel to smaller rooms without taking up much space.
- Gallery walls: Mix shadow boxes or shell art frames with photos or simple prints for a casual, layered look.
Spread pieces throughout different rooms or cluster a few together for more visual impact. Step back and make sure your sea shell art ideas look balanced with the rest of your room.
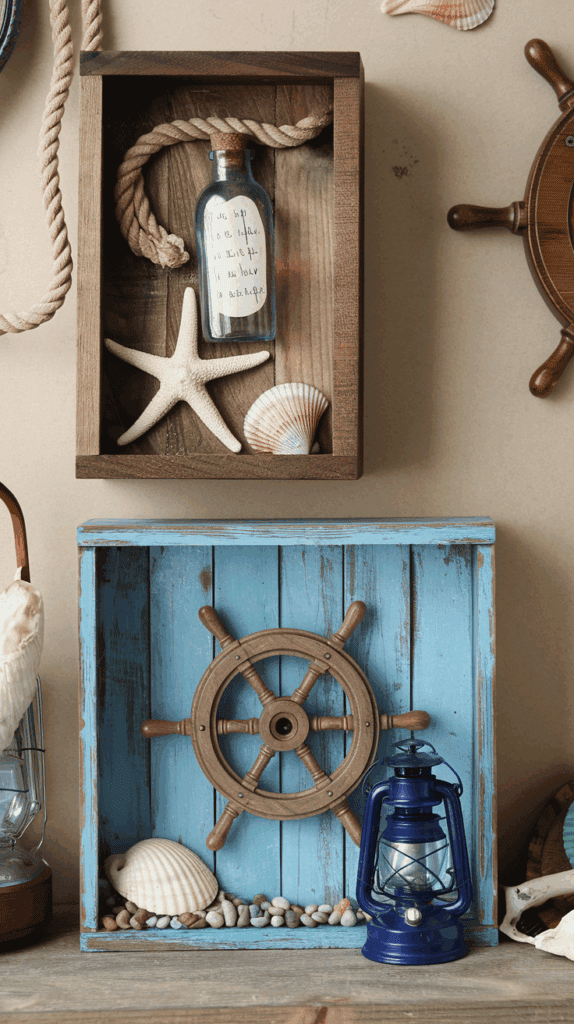
Mix Sea Shell Art with Other Decor Elements

Combining sea shell art with other textures and styles makes your decor more interesting. Contrast brings depth and makes shells pop.
- Place shells next to driftwood, woven baskets, or seagrass for a natural, beachy style.
- Group sea shell art with candles in hurricane jars or glass lanterns for extra sparkle at night.
- Mix in simple greenery, like small succulents or air plants, for a fresh look.
- Add metal touches, such as copper trays or brushed nickel picture frames, to keep things modern.
It’s the mix of materials—smooth shells, rough wood, soft linens—that makes your summer decor feel collected over time.
Scale and Layer for Interest
Variety in size and height keeps sea shell art ideas from looking flat or boring. Layer different shapes and sizes for a look that feels full of life.
- Use large conch shells as anchors, then fill with smaller pieces for detail.
- Stack shell-filled bowls on a stack of books for instant height and interest.
- Lean framed shell art against the wall behind shorter pieces for a more relaxed, casual display.
Layering isn’t fussy—it lets you easily swap or add pieces as you bring home new finds.
Keep the Style Simple and Light
Summer decor looks best when it feels relaxed, not overdone. Too many pieces or heavy colors can take away from the laid-back look you want.
- Stick to groups of odd numbers—like three or five shells—for a more natural display.
- Limit sea shell art to one or two spots per room to avoid a cluttered look.
- Let open space work with you so each piece gets noticed.
Simple styling lets your favorite beach finds stand out and makes every room inviting.
Sprinkle sea shell art ideas throughout your home using these styling tips. When shells are displayed with care, they don’t just decorate—they set a mood that lasts all season.
Caring for and Preserving Sea Shell Art Creations

Beautiful sea shell art ideas deserve to stay bright, clean, and strong for many summers. A bit of care keeps your favorite pieces looking fresh so you can enjoy them year after year. Proper cleaning, gentle handling, and smart storage help sea shell art stand the test of time. Here’s how you can keep every shell project looking its best.
Regular Cleaning for Lasting Shine
Sea shell art may pick up dust or lose some shine as it sits on shelves or walls. Regular, easy cleaning will help your creations keep their natural beauty.
- Dust weekly using a soft, dry brush or a microfiber cloth. This helps remove dirt without scratching delicate shells.
- For stuck-on dust, gently wipe using a lightly damp cloth. Avoid soaking as moisture can loosen glue or damage the backing.
- For glass surfaces or frames with shells on them, use a soft glass cloth and wipe around, not over, the shells.
Stay away from harsh cleaners, bleach, or abrasive sponges. Simple is always best with natural decor.
Protecting Sea Shell Art from Damage
To keep your sea shell art ideas in top shape, think about where and how you display them. Sunlight, moisture, and bumps can all take a toll on shells over time.
- Keep art out of direct sunlight to prevent fading or cracking, especially if your shells are painted or sealed with a clear coat.
- Avoid hanging or placing sea shell decor in very humid rooms, like bathrooms without proper ventilation. Moisture can cause shell colors to fade and glue to weaken.
- Handle your shell art gently, especially with delicate or thin shells that can chip or break.
- For pieces displayed on tables or shelves, use a soft pad or felt tabs underneath to protect both the art and your furniture.
If little hands love to touch, choose sturdy designs for busy spaces. Save fragile works for quieter spots.
Sealing and Finishing for Extra Protection
Applying a protective sealer helps sea shell art last longer and keeps colors vivid. Depending on your style, you may want a glossy shine or a subtle, natural look.
- Finish your projects with a clear acrylic spray or brush-on varnish.
- Use a matte sealant for a soft, beachy finish, or go glossy for shine that pops.
- Always apply sealers in a well-ventilated area and allow shells to dry fully before using or hanging.
A thin, even coat is all you need. Too much can change shell colors or make pieces sticky.
Storing Sea Shell Art for the Off-Season
Some sea shell art ideas are best saved for summer, so smart storage keeps them safe when not on display.
- Wrap each piece in acid-free tissue, bubble wrap, or a soft cloth to prevent chips and scratches.
- Store in a sturdy box or bin with a lid, and keep it in a cool, dry place away from sunlight.
- For framed or shadow box pieces, store upright to avoid cracking or warping.
- Place small, loose shell items in divided containers to keep shells separated.
Label boxes so you can find your favorite works next summer, and always handle them carefully when unpacking.
Quick Tips for Long-Lasting Art
A little effort goes a long way in caring for sea shell art ideas. Keep these simple tips in mind:
- Check shells now and then for chips, loose glue, or faded spots.
- Re-glue any loose pieces using a clear, strong adhesive.
- Replace worn ribbons, backings, or frames to give art new life.
- If you need to repair paint, touch up with matching acrylics and reseal the shell.
Taking care of your sea shell art means you can relive warm, happy beach days each time you see it. A few smart habits help every piece look as fresh as the day you made it.
Conclusion
Sea shell art ideas bring a slice of the shore into your home, adding warmth and a relaxed summer feel that lasts all season. These projects offer a fresh way to decorate, whether you keep it simple or try something bold. Anyone can transform beach finds into decor that feels both personal and stylish.
Starting is easy—pick up some shells and try a project that suits your mood and skill level. Even the smallest sea shell art ideas can brighten a shelf or become a conversation piece. Share your creations, swap tips with friends, and let your favorite summer memories show in every detail.
Thanks for reading. If you try these ideas, snap a photo or drop your tips in the comments. Your home should tell your story, and a touch of sea shell art helps it feel just like summer, no matter the season.
This post may contain affiliate links. Read the full disclosure here.