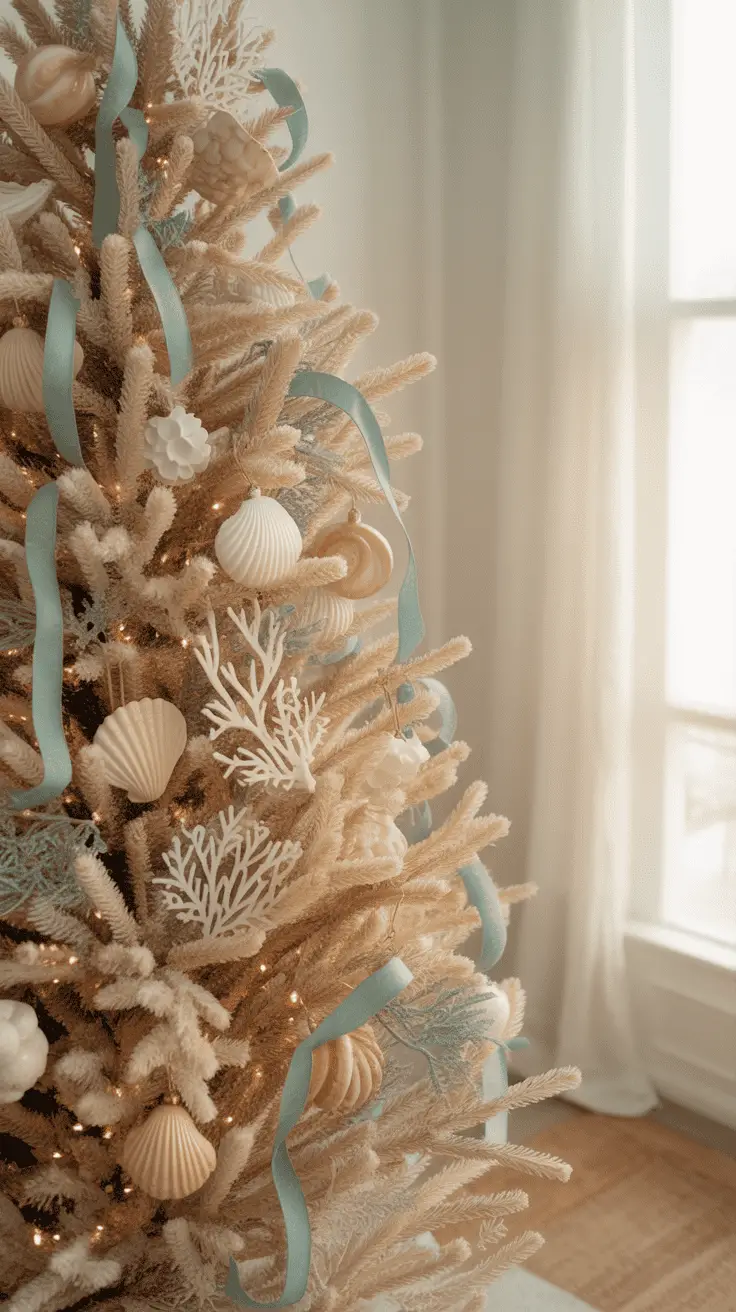
9 Beach Ornaments DIY Coastal Christmas Ideas for a Creative Holiday
There’s something absolutely magical about combining the cozy warmth of Christmas with the breezy, relaxed vibes of the beach! As a mom of three energetic boys, I’m always looking for crafting projects that bring something unique to our holiday celebrations while keeping the chaos manageable.
These beach ornaments DIY coastal Christmas ideas have become our favorite tradition, and honestly, they’re so much easier than you’d think!
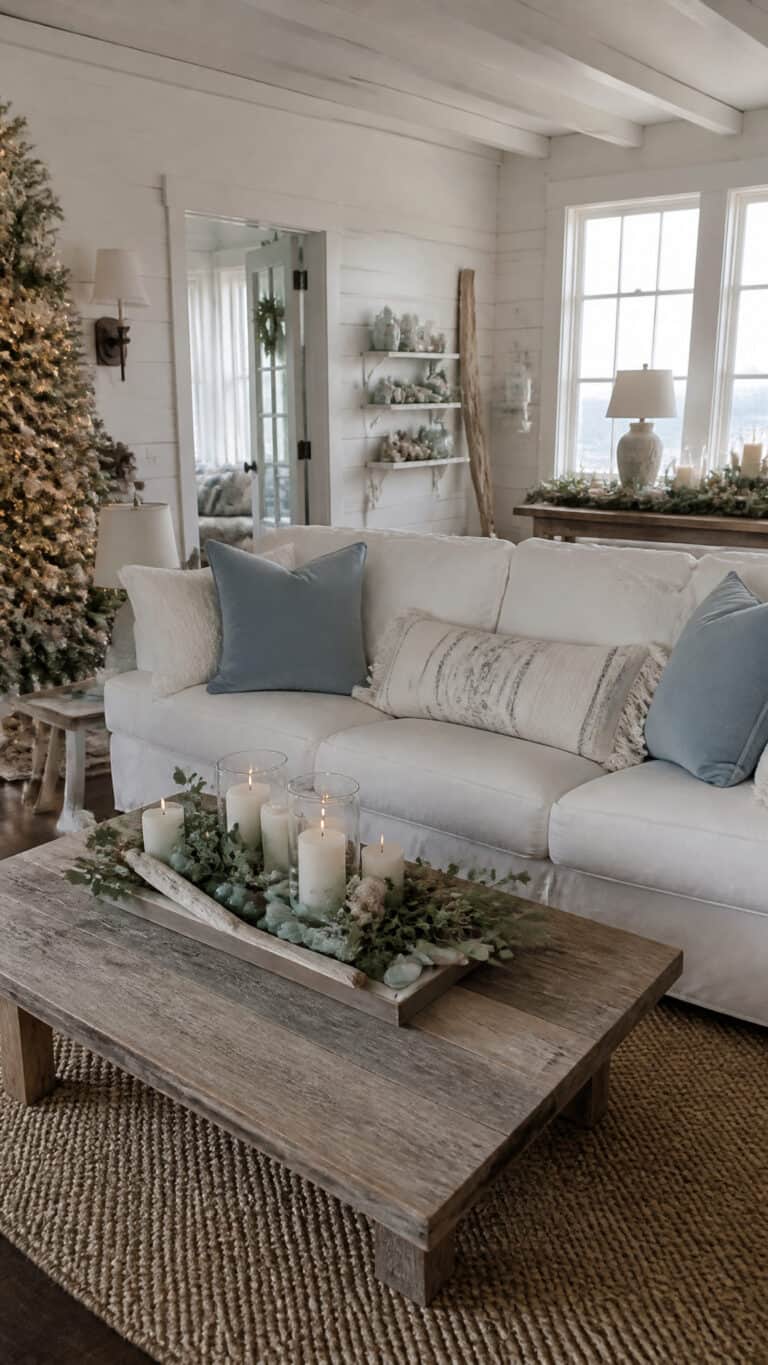
Once your ornaments are finished, use these DIY coastal holiday decorating ideas to complete the rest of your space!!
Whether you’ve collected treasures from your summer beach trips or you’re picking up supplies from the craft store, creating coastal-themed ornaments is the perfect way to add a personal touch to your tree. The best part is that these projects are fun enough to keep the kids engaged (yes, even my wild bunch!), and they result in beautiful keepsakes you’ll cherish for years to come. Let’s dive into these creative ideas that’ll transform your Christmas tree into a seaside wonderland!
Seashell Snow Globe Ornaments

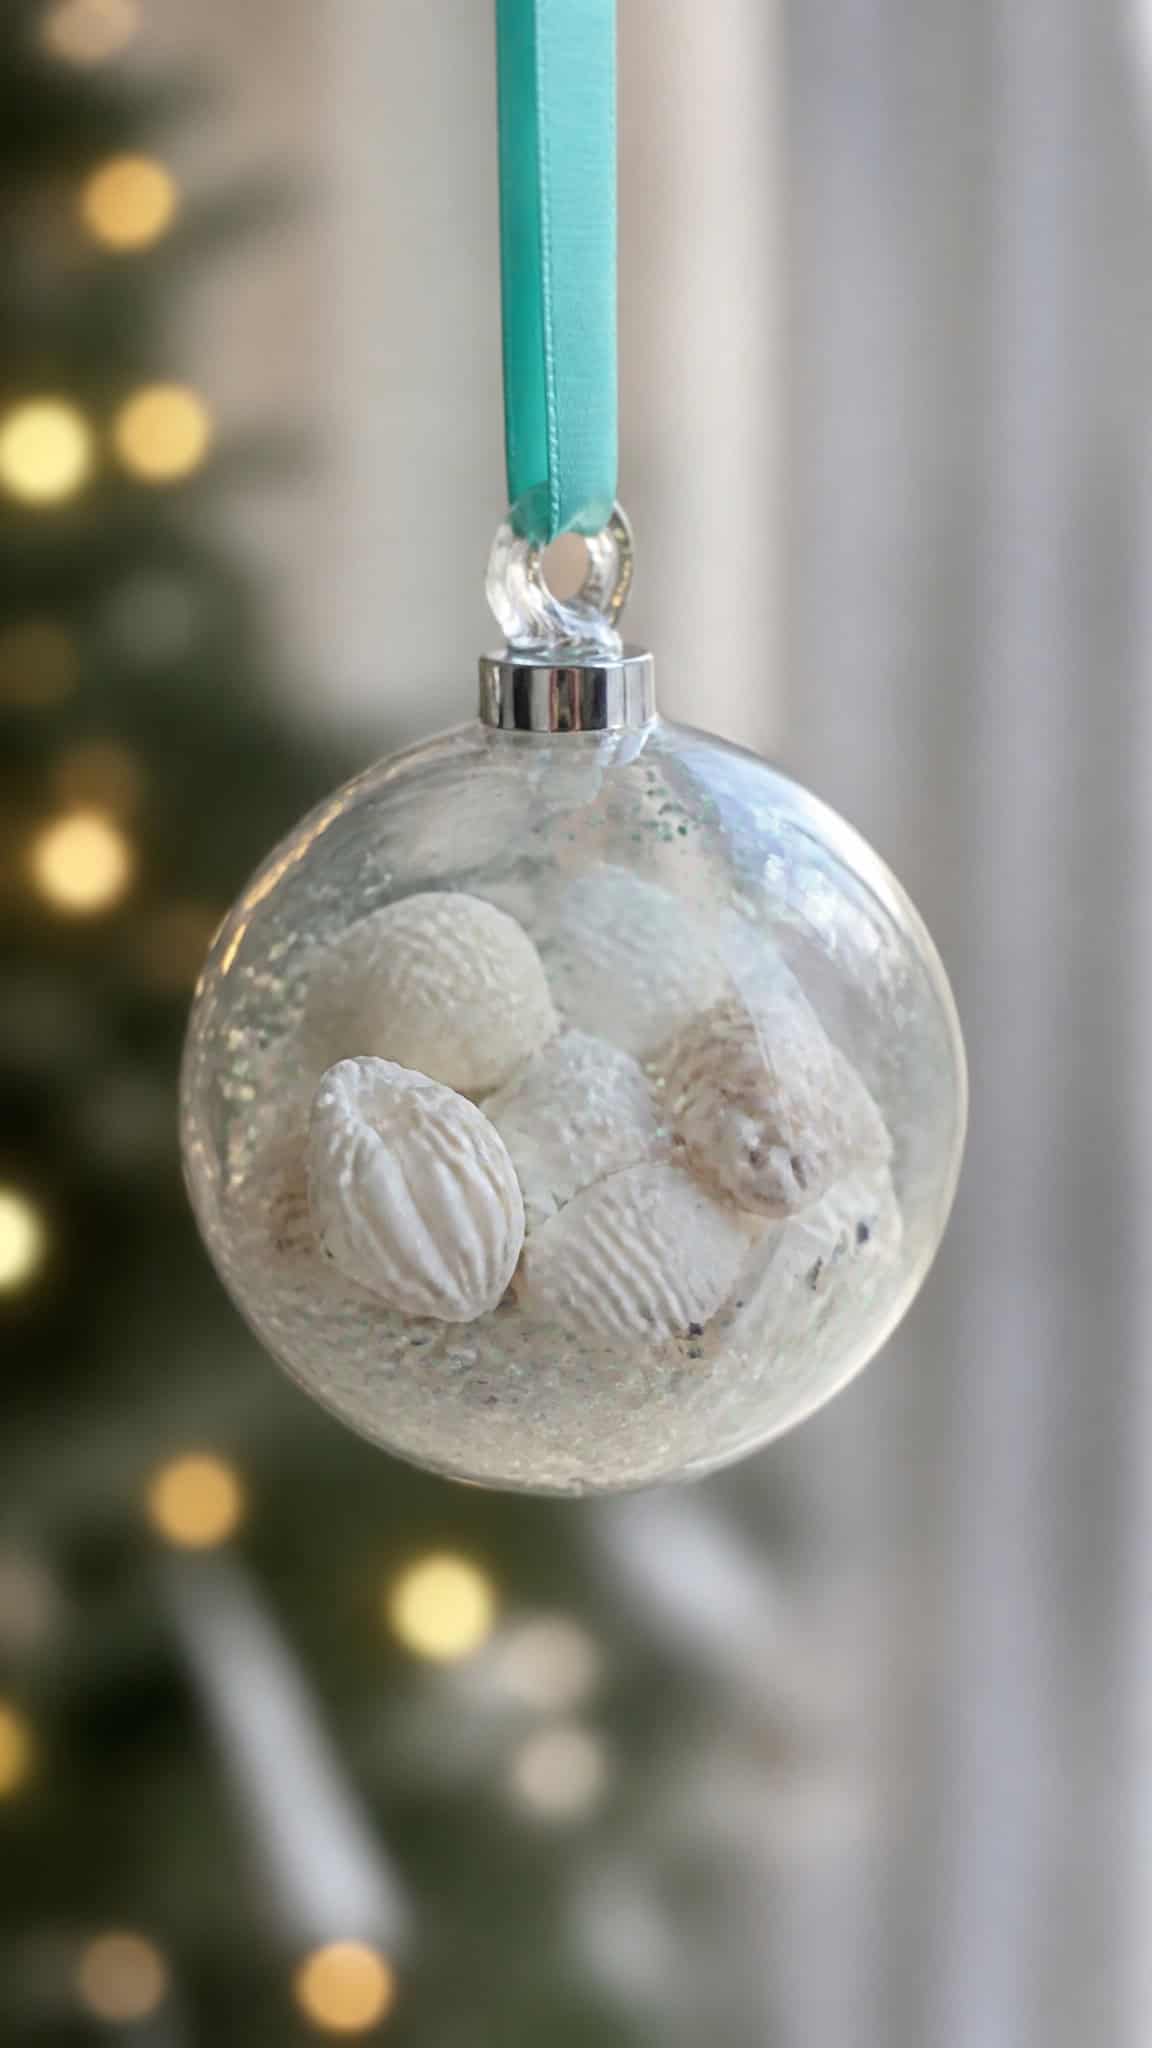
These adorable little snow globe ornaments are absolutely showstoppers on any Christmas tree! I discovered this project last year when my middle son brought home a bag of shells from his school field trip, and now we make them every single year. The combination of glittery “snow” and beautiful shells creates this dreamy winter-meets-beach aesthetic that’s just perfect for beach ornaments DIY coastal Christmas decorating.
To create these beauties, you’ll need clear plastic or glass ball ornaments that open up, small seashells, white or iridescent glitter, and some clear-drying glue. Start by applying a thin layer of glue inside the bottom half of the ornament, then sprinkle in your glitter to create a snowy base. Carefully position your prettiest shells on top of this glittery foundation, making sure they’re secure. You can add tiny starfish, small pieces of coral, or even miniature sand dollars for extra coastal charm!
Once everything is positioned exactly how you want it, gently close the ornament and give it a little shake to distribute the excess glitter. The result is this gorgeous, shimmery scene that looks like a winter beach day captured in a bubble! My boys love shaking these gently to watch the “snow” swirl around the shells. Pro tip: use a ribbon in coastal colors like aqua, turquoise, or sandy beige to hang these from your tree, and they’ll look even more cohesive with your beach theme!
Driftwood Star Ornaments
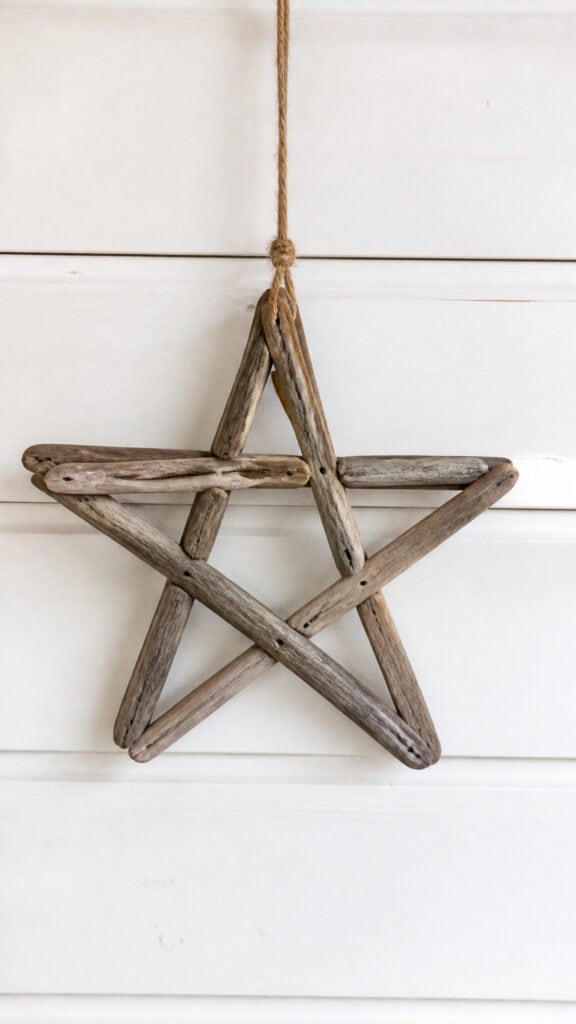
Driftwood has this incredible weathered beauty that instantly brings coastal vibes to any space, and these star ornaments are ridiculously simple to make! I absolutely love this project because it gets the kids outside hunting for the perfect pieces of driftwood, which burns off some of that endless boy energy while gathering supplies. You can find driftwood at the beach, of course, but also along lakeshores or even purchase small pieces from craft stores.
For each star, you’ll need five similar-sized pieces of driftwood (about 3-4 inches long), a hot glue gun, and some twine or fishing line for hanging. Arrange your driftwood pieces in a star pattern, overlapping the ends to create the classic five-pointed shape. This is where my oldest son really shines – he’s got an eye for making them look balanced and symmetrical! Once you’re happy with the arrangement, use hot glue to secure each intersection point where the wood pieces meet.
After the glue dries completely, wrap a piece of twine around one of the star points to create a hanging loop. You can leave these natural for a rustic look, or get creative with embellishments! We’ve added tiny shells at the intersection points, wrapped sections with thin rope for a nautical touch, and even painted some with white wash for a more refined coastal look. These beach ornaments DIY coastal Christmas decorations look absolutely stunning clustered together on the tree, and they’re lightweight enough that they won’t weigh down branches!
Rope-Wrapped Ornament Balls
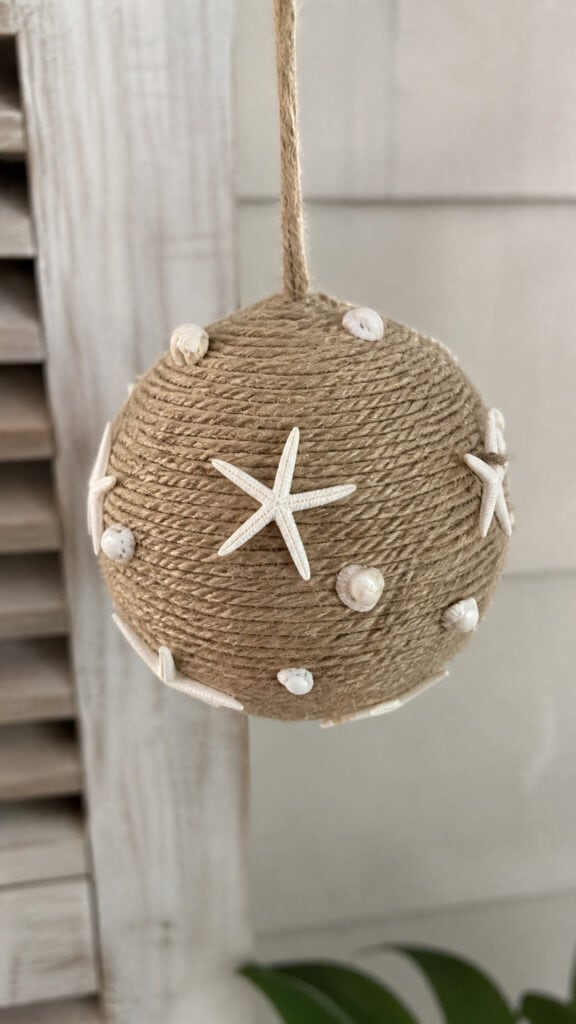
Nothing says nautical quite like rope, and these rope-wrapped ornaments are so satisfying to make! I started creating these during naptime one afternoon, and honestly, I found the wrapping process almost meditative. They add this wonderful texture to your tree and pair beautifully with shinier ornaments for a balanced coastal look that’s not too theme-heavy.
You’ll need plain ball ornaments (foam, plastic, or glass work great), natural jute rope or white cotton rope, and a good craft glue or hot glue gun. Start at the top of the ornament near the cap, applying a line of glue, then carefully wrap the rope around and around, pressing each row snugly against the previous one. The key is keeping the rows tight and even as you work your way down the ornament. My boys actually really enjoy helping with this part – it’s like a puzzle trying to cover every bit of the surface!
Once you’ve completely covered the ornament, secure the end with extra glue and let it dry thoroughly. Now comes the fun part – decorating! You can hot glue small shells, starfish, or sand dollars onto the rope surface. We’ve also added small anchors, tiny pieces of sea glass, and even miniature life preservers from the craft store. Some of our rope ornaments stay completely natural, while others get a light spray of white or metallic paint for variety. These beach ornaments DIY coastal Christmas creations add such a cozy, textured element to the tree!
Sand Dollar Snowflake Ornaments
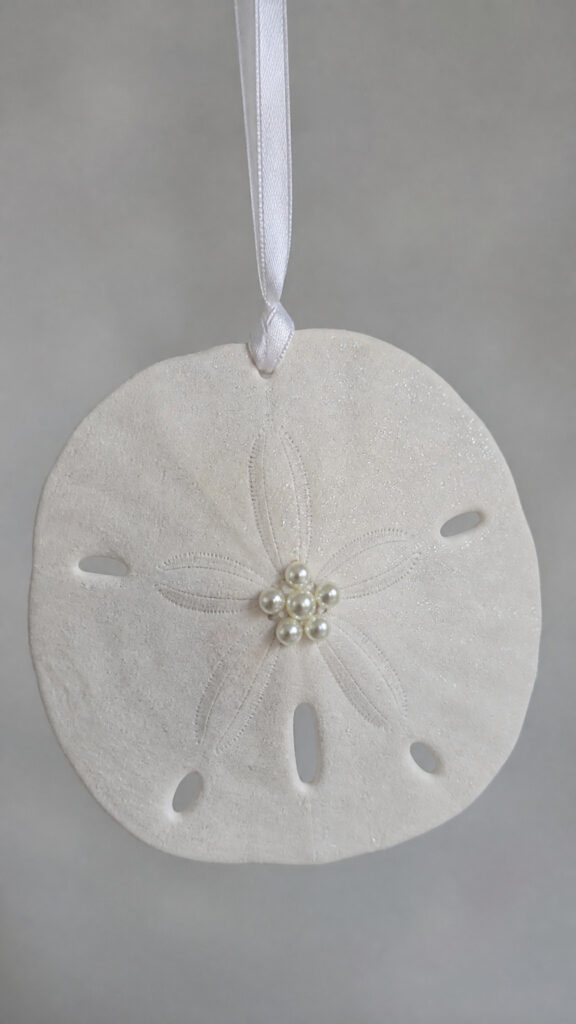
Sand dollars are basically nature’s snowflakes, so using them as Christmas ornaments is just perfect! I love how these delicate treasures from the beach transform into elegant holiday decorations. If you don’t have real sand dollars, you can find them at craft stores or online, though there’s something extra special about using ones you’ve collected yourself during beach vacations with the family.
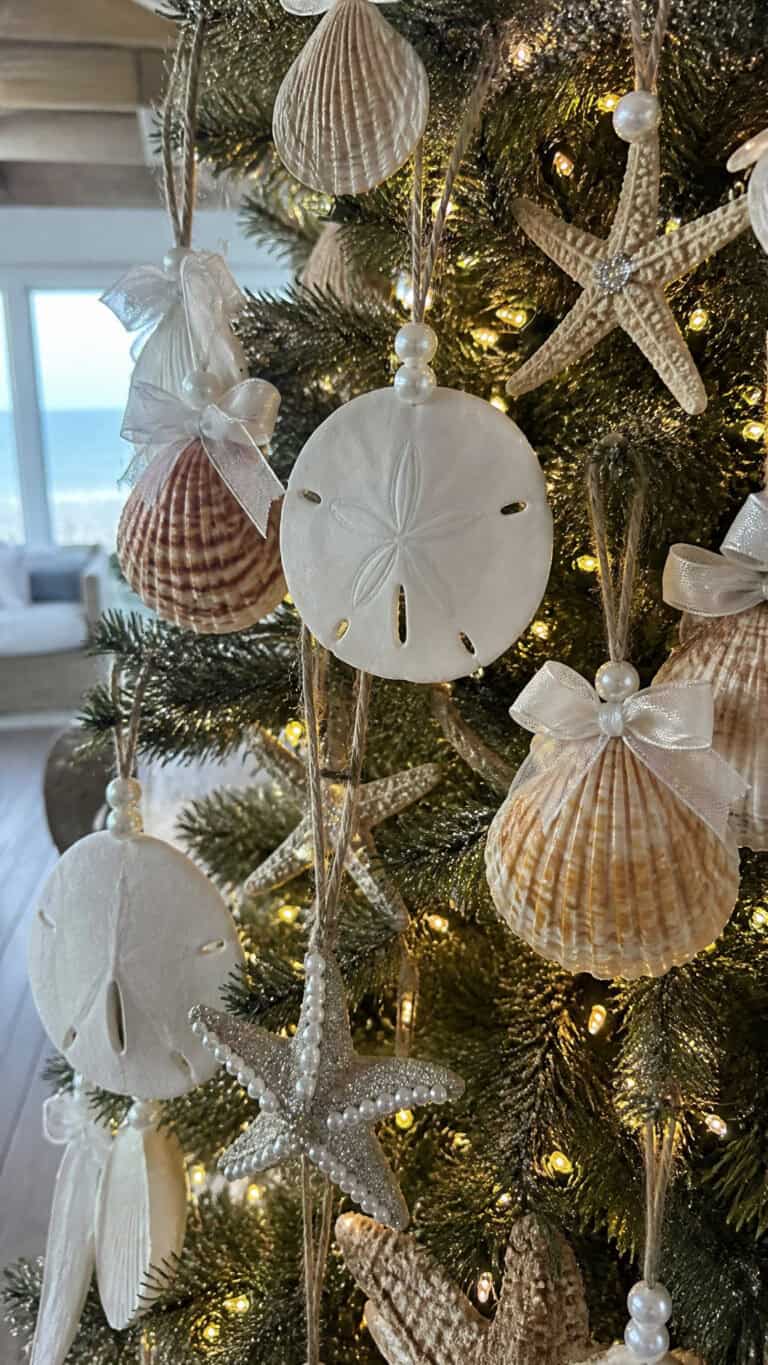
For this project, you’ll want sand dollars that are already bleached white (or you can bleach them yourself if they’re tan). The simplest version involves just drilling a small hole near the edge, threading through a ribbon, and hanging them as-is – their natural beauty really shines! But if you want to get fancy, you can paint them with white glitter glue, add a light dusting of iridescent glitter, or even paint delicate snowflake patterns on them with dimensional paint.
My favorite technique is to create a layered look by gluing smaller shells or pearl beads in the center of the sand dollar, right where those five little slots create a natural star pattern. You can also group three sand dollars together in a cluster, connecting them with ribbon or wire to create a statement ornament. These look absolutely gorgeous catching the light from your Christmas tree, and they’re so lightweight that they work perfectly on any branch. Just be gentle – sand dollars are fragile, which is why I usually hang these higher up where little hands (and flying toy cars!) can’t reach them!
Beach Glass Icicle Ornaments
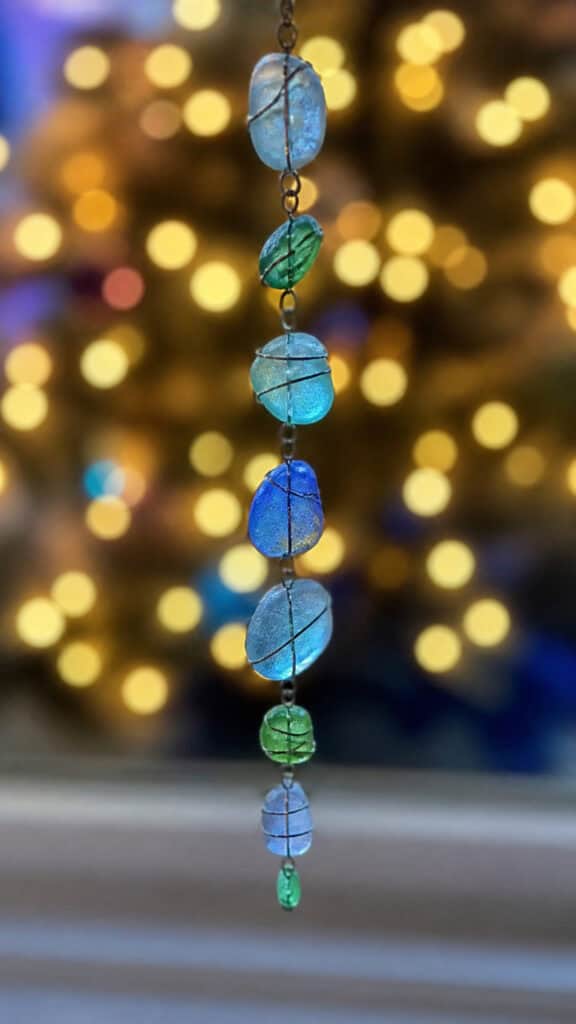
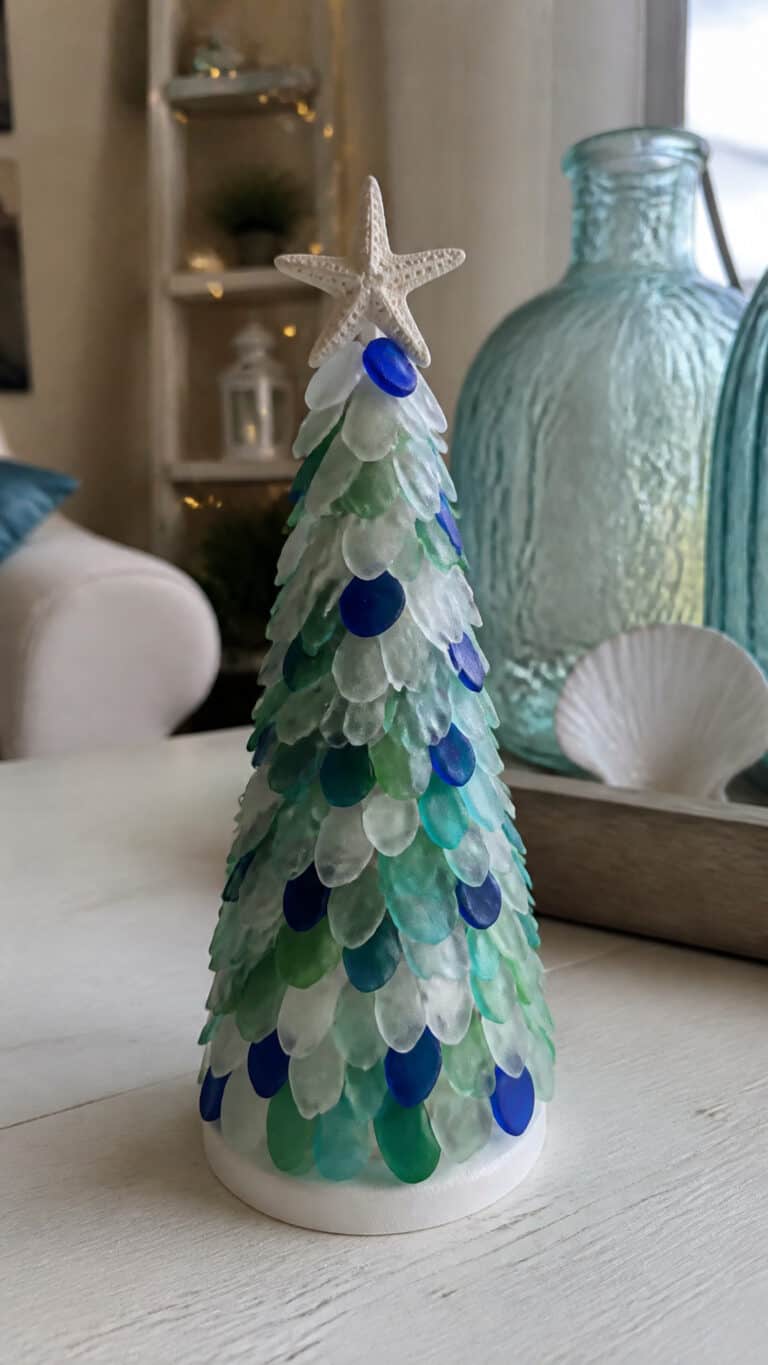
Beach glass has always been like finding little treasures during our family beach trips, and turning these frosted gems into icicle ornaments is absolutely brilliant! The way the light catches the sea glass creates this gorgeous glow on the tree, and each piece is completely unique. This is one of those beach ornaments DIY coastal Christmas projects that looks way more complicated than it actually is!
To make these, you’ll need pieces of beach glass (or tumbled glass from craft stores), thin wire (20-22 gauge works perfectly), needle-nose pliers, and ribbon or fishing line for hanging. Start by creating a wire wrap around each piece of glass – this takes a little practice, but basically you’re creating a cage that holds the glass securely. Wrap the wire around the glass several times, then twist the ends together at the top to create a loop for hanging.
For the icicle effect, create strands of varying lengths by connecting multiple pieces of wrapped beach glass together with wire or clear fishing line. I like to graduate the sizes, with larger pieces at the bottom and smaller ones toward the top. You can stick with one color family (all blues and greens look amazing together) or mix different colors for more variety. Hang these at different heights throughout your tree for a cascading, icicle-like effect. The boys love how these catch and reflect the Christmas lights, creating little rainbow sparkles all over the room!
Nautical Rope Knot Ornaments
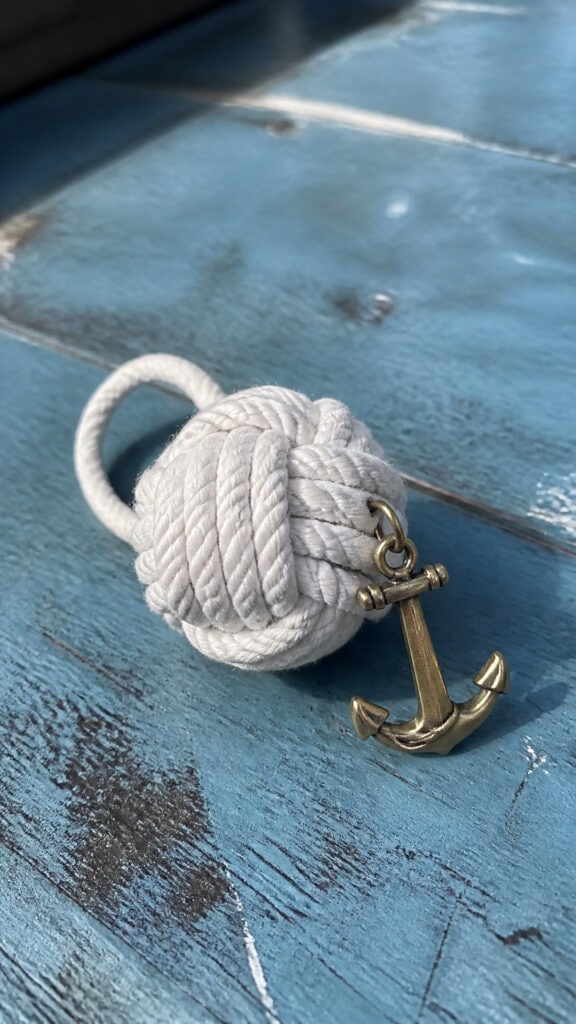
Learning basic nautical knots has been such a fun adventure with my boys, and these rope knot ornaments are the perfect way to show off those new skills! There’s something really charming about these simple, classic ornaments that bring authentic maritime character to your coastal Christmas tree. Plus, they’re practically indestructible, which is a huge bonus in our house!
You’ll need cotton rope or nautical cord (about 1/4 to 1/2 inch thick works best), scissors, and optionally some fabric stiffener or diluted glue to help the knots hold their shape. The most popular knots for ornaments are the monkey’s fist, the Celtic button knot, and simple figure-eight knots. There are tons of tutorials online, and honestly, once you get the hang of it, you can tie these while watching Christmas movies with the kids!
After tying your knots, you can leave them natural for a rustic look, or dip them in fabric stiffener to make them hold their shape better. Some people paint them white or navy blue, add glitter, or even spray them with metallic paint. I like to attach small embellishments like miniature anchors, shells, or tiny starfish to the center of the knots using hot glue. These beach ornaments DIY coastal Christmas decorations are also fantastic for gift-giving – I’ve tied them onto wrapped presents as ornament-toppers that become part of the gift! They add such authentic nautical charm without being too cutesy.
Starfish and Twinkle Light Ornaments
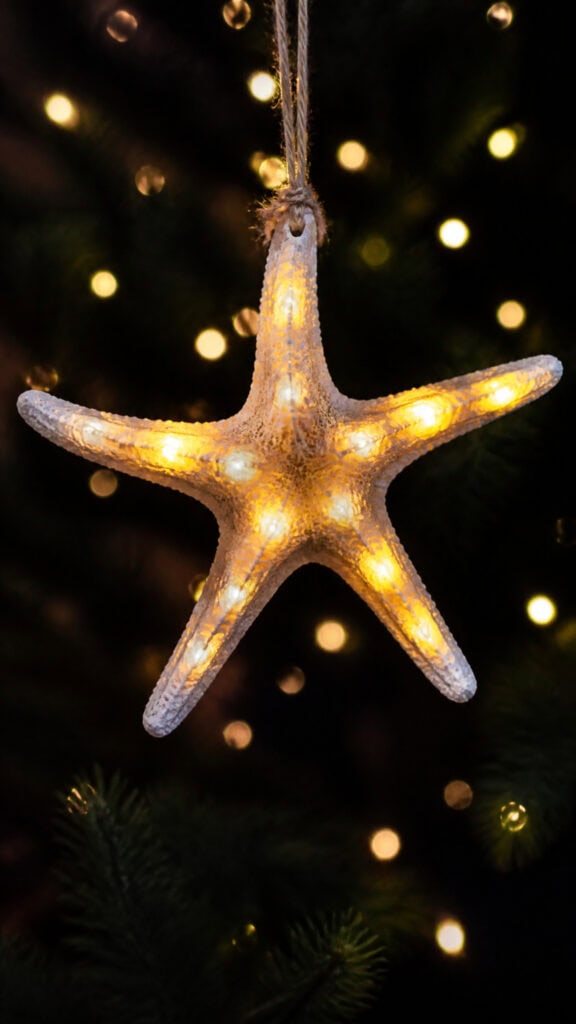
Combining starfish with tiny LED lights creates these absolutely magical ornaments that my kids call “glowing stars” – and they’re right! These are definitely showstoppers on the tree, and they’re surprisingly easy to make. The warm glow from inside the starfish creates this cozy, beachy ambiance that’s just perfect for the holidays.
For this project, you’ll need white or natural starfish (real or resin), battery-operated micro LED lights (the tiny ones on thin wire), and clear-drying glue. If you’re using real starfish, make sure they’re fully dried and cleaned. The trick here is to carefully insert the LED lights into the starfish, weaving the thin wire through the arms and body. Start from the center and work the lights outward, using tiny dabs of glue to secure the wire in place as needed.
You can use warm white lights for a classic look, or colored lights for something more playful – we’ve done blue lights that look like the ocean at night, and they’re stunning! Once the lights are positioned and secured, add a ribbon or fishing line loop for hanging. When you turn on the lights, the starfish glows from within, highlighting all its natural texture and details. These look incredible on the tree at night when all the other lights are on. Fair warning though: you’ll need to remember which ornaments have batteries so you can turn them on and off! I keep all ours clustered in one section of the tree to make it easier.
Seashell Cluster Ornaments
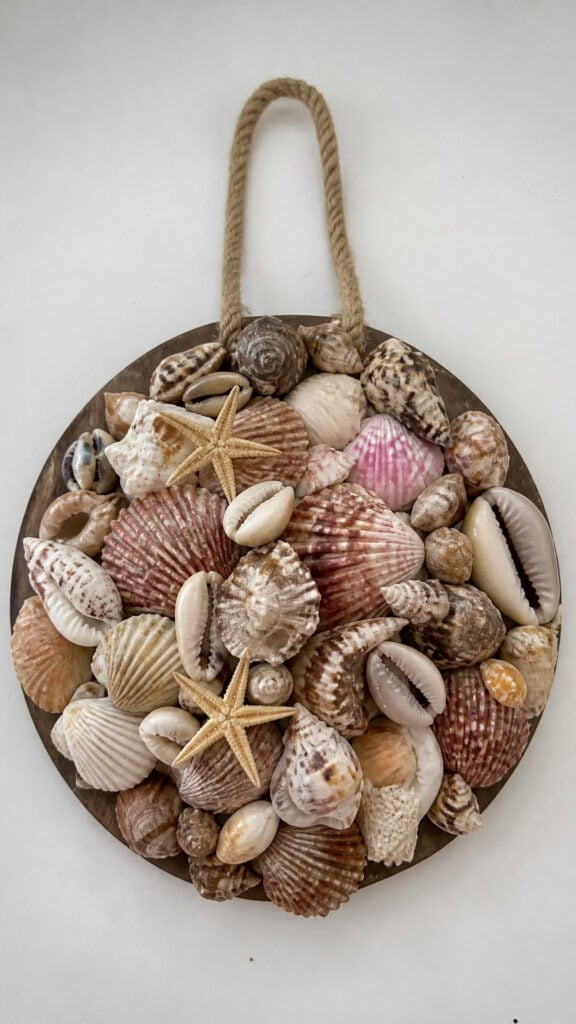
Sometimes the best approach is to showcase a variety of shells all together, and these cluster ornaments do exactly that! They’re like little collections of beach memories hanging on your tree, and they’re perfect for using up all those smaller shells that are too pretty to throw away but too small to use individually. This is definitely one of my favorite beach ornaments DIY coastal Christmas projects because there’s no wrong way to do it!
Start with a base – you can use a clear or white ball ornament, a wooden disk, a large scallop shell, or even a small grapevine wreath. Then it’s time to raid your shell collection! Gather shells in various sizes, shapes, and colors, along with small starfish, tiny pieces of coral, or sand dollars. Using hot glue or strong craft glue, start attaching shells to your base, building up layers and filling in gaps with smaller shells.
The key to making these look professional is varying the sizes and creating depth – don’t just glue everything flat! Let some shells overlap others, and fill in spaces with tiny shells or pearl beads. You can add a nautical rope bow, some raffia, or a piece of netting for extra coastal flair. I like to spray some of ours with a light coating of clear glitter spray for a subtle sparkle that catches the Christmas lights. My middle son has become quite the shell-arranging artist – he spends ages getting each ornament just right, and honestly, his turn out better than mine! These ornaments are substantial and really make a statement on the tree.
Coastal Message in a Bottle Ornaments
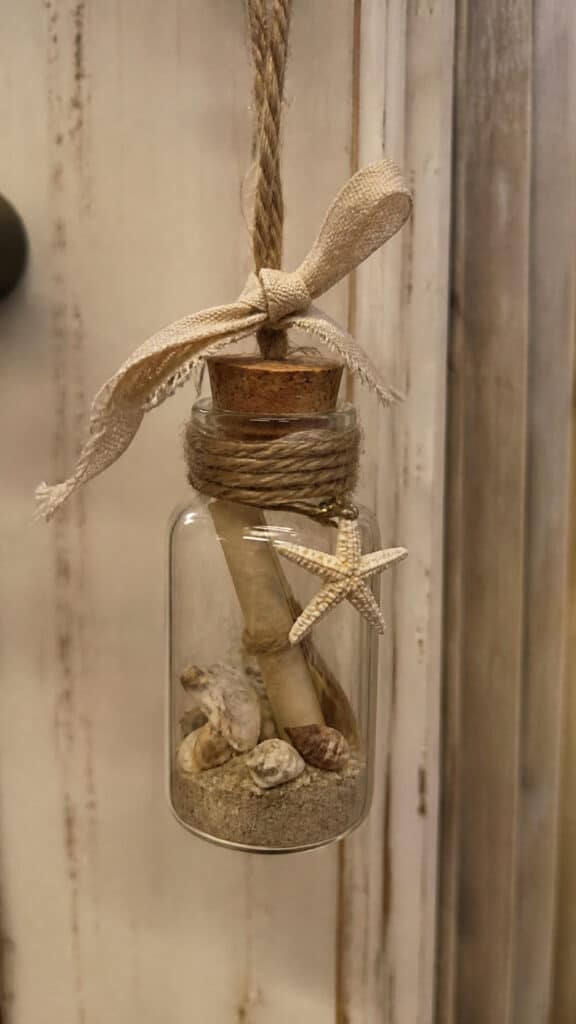
How adorable are message in a bottle ornaments?! These are such a sweet way to combine the coastal theme with the spirit of Christmas, and kids absolutely love creating the tiny messages that go inside. We’ve made these as gifts for grandparents, teachers, and friends, and they’re always a huge hit. Plus, they’re a wonderful keepsake that captures a moment in time!
You’ll need small glass bottles with corks (you can find these at craft stores), sand, tiny shells, miniature paper and pen, ribbon, and any small coastal embellishments you like. Start by adding a layer of sand to the bottom of the bottle – just enough to create a beach scene. Then add a few tiny shells, a small starfish, or even a bit of sea glass. Now for the message! Write a short Christmas greeting, a Bible verse, a wish for the new year, or even just the year and your family name on a small piece of paper, roll it up, and tuck it into the bottle.
Cork the bottle tightly, then decorate the outside! We wrap twine around the neck of the bottle, add small shell charms, and tie on ribbon for hanging. You can also attach a small tag to the outside with a label like “Beach Memories” or “Coastal Christmas.” Some people add a tiny bit of glitter to the sand for extra sparkle. These beach ornaments DIY coastal Christmas creations are so personal and meaningful, and I love that each one tells a little story. My boys enjoy writing different messages each year, and it’s become a sweet tradition to read the old messages when we unpack ornaments!
Bringing the Beach Home for the Holidays
Creating these beach ornaments DIY coastal Christmas decorations has brought so much joy to our holiday traditions! There’s something really special about combining the relaxation and beauty of the beach with the warmth and magic of Christmas. These projects have given us countless hours of quality family time, and our tree tells the story of our adventures and creativity. Even better, most of these ornaments are durable enough to survive in a house with three boys, which is saying something!
Whether you’re a beach lover dreaming of sandy shores during the winter months, or you just want to try something different from traditional Christmas decor, these coastal ornaments add such a unique and personal touch to your celebrations. The best part is that you can adjust each project to match your skill level and available time – some can be whipped up during naptime, while others make perfect weekend family activities. So grab those shells you’ve been saving, put on some Christmas music, and start creating your own coastal holiday magic! Your tree will thank you, and you’ll have beautiful handmade ornaments that bring back wonderful memories for years to come!
This post may contain affiliate links. Read the full disclosure here.