Valentine Tiered Tray Decor That’s Sweet and Simple
By the time I kick one more toy truck out of the walkway, dig a sock out from under the couch, and glance at the clock before our next practice, the idea of decorating for Valentine’s Day feels a little crazy. But I still want our home to feel sweet and festive, even in this season of busy schedules and sticky little hands. That’s why I’ve fallen in love with valentine tiered tray decor. It gives me a tiny, happy corner of the house that looks pulled together, even when the rest of the place looks like three boys actually live here, which they do!
If you’re new to tiered trays, they’re just small, stacked shelves you can set on a counter, table, or coffee bar. Think of a little stand where you can tuck in mugs, mini signs, hearts, and a few cute pieces, all in one spot. It’s perfect for quick, low-stress Valentine decorating, because you only have to style this one little area, not the whole house. In this post, I’ll share easy ideas that use budget finds, things you already have at home, and kid-friendly pieces that won’t make you panic if tiny fingers touch them. You really can have a cozy, Valentine-ready corner without turning it into a big project!

Why a Valentine Tiered Tray Works Perfectly in a Busy Family Home

With three little boys racing through the house, I need my seasonal decor to be cute, quick, and easy to move if someone decides to turn the kitchen into a race track. That is why I love using valentine tiered tray decor. It gives me one happy, themed spot that feels festive, without me needing to decorate every surface in sight. It is small, contained, and still feels special, even when everything else is covered in Legos.
A tiered tray also fits right into real family life. I can slide it to the side when we need more counter space, or pick it up and move it if the kids are doing a messy project. It feels like a little Valentine vignette that lives right in the middle of the chaos, which I secretly love.
You do not need a picture-perfect house or fancy decor to make it work. You just need the right tray, a simple color plan, and a few pieces you already own.
Choosing the Right Tiered Tray Size, Shape, and Material

The best tray is usually the one you already have. I mean it. Before you add anything to your cart, look around your home and see what could work. A cake stand, a small shelf, or a tray with little feet can all play the part if you get a little creative.
If you are shopping or choosing between a few options, here is how I think it through as a busy mom.
Size: 2-tier vs. 3-tier
A fast way to decide is to match the tray to the space.
- 2-tier tray: Great for smaller kitchens, tight counters, or open shelves. It looks full with fewer items and is easier to clean around.
- 3-tier tray: Better for a large island or a big corner. It gives more height and drama, and you can layer in more pieces without it looking bare.
In my small-ish kitchen, I use a 2-tier tray on the coffee bar, then a 3-tier tray only if it is on our big island. The taller tray feels like decor and not clutter when it has room to breathe.
Shape: round vs. rectangle
Shape matters more than people think, especially in a busy kitchen where every inch counts.
- Round trays: Softer and easier to tuck into corners. They work nicely beside the sink, on a coffee bar, or in the corner of an island.
- Rectangle trays: Fit better along the back of the counter or on a narrow console table. They sit flush against the wall, so you keep more usable counter space.
If you are short on space, a small round tray in a corner is your best friend. If you have a long stretch of counter, a rectangle tray hugs that line and leaves plenty of room for snacks and school papers.
Material: wood, metal, or white farmhouse style
The material sets the mood, even if you are just using a few dollar spot finds and kid art.
- Wood: Warm, cozy, and forgiving. It feels homey and hides crumbs and smudges better than shiny surfaces. Perfect if you love a snug, family feel.
- Metal: Clean and modern. Think black or galvanized metal. Great if you like simple, bold decor and want your hearts and mugs to pop.
- White farmhouse style: Bright, airy, and easy to mix with any color. White trays make reds and pinks really stand out and look sweet and fresh.
For a busy family home, I like wood or white best, because they feel calm and work with all the random pieces my kids hand me.
How to match the tray to the spot
Here are a few quick rules that help keep things practical and safe:
- Taller trays for corners: A 3-tier tray looks pretty in a back corner where no one is reaching over it to grab snacks.
- Lower trays where kids reach: A 2-tier or even a single stand works better on the edge of the island or on a low shelf.
- Sturdy base near traffic: If little feet run past your island nonstop, choose a tray with a wide, heavy base that does not wobble.
And remember, you do not have to buy a new tray each season. Use what you have. Change the decor, not the stand. Your future self who just survived bedtime will thank you.
Setting a Simple Color Palette So Your Tray Looks Pulled Together

A color plan is the secret that makes a tray look styled instead of messy, even when it holds kid crafts, random mugs, and that one little gnome you bought on a whim. You do not need anything fancy. Just a tiny bit of thought before you start piling things on.
I like to keep it very simple:
- Pick 2 or 3 main colors.
- Add 1 neutral to calm it all down.
For Valentine’s Day, an easy combo is:
- Red, white, pink, plus a neutral like wood, black, or cream.
Once you pick your colors, it gets so much easier to say yes or no to things. If it does not fit the palette, it probably does not belong on the tray.
Why a color palette matters in a busy home
Kids are colorful. Their art is colorful. Their toys are colorful. Our eyes get tired when every surface is shouting for attention.
A simple color palette does a few helpful things:
- Makes the tray look intentional, not like a drop zone.
- Lets kid crafts blend in with store-bought pieces.
- Calms the space so your brain does not feel overwhelmed.
If my boys bring me a new paper heart, I usually say, “Can we make it red or pink so it can go on the Valentine tray?” It feels like a team effort, and their art fits the look.
How to repeat colors on each tier
The trick is to sprinkle your colors on each level so your eye moves around softly instead of getting stuck in one busy spot.
A simple way to think about it:
- If you use a color on the top tier, repeat it on the middle and bottom.
- Spread the color side to side, not just in one clump.
Some easy examples:
- Red mug on the top tier? Add a tiny red heart on the bottom.
- Pink candle on the middle? Add a pink bead garland that drapes down.
- Wood sign on the bottom? Use a wood bead or wood riser on the top.
You want your tray to feel like a little color “echo” from top to bottom.
Sample palettes that work every time
Here are a few quick ideas if you feel stuck:
- Classic sweet: Red, white, pink, plus wood.
- Modern bold: Red, black, white, plus metal.
- Soft and cozy: Blush pink, cream, light gray, plus wood.
- Kid fun: Red, pink, white, plus one playful color like teal.
Once you pick your colors, shop your house first. Grab mugs, mini bowls, books with the right colored spines, even small toys that match. You will fill that tray faster than you expect, and it will look like you spent way more time on it than you did.
Easy Valentine Tiered Tray Decor Ideas You Can Copy Today
When I style my valentine tiered tray decor, I always start with one thought: keep it simple and use what I already have. I do not have time to scroll for hours or wait on shipping. I need fast, cute, and easy to clean up when someone spills juice nearby. These ideas are meant to be copy-and-go, so you can pull your tray together during nap time or while dinner is in the oven.
Use Everyday Kitchen Items and Add Just a Little Valentine Flair
The fastest way to fill a tray is to shop your own kitchen. You probably already own 80% of what you need. Then you just sprinkle in a few Valentine touches, and it feels festive in minutes.
Look for neutral, basic pieces like:
- White mugs or simple patterned mugs
- Small bowls or ramekins
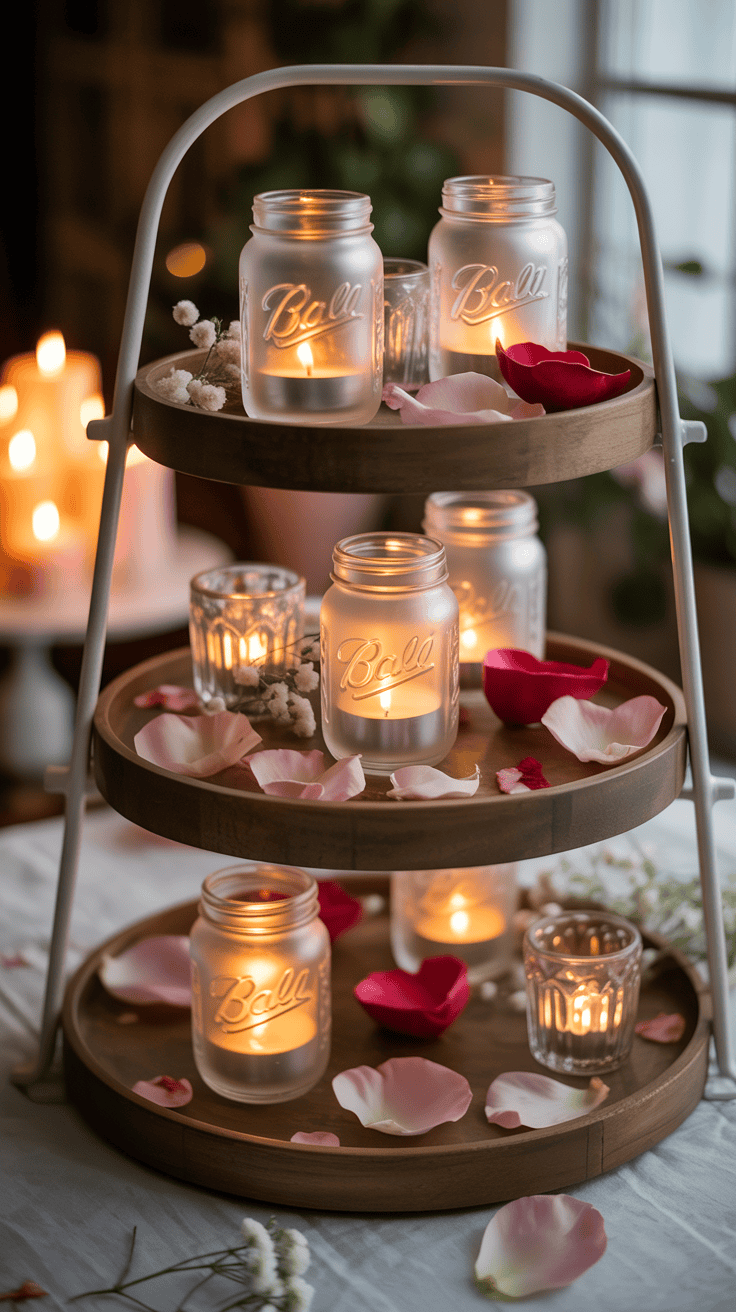
- Mason jars or small glass jars
- Mini cutting boards
- Metal or ceramic measuring cups
Once you have a little pile on the counter, start adding the Valentine flair. Think about small, fun touches, not big pricey decor:
- Heart stir sticks in a mug
- Red and pink paper straws in a jar
- A tiny bowl filled with candy hearts or M&M’s
- A red or pink dish towel draped over the edge of the tray
- A simple ribbon tied around a mason jar
Here are two easy layouts so you can picture it clearly.
Example 1: Cozy coffee station tray
- Top tier:
- One white mug with a couple of heart stir sticks peeking out.
- A small mason jar holding red and pink paper straws.
- A tiny sprinkle of loose candy hearts near the jar for fun color.
- Bottom tier:
- A mini cutting board leaned up in the back as a backdrop.
- A small bowl filled with sugar packets or creamers.
- A red dish towel folded and draped over the front edge of the tray so it hangs just a bit.
It looks pulled together, but you only used mugs, a jar, and a couple of cheap Valentine add-ons.
Example 2: Snack-style family tray
- Top tier:
- Measuring cups stacked in a cute little tower, with the smallest one on top holding a few candy hearts.
- A tiny mason jar with a red ribbon tied around the top. You can tuck a tea bag or two inside.
- Bottom tier:
- Two white mugs side by side, each with a paper straw inside.
- A small bowl of wrapped chocolates or mini cookies.
- A mini cutting board laid flat, almost like a “mini serving board” for the treats.
I like to think in “clusters” when I style. Mug plus stir stick. Jar plus ribbon. Bowl plus candy. When you repeat those little combos on each tier, your tray looks cute, not cluttered.
Mix In Dollar Store and Target Dollar Spot Finds for Budget Friendly Cuteness

Once the basics are in place, I like to add a few fun pieces from the Dollar Store or Target Dollar Spot. Those spots are dangerous, but also amazing if you go in with a plan.
Some easy pieces to look for:
- Mini signs with love sayings
- Wooden hearts or small heart blocks
- Tiny trucks with hearts in the back
- Felt garlands or tiny felt hearts
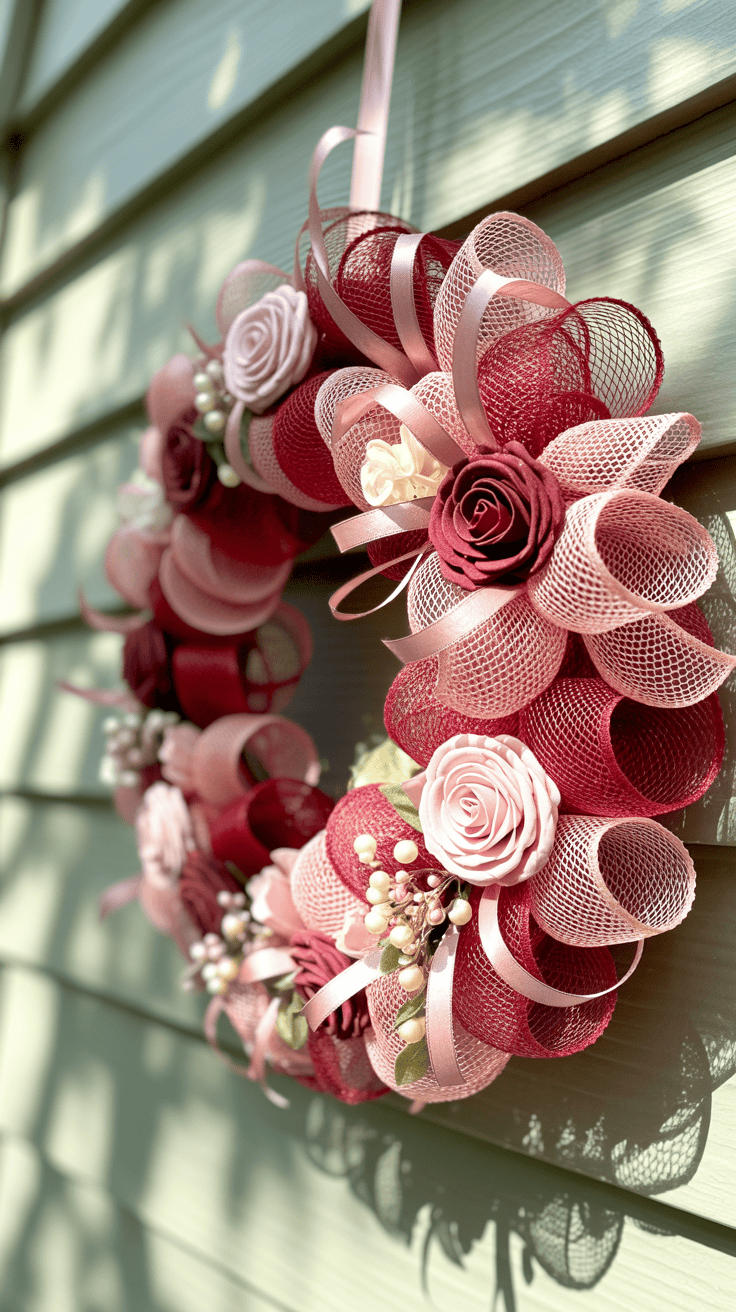
- Faux roses or small bunches of flowers
The key is to create little “moments” on your tray. If you scatter every cute thing you find, your eye will not know where to look. Group items together so they tell a tiny story.
A few simple groupings that work well:
- Sign + heart: A mini “love” sign with a small wooden heart beside it.
- Truck + filler: A tiny truck with faux roses or mini hearts in the back.
- Garland + anchor: A felt heart garland draped around a mug or wrapped across the front of a small sign.
I also try to pick just a few favorites instead of buying every single cute item. It helps me stay on budget and keeps the tray from feeling overstuffed. One sign, one truck, a few hearts, and maybe a small bunch of faux roses is usually plenty.
If some of the decor feels too short or gets lost behind other items, use simple risers to lift them up:
- Flip a small bowl upside down and set a sign on top.
- Stack two or three small books with red or pink spines and place a heart or faux flower on them.
- Use a thick wooden coaster under a tiny truck or vase.
Those little lifts give height, and they help your small decor pieces stand out. My boys also think the “tiny cars on books” look is the best thing ever, which is a win.
Add Personal Touches With Photos, Kid Crafts, and Handwritten Notes

Pretty is nice, but I want our tray to feel like us, not a store window. This is where the personal pieces come in. When I add family photos or kid art, the tray suddenly feels warm and a little bit sentimental.
Some sweet personal touches:
- A mini framed photo of your family
- A photo from a past Valentine date night with your spouse
- Tiny Valentine cards your kids brought home from school
- Little notes you write, like “We love you!” or “You are my favorite!” on cardstock
You can clip small cards to a mini clipboard, tuck them into a mason jar, or lean them in front of a mug. I like using mini clothespins to clip kid valentines to twine and then wrapping that across the front of the tray.
Kid crafts are perfect here. Think simple and small:
- Painted wooden hearts from the craft aisle
- Paper hearts glued to popsicle sticks and tucked into a jar like a “heart bouquet”
- Handprint or thumbprint hearts cut down to a size that fits on the tray
The best part is that these do not need to look perfect. I actually want the fingerprints and wobbly lines to show. They make the tray feel like real family life. When my boys see their art right in the middle of the “fancy” decor, they light up.
If you want one easy idea, here is a quick combo:
- Bottom tier: a small frame with a family photo in the back, a mason jar filled with paper heart “flowers” your kids made, and a tiny wooden heart in front.
- Top tier: one white mug with a handwritten note sticking out, and a painted wooden heart propped beside it.
It feels personal, sweet, and still tidy.
Use Natural Elements Like Wood, Greenery, and Cozy Textures

With all the red, pink, and hearts, things can feel a little loud. A few natural touches calm everything down and help your tray blend in with the rest of your kitchen.
I like to mix in:
- Wood pieces, like mini cutting boards or wood beads
- Greenery, like faux eucalyptus or a tiny potted plant
- Soft textures, like knit hearts, mini baskets, or ribbon
Even one small plant makes a big difference. You can use:
- A tiny potted plant from your windowsill
- Faux eucalyptus sprigs tucked behind a mug
- A small vase with one real rose or a couple of faux stems
For cozy texture, think about what you already own:
- A knit or crochet heart tucked beside a mug
- A strip of burlap or twine tied around a jar
- A mini basket holding candy or wooden hearts
Here is how it might look pulled together:
- Top tier:
- A tiny white vase with a stem of eucalyptus or faux greenery.
- One knit heart leaning in front of it.
- A wood bead strand draped gently across the edge of the tier.
- Bottom tier:
- A wood mini cutting board in the back.
- A mason jar wrapped with twine and filled with paper straws or heart picks.
- A small basket in front holding a few candy hearts or a folded note.
The wood, greenery, and soft textures keep all the red and pink from feeling too intense. It also helps the tray fit with your everyday decor, so you do not feel like Valentine’s Day exploded on your counter.
With a few kitchen basics, a handful of budget finds, and some sweet family touches, your tray can be both pretty and practical, even in a house full of busy kids and toy trucks.
Step-by-Step: How I Style My Valentine Tiered Tray in 10 Minutes

When I style my tray, I treat it like a tiny, fun project I can actually finish, which is why I love using valentine tiered tray decor in quick 10-minute bursts. I usually do it while the boys are having a snack or watching a show, so I move fast and keep it simple. This step-by-step routine keeps me from overthinking every little heart and mug, and it helps the tray look cute instead of crowded.
I follow the same order every time:
- Start with a clean tray and a few strong anchor pieces.
- Add medium items to fill in and tell the story.
- Finish with tiny fillers and a few final tweaks.
Once you do it like this a couple of times, it starts to feel easy and almost automatic!
Start With a Clean Slate and Anchor Pieces

I always start by clearing every single thing off the tray. No cheating and working around old pieces. I set everything to the side, give the tray a quick wipe with a damp cloth, and dry it so nothing sticks. It is like a reset button for your decor and your brain.
Then I pick my anchor pieces. These are the bigger, eye-catching items that set the tone and the color story. For Valentine’s Day, I like to choose 2 or 3 of these:
- A big Valentine mug
- A small framed sign
- A mini house or cottage
- A chunky candle in a pretty jar
I ask myself, “What feeling do I want?” Sweet and soft, or bold and fun. Then I pick anchors that match that mood and my color palette.
Anchors do a lot of work for you:
- They decide the main colors for the tray.
- They set the style, like farmhouse, modern, or playful.
- They give your eye a clear focal point on each tier.
Once I have my 2 or 3 anchors, I place them first so the rest feels easy. Here is how I usually do it:
- Top tier: One strong anchor, like a favorite Valentine mug with a simple pattern. I place it slightly off-center so it feels natural, not stiff.
- Bottom tier: One bigger sign or a mini house, leaned against the back rail so it acts like a backdrop.
- Middle tier (if I have one): A candle, mini canister, or smaller sign that coordinates with the others.
I like to spread the visual weight. If I put a tall mug on the top, I will balance it with a wider sign or house on the bottom. That way the tray feels steady, not top-heavy. Once the anchors are in place, everything else is just filling in the gaps.
Layer In Medium Pieces Like Mugs, Jars, and Mini Signs

With the anchors set, I move on to medium pieces. These are the items that tuck around the anchors and make each tier feel full, but not jammed.
Some of my go-to medium pieces:
- Extra mugs or tea cups
- Small jars or canisters
- Little framed mini signs
- Stacked coasters or tiny books
- Short faux plants or greenery stems
I place these pieces around the anchors, not right in front of them. I want to see the main items, so I keep medium pieces slightly to the side or in front, but lower.
A few tricks that help:
- Turn items at angles: I almost never line things up in a perfect row. I turn mugs a little so the handle faces out. I tilt signs just a touch. It feels relaxed and homey.
- Use stacks for height: I stack 2 or 3 small books or a set of coasters, then sit a jar, small heart, or mini plant on top. It adds height and layers without buying anything new.
- Repeat shapes or colors: If there is a red heart on the bottom, I repeat a red mug or red jar on the top. If I use a round jar on one tier, I might use a round candle on another.
I like to think of each tier as its own little scene:
- The top might be a tiny coffee moment, with a mug and a jar of spoons.
- The middle might be a love-note corner, with a mini sign and a jar of heart picks.
- The bottom might be the snack zone, with a bowl or small dish ready for candy.
Even though each tier has its own tiny story, I keep them connected with shared colors and themes. For example, all tiers might have:
- The same red and pink color mix
- One repeat detail, like wood, black accents, or greenery
- A mix of words, hearts, and simple shapes
If a tier starts to look stuffed, I pull one thing off and see how it feels. It is much easier to edit as you go instead of fixing it at the end.
Finish With Tiny Fillers and Final Touches
The last step is my favorite, because it feels like adding sprinkles. This is where I use the tiny fillers that bring the whole tray to life.
Some small pieces I love for Valentine’s Day:
- Wood bead garlands
- Tiny hearts, wood or ceramic
- Felt balls or mini felt hearts
- Wrapped candy or candy hearts
- Faux flower stems or small roses
- Cute folded napkins
I always add these after the anchors and medium pieces are done. If I start with fillers, the tray turns into chaos fast.
Here are a few easy ways to use them:
- Bead garland drip: I take a wood bead garland and let it drip gently from one tier to the next. I hook part of it behind a mug or sign so it feels like it is resting there, not about to slide off.
- Tiny hearts in gaps: If I see a little open spot that looks a bit bare, I pop in a tiny heart, a felt ball, or a small cluster of candy.
- Flowers for soft spots: A single faux rose tucked beside a mug or peeking out of a jar adds just enough softness without taking over.
- Folded napkin for color: I fold a napkin into a small rectangle or triangle, then tuck it under a mug or dish so just a bit hangs out. It adds color without losing any surface space.
When I think I am done, I take one last step that helps a lot. I step back a few feet, then:
- Snap a quick photo on my phone.
- Look at the picture instead of the tray.
For some reason, things that feel fine in person look crowded in a photo. If one area looks heavy, I remove one item or slide things apart a little.
And then I remind myself of this important truth: my kids will move things anyway. Someone will spin a heart, slide a mug, or sneak candy out of a bowl. So I keep it casual and fun, not museum-level serious.
If the tray makes you smile when you walk by, it is styled just right, even if the hearts are a little crooked and the beads are not perfect. That is real mom life decor, and it still looks sweet.
Kid Friendly and Real Life Tips for Keeping Your Valentine Tray Cute (Not Chaos)

With three little boys flying past my counters all day, I have to keep my valentine tiered tray decor cute, but also safe and simple to reset. I want it to feel fun and welcoming, not like a “look but don’t touch” museum piece. These tips help me keep the tray pretty while still letting my kids live their very real, very active lives around it!
Choose Safe, Sturdy Pieces When You Have Little Hands Around

If your kids treat the kitchen like a racetrack, safety has to come first. I love pretty decor as much as anyone, but I don’t want to worry every time someone reaches for a snack.
As a rule, I keep breakable or sharp items up high or skip them completely. Here is how I sort things out on my tray:
- Bottom tier: Wood, metal, or thick plastic pieces.
- Middle tier: Sturdy mugs, jars, and low-risk decor.
- Top tier: Any glass or fragile decor, or nothing fragile at all.
If I use glass, it is usually:
- One small jar filled with wrapped candy.
- A thick glass candle that does not tip easily.
- A simple vase that can sit snug against the back rail.
I never put glass on the bottom tier where little hands can grab it fast. If your kids are still toddlers, it might be easier to avoid glass on the tray completely and use it somewhere higher, like a shelf or mantel.
For everyday styling with kids, I rely on sturdy materials:
- Wood: Blocks, mini signs, risers, beads, small houses.
- Metal: Buckets, mini tin signs, small pails, cookie cutters.
- Plastic: Heart containers, plastic jars, kid cups.
Those pieces can survive curious fingers, surprise bumps, and the occasional toy collision.
I also think about mess potential before I add anything. I skip things that turn into instant clutter, like:
- Loose glitter.
- Tiny confetti pieces.
- Fake snow.
- Sequins that drift everywhere.
Instead, I use contained fillers that stay put but still look cute:
- Wooden bead garlands.
- Felt balls or felt hearts.
- Faux greenery stems.
- Solid wood hearts or blocks.
- Ribbon tied onto mugs or jars.
These give color and texture, but they do not leave you vacuuming glitter out of your grout for a week.
Before I finish, I do a quick “kid test” in my head. I ask myself:
- What will my kids try to touch first?
- What is near the edge if someone leans on the counter?
- Can anything roll, slide, or shatter?
Then I adjust the tray as if I am styling it for real life, not a photo. If something would stress me out when the boys are wild after school, it goes up a tier or back in the bin.
Make the Tray Interactive With Snacks and Little Surprises

My kids are way more careful around decor if it feels like it belongs to them too. When the tray includes snacks and surprises, they see it as a fun family spot, not just “mom’s pretty stuff”.
I like to make the tray a tiny invitation for them to slow down and feel loved. A few simple ideas that work well:
- A small lidded jar of wrapped chocolates they can ask for after dinner.
- A mini bowl of heart-shaped marshmallows for hot cocoa nights.
- A little dish of Valentine sprinkles to add to yogurt or ice cream.
- A reusable heart-shaped container filled with fruit snacks or mini crackers.
I keep most snacks on the lower or middle tier, in containers that will not break if they slide. Wrapped candy is my favorite, because it stays neat and I can refill it quickly.
I also love adding tiny surprises that are not food:
- A small bowl where they can find a love note from me or my husband.
- A rolled-up card that says things like “You are kind” or “You are brave”.
- A mini jar with stickers, heart erasers, or little paper jokes.
- A stack of simple conversation starters, like “Tell me something kind you did today”.
Sometimes I write a quick note during quiet time, fold it, and tuck it into a bowl or mug. The boys run over in the morning to see if there is a new note. It takes thirty seconds, but it feels big to them.
The tray is also a great spot to start simple family talks about kindness and gratitude. While we grab a marshmallow or treat, I might ask:
- “Tell me one kind thing someone did for you today.”
- “What is one thing you loved about today?”
- “Who can we encourage this week?”
It turns the tray into more than decor. It becomes a tiny “heart station” for the whole family.
And honestly, I remind myself often that it is okay if the tray gets touched, rearranged, or a little messy. If the hearts are moved around and the marshmallows are not in a perfect line, that means my kids are enjoying it. I would rather have a lived-in tray than one my boys are scared to go near.
If you struggle with that, try this mindset shift:
- Styled for photos: straight beads, perfect spacing, untouched candy.
- Styled for family: a little crooked, some empty wrappers, hearts moved by tiny hands.
Both are pretty in their own way, but only one tells the story of your real house.
Quick Reset Habits So Your Tray Stays Cute All Month

With a busy house, I need anything I decorate to be fast to reset, or it will end up looking wild by week two. A few tiny habits help my tray stay sweet instead of stressful.
My favorite is a simple 2-minute reset at night. After the boys go to bed, I walk by the tray and:
- Toss any candy wrappers.
- Put pieces back on the right tier.
- Straighten a few mugs or signs.
- Refill one snack if it is almost empty.
I do not overthink it. If I keep it under two or three minutes, I actually stick with it. If something keeps falling or never looks right, I pull it off and store it for another season.
I also like to keep a small basket or shoebox nearby with extra decor that fits the tray, such as:
- Extra wooden hearts.
- A second mini sign.
- Extra ribbon.
- A few faux flowers.
- Backup wrapped candy.
I tuck this basket in a cabinet close to the tray. That way I can rotate items during the month without dragging out all my bins. Maybe one week I use the wood hearts, then the next week I swap in a mini love sign and a different garland. It makes the tray feel fresh without any extra shopping.
For candy and snack refills, I keep it simple:
- I refill jars during my normal kitchen clean-up.
- When something runs out, I either refill it that day or put the jar away.
- If we are on a sugar break that week, I swap candy for stickers or notes.
The key is low pressure. The tray does not have to look fully styled every single day to be worth it.
Some days mine looks like a Pinterest photo. Other days it looks like a love explosion, with fingerprints on jars and hearts lined up like cars. Both are okay.
I try to remember:
- Cute is fun, but loved is better.
- Done is better than perfect.
- A tray that changes a little every day is a sign that your home is full of life.
So if you walk by and the beads are hanging funny or the marshmallows are a little scattered, smile. That is proof that your Valentine corner is doing its job and making sweet memories, not just sitting pretty on the counter.


Conclusion
When I step back and look at our little tray, I always remind myself that valentine tiered tray decor does not have to be perfect to feel special. A few favorite mugs, a tiny sign, some kid art, and a bowl of candy are more than enough. The goal is cozy and happy, not flawless and fussy.
As a mom of three wild little boys, these small touches help our home feel warm in the middle of school runs, snack spills, and never-ending laundry. The tray becomes a calm, sweet corner that says, “Love lives here,” even when the floor is covered in cars. Using what I already have, adding a couple of budget finds, and tucking in their crooked paper hearts makes it feel real and personal.
If you feel overwhelmed, just pick one simple idea from this post and try it this week. Maybe it is a snack jar on the bottom tier, a framed photo, or a tiny garland your kids help hang. Let them help choose a mug or place a heart, and enjoy the wonky, kid-touched version of pretty!
I hope your tray makes you smile every time you walk by, even on the messy days!
This post may contain affiliate links. Read the full disclosure here.